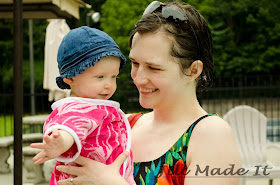
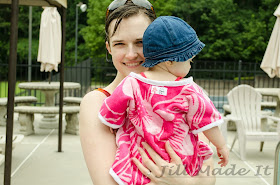
Boo had a cute little terrycloth beach cover-up that we loved. It was so convenient to just put the cover-up on her and not have to worry about carting around another towel. My goodness, with two kids, there sure is a lot of pool stuff to cart around! But Boo did what kids are so good at doing and she outgrew her cover-up. So I decided to make her a new, robe-style terrycloth cover-up. One beach towel was even enough fabric to make matching robes for both my girls!
Want to make one? It's not as quick and easy as my sarong-style cover-up, but it's still a fairly quick and easy project.
You need:
a beach towel
bias tape (bought or homemade)
a dress to draw your pattern from
general sewing supplies
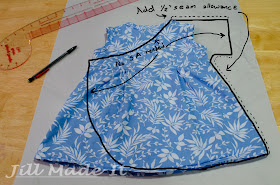
Use the dress to draft the front piece of your pattern like in the picture. Curve the neckline down so it meets the side seam at the waist. I chose to curve the lower edge, but you could have it go straight down or follow the line of the dress; whatever you'd like.
For sleeves, go out straight from the shoulder. Connect the underarm with a curved line--this will make the robe lay nicer when it's sewn together. Make the sleeve roomy.
Add 1/2" seam allowance just to the shoulder seam and side seam. We'll be binding the other edges, so no seam allowance is needed.
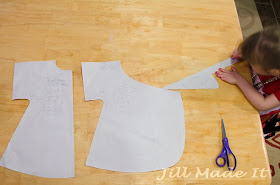
You will need to cut out two front pieces.
For the back, trace the pattern you just made. Raise the neckline, and cut the pattern down the center back. You'll cut out one back piece on the fold.
So here are my pieces all cut out.
Go ahead and zig-zag over the shoulder and side seam edges. Usually you'd do this after sewing, but my towel frayed pretty badly, and I thought it was easier to zig-zag first. If you have a serger--lucky!
Sew the side seams. You'll probably have to clip the seam to get it to lay nicely.
This next step is optional. After sewing the side seams, I went back and sewed down the seam allowance. I did this to make the seam stronger by making the highly fray-prone towel less likely to fray. Not totally necessary, but I want these beach robes to last (and last and last). It also helped the seams to lay nicely.
Sew and, if desired, reinforce the shoulder seams.
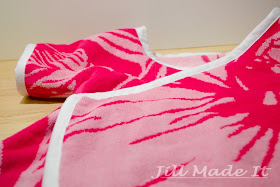
The robe is coming together! Just a couple of finishing touches, and you'll be ready to take your munchkin to the pool. :D
The rest of the edges get bound. I learned to quilt before I learned to sew clothes, so I bind everything like I bind a quilt. I wrote a whole tutorial about making and using bias tape (in the quilting method) so just click on over if you'd like a little help with that. (Just remember, since you have curved edges, you really do need to cut the fabric on the bias. I explain that in the tutorial, but I also say I usually don't bother actually cutting in on the bias, since quilt sides are usually straight. So just remember.)
If you'd rather bind the edges the clothes-sewing way, here's a great tutorial (not by me) for that.
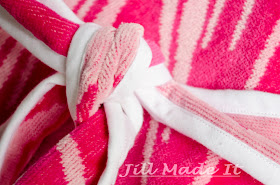
The last step is to make the tie. Just cut out a rectangle from the towel however long and wide you want it. You could curve the corners if you want, or leave them. Then bind the edges like you did for the rest of the robe.
Thanks for reading! If you like what you've seen, please pin and share!



No comments:
Post a Comment
Thank you for your comment! I love to hear from you--your comments make my day!
I've been getting a lot of spam comments lately, so I'll not be allowing anonymous comments for the time being. Sorry to any legitimate anonymous commenters!