19 October 2013

All Autumn Pumpkins Tutorial

 Last year about this time, I had a little tiny baby, a three-year-old, a Halloween party at church that I'd committed to bring table decorations to, and almost no time at all!  What Halloween decoration could I make really quickly?

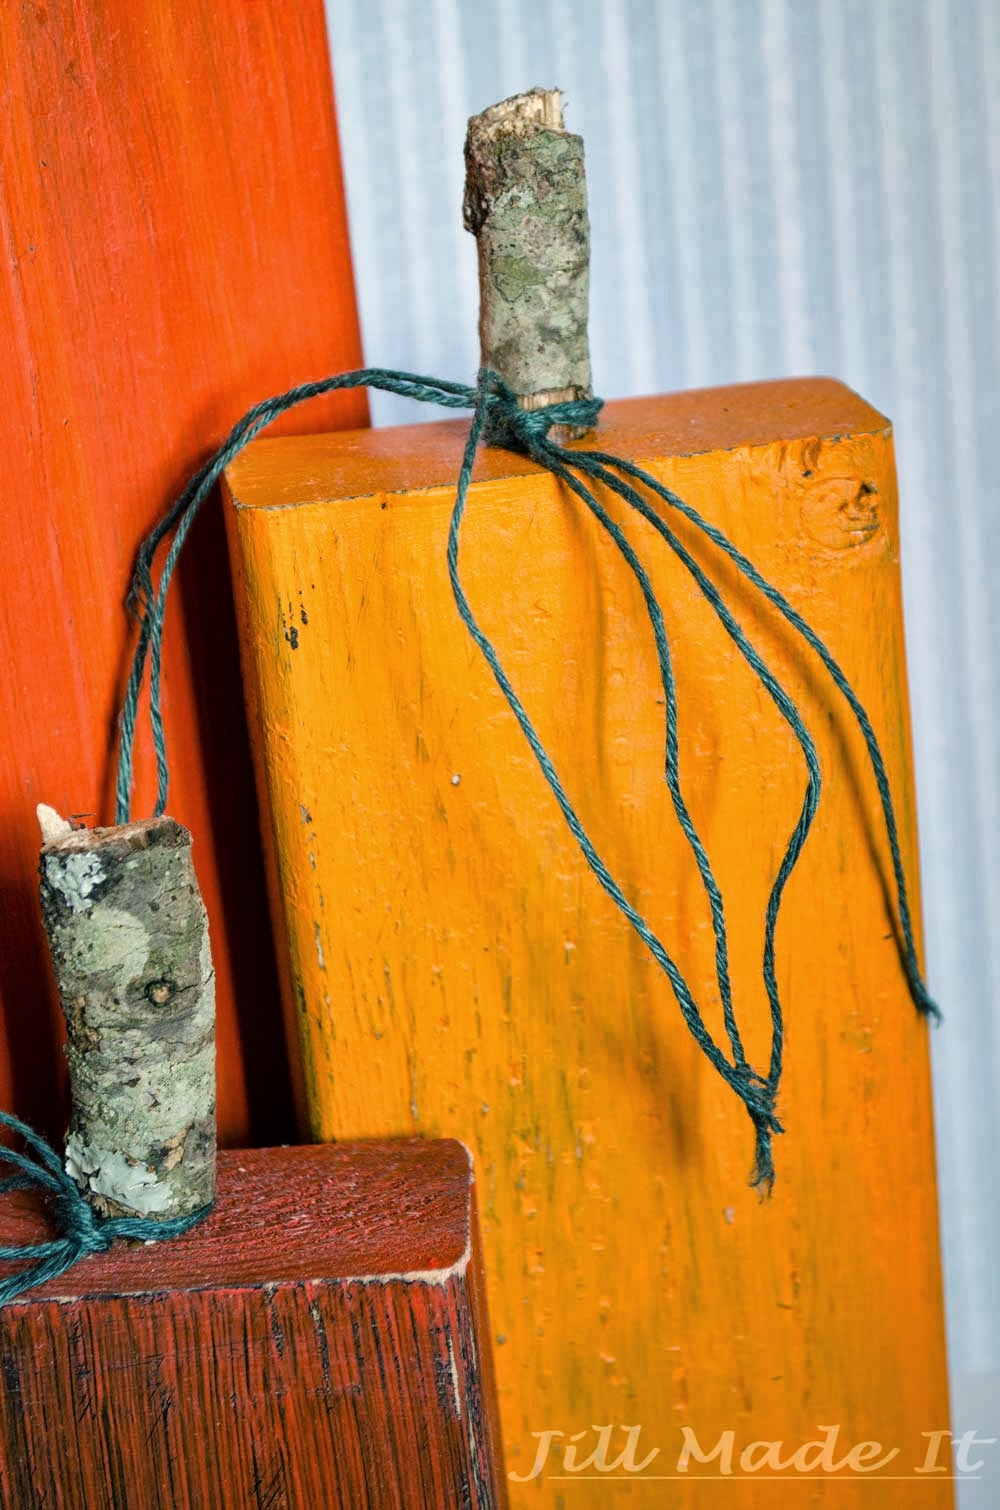
If you were following my blog a couple years ago, you know I love pumpkins for Halloween/Thanksgiving decorations.  So I came up with the perfect quick, easy, and cheap Halloween decoration--pumpkins made from a 2x4!  And these pumpkins transition seamlessly from Halloween to Thanksgiving, so I was ready for all of autumn.


All Autumn Pumpkins Tutorial

These pumpkins are so easy to make!  Watch this.

Short lengths of 2x4 + black spray paint + orange paint + sandpaper to distress + drill holes in the tops + glue in short, fat sticks from the backyard (or dowel rods, if you'd prefer) + raffia/hemp tied around pumpkin "stems."

All Autumn Pumpkin Tutorial Close-up

And done.

If you like pumpkin decorations like I do, you may want to check out the other pumpkin projects I've made.  

Fabric Pumpkin.  I didn't make a tutorial for this one, but I did find you some tutorials for similar projects.

16 October 2013

Flower Clip Tutorial, AKA Flowers In Winter


The Finished Flower Clip

This post is a first for me: the first time doing my own pictures.   Here's a bit of what that involved: 
Jill: The camera's set to shoot in RAW, so you'll have to process the pictures.
Me: I don't know what that means.
(Later) Jill: You might be able to do batch processing.
Me: I don't know what that means either.
I was going to attempt to edit the pictures with newly-aquired Photoshop Elements, courtesy of Jill's husband, who already had the full version. (Thanks!)  Neither Jill nor I could figure out how to get the pictures from iPhoto to Elements, so we eventually put them on Jill's computer and she edited them for me.  Next time, though, the pictures will be all mine.  Now, on to the flowers!

 A while ago, some crafty ladies at my church got together and we made flower hair clips.  They are fun, easy to make, and compliment-attractors, so I thought I’d show you folks how to make your own.  If you don’t want a flower in your hair, clip it on you purse or your belt.  You could also put it on a headband for your baby so when strangers see her, they can tell that the baby  dressed in pink, with a pink blanket and a pink diaper bag, is, in fact, a girl.  

My Everlasting Gardenia

You can put them wherever you want an embellishment.  I like them because they're a quick way to add color, and they make it look like I at least put some effort into my hair.  (Let's just say I'm "low maintenance" with my hair.  Anything beyond washing and brushing it is usually deemed more trouble than it's worth.  Thank goodness my hair cooperates.)  They can look surprisingly real, too.  One time when I was wearing my white flower, in the picture above, a lady I know who owns gardenias thought I had a real gardenia in my hair.  

The Needed Supplies

Here are the materials you’ll need:
Synthetic fabric, any color or pattern you like
Fabric scissors
Circle templates, if desired
Small candle, like a tea light
Something to light the candle, of course
Needle and Thread (optional)
Small beads
Felt, at least two square inches per flower
Hair clips
Hot glue gun 

Several Fabric Circles

Cut out several circles of fabric, each one bigger (or smaller) than the one before it.  You can use a template if you want, but wobbly edged circle-wannabe's aren’t a big problem with this.  I think the easiest way to figure out how big to cut each one would be to cut your biggest and your smallest circles first.  Cut them a little bigger than you think they should be.  In the first picture, I have two flowers as one clip because they both ended up unexpectedly small.  Next,  cut your smallest and use that as a template to make each successive circle  bigger.  That way, you can pin the previous circle to the fabric and cut your next one a bit bigger.  Or you can wing it.  That works too.  You can do as many or as few layers as you think would look good, but I wouldn’t go less than three. The blue one you're seeing in progress has seven layers. 

The Flower Layers Now Have Petals

You can keep these as circles, you you can cut petals into them.  The circle flowers are a bit easier, but ones with petals will look more realistic.  If you want petals, make sure to not cut too far towards the center.  Cut as many or as few petals as you want, but don't cut them too thin, or you'll make the next step difficult.  You may want to practice the next step before you cut your petals, if you want them to be thin.

Melt the Edges of the Fabric and Sew the Layers Together

Melt the edges with your candle.  Besides keeping the fabric from fraying, melting the edges makes them pucker and warp and not just lay there like a flat piece of boring.  This is why you needed to use synthetic fabric.  Synthetic will melt; natural will burn.  I suggest you practice a little with some scrap fabric to see how exactly you want to do it.  I prefer to have the edges curl down, but you see what you prefer.  Make sure to not let the hot edges touch. They could melt together.  If something doesn't go quite right, don't worry.  This is a forgiving craft.  It seems like half of my petals curled up and half curled down, but the flower still worked out nicely.

Sew or hot glue the layers, one on top of the other.  I prefer to sew them, but glueing should work too, if you want a no-sew project.  See?  It’s coming together!

Almost Done!  Add Beads

Sew or glue a few beads in the center of the flower.  Again, I prefer to sew it. That way, I don't have to worry about the glue showing around the beads.  I was going to say this step was optional, but then I realized the beads serve a practical purpose.  If you sew the layers together, you'll need the beads to hide the stitching that will show on the top layer.

Add your Felt

Cut out two small pieces of felt.  Glue one to the underside of the flower.  Glue the other one onto it, with the top of a hair clip sandwiched between the two felt pieces.  After the glue’s set, you’re done!  

My Pretty Flowers, All In A Row

How will you use your flower hair clip?  Do you prefer “natural” looking fabrics, or ones with bold colors or patterns?

11 October 2013

Senior Pictures

When I first started taking pictures as a serious hobby, my goal, what I thought was the pinnacle of professionalism, was to have the pictures look like they were taken in a studio.  Like at the mall.  Or for school yearbook pictures.  (Bleh!)

My style has evolved a bit since then.

Now, I love the lifestyle photography look.  Natural light, naturally posed people, friends and family having fun--that's what I like!  

While we were on our family reunion trip, I had the opportunity to practice this style of photography in a way I've never done before:  senior pictures for my beautiful sister-in-law.  We had so much fun--I got a lot of pictures of her laughing!  My MIL and other SILs came along to help with the shoot and join the fun, and we had a great time together.  I love spending time with my family. 

Want to see the pictures we got?  I probably took about five million (give or take), and here are a few of my favorites.


 My SIL loves Mini Coopers, so we borrowed one from a friend for a few shots.

Senior Pictures in a Mini Cooper 1

See?  So happy to be in a Mini Cooper.

Senior Pictures in a Mini Cooper 2

I had fun editing this picture.  Any guesses what year she'll graduate?  :)

More Senior Pictures

I love her eyes in this picture.  Wow.

Next, we took more pictures at the cabin where we had our family reunion.

Senior Pictures Close-Up

I had my telephoto lens on my camera from taking pictures at Mr. MadeIt's graduation (I'm so proud of him!), and my portrait lens was in the room with my sleeping baby.  Telephoto lens it was, then.  I actually love the super-close-up shots I got.


Senior Pictures with HatSenior Pictures with Umbrella 1


Senior Pictures with Umbrella 2

It was starting to rain, so we needed to grab an umbrella from another SIL's car--I'm so glad it was a super-cute one!  I love when necessity makes for good design.  :)


The last place we went was The Gardens at BYU-I.  Beautiful place.  I wish I could take pictures there every day...


Golden Hour Senior Pictures 1

We tried to get here at the "golden hour" (There are two each day:  the hour right after sunrise, the hour right before sunset.) which is hard then that's about bedtime for munchkins.  We managed to catch some of it, though.  Isn't the lighting on her hair beautiful?


Golden Hour Senior Pictures 2


Golden Hour Senior Pictures 3

Golden Hour Senior Pictures 4

Thanks for asking me to take your senior pictures, Sis.  I hope you like them!

30 September 2013

PR&P Week #4: Simple and Special

It's the last week of this season's Project Run & Play.  Boo has certainly loved week one's Belle Dress and week two's Easy Starburst Dress.  I was teaching Boo's preschool during week three, so even though I already had a project done (I didn't make it for PR&P, but it fit the theme), I couldn't manage to get it posted!  Life was crazy that week.  I'm hoping to post that project later.

This week's theme is Your Signature Look.  At first I thought, "I don't have a signature look.  I just do whatever I feel like at the time."  

But I don't sew shirts.  

I don't sew pants.

I rarely sew skirts.

I mostly sew dresses.

It's not like I'm necessarily opposed to sewing shirts or pants, they're just never what I feel like doing.  Because they're less special.  If I'm going to take the time to make clothes, they're going to be something a little fancy, and a little special.  Which works, because Boo loves fancy.  She wears dresses/skirts almost every single day.  I like dresses better than skirts because a dress is a complete outfit.  Simple and done.

I also like the designs to be fairly simple.  This may change as I sew clothes more, but for children's clothes, at least, I don't really want to be fussing with little details.  Cute, but simply executed details, simple to put on/take off (especially for wiggly babies!)--that's what I like to make for my girls.

So here is my Signature Look:

Simple and Special
Easter Dresses

Jill Made It | Easter Dresses for My Two Little Girls

I never did get around to posting my little girl's Easter dresses, and since they fit exactly into this week's theme, I thought today was a great day to show them off.

Jill Made It | Easter Dress for My Baby

Daddy's Girl's dress was another variation of a pattern I've used several times before.  I change the pattern every time!  Here are the first two dresses I made from this pattern.  This time, I made the dress fully lined, instead of using bias tape (blue dress) or facings (orange dress).  I lowered the neckline and thinned the straps, like I did for the orange dress.  I used a hook-and-eye closure instead of the zipper, which was a new alteration.  

I also added a contrast band around the bottom.  That was a really fast and easy alteration, and it made so I didn't even have to hem the dress!  I'll have to do a quick tutorial another day, so you can see how that worked.

Jill Made It | Baby Portrait

Aww, isn't she so pretty?  I love yellow on her.

Jill Made It | Beautiful Little Girl's Dress

Boo's dress is the same style, with a sash that ties in the back, hook-and-eye closure, and contrast band. This dress, I actually spent a lot of time on, and did a lot of work by hand.  (For Daddy's Girl's dress, which I did second and whipped out in one late night of sewing, I figured out how to do it without the handwork.  Good thing, too, because it was the night before Easter!)  

Jill Made It | Easter Dress

Easter morning, I gave Boo her new dress I'd spent so much time on...and she wanted to wear a different dress to church!  (Cry!)  But when I showed her she would be matching her baby sister, she became excited about this dress.  I'm doubly glad I got Daddy's Girl's dress done in time.

Jill Made It | Easter Portraits

After church, we went to the park to take family Easter pictures.  Boo actually didn't like being up in the tree, even though her Aunt Kelli was right there, making sure she stayed safe.  (I actually photoshopped her out of this picture--she was really right by Boo.)  But Boo was a good sport anyway, and let me get a few good pictures of her in the tree.

Jill Made It | Easter Dress

So here's the back of the dress.  The contrast band was actually a necessity, not just a design choice.  I'd bought the two fabrics for this dress one or two years before, intending to make Boo a dress for Christmas, but then the holidays rolled by without the dress being made.  This year, I realized I had to get the dress made NOW or Boo would be too big for the amount of fabric I'd bought.  I had to add the contrast band to the bottom of the skirt to make it long enough, even now.

Jill Made It | Baby Portrait

So that's it; that's my signature look.  Simple to sew, simple to wear, but also special.


And they make my little girls happy.  That's really what matters.

17 September 2013

PR&P Week 2: Easy Starburst Dress

The Easy Starburst Dress

This week's theme for PR&P was "Candy Inspired."  I had some cute ideas--a dress with an orange-ish top and pleated skirt (Reese's Peanut Butter Cup)?  This cute orange striped adult's dress I found at Goodwill, cut up and pieced together into a cute chevron skirt (Starbursts--the connection being the color and the angles)?  I loved the orange stripes, so I went with that one.

That thrifted dress had a cute flower-and-hearts pattern on the bottom, so I wanted to make a quick dress for Boo with it before I used the rest to make the chevron skirt.  I knew Boo would love the dress, and she even hugged the fabric before I made it into a dress!

My Happy Little Girl in Her New Dress

Just look at that happy face!  Boo loves her new dress, which is just the Popover dress again, virtually unaltered this time for simplicity.  She's worn it three times so far, and I just made it on Saturday.  :)

I realized my children have plenty clothes, so I decided not to make the second dress.  I know this simple dress won't win this week's contest, but I'm okay with that.  Boo LOVES the dress, and that's what really matters.

11 September 2013

Project Run & Play Week 1: If Belle Was a 20's Flapper (aka Drop-Waist with Ruffles)

So, does everybody know about Project Run & Play?  It's the kid version of Project Sewn, which I participated in earlier this year.  (I made a date night high-low skirt, a 50's inspired sundress, an asymmetrical draped knit shirt, and a button and ruffles dress.  You could go and check them out; I'll wait for you.  ;)

The theme for week one of PR&P was to remix the Popover Dress.  (It's a free pattern--HERE.)  This is my interpretation.

Jill Made It:  If Belle Was a 20's Flapper--a Popover Dress Remix

When I showed Boo the mostly-completed dress, she said, "It's a Belle dress but it has sleeves!"  Really, to Boo, any yellow dress is a Belle dress, but I thought it was a Belle dress, too...if Belle was a 20's flapper.  :D

Jill Made It:  My Little Girl Dancing in Her New Dress

The original dress is a simple A-line with a small yolk and tie straps.  While my version of the dress looks significantly different than the original, structurally speaking, it's altered very little.  The straps no longer tie, and I added sleeves.  Besides that is the obvious drop waist and ruffles, but those were just sewn on top of the A-line dress--no structural change.

Jill Made It:  Bare Feet and Ruffles

So it was a really simple alteration.  But I learned something important in the process:  I really don't like making ruffles.

I love the dress.  I think it's adorable.  Boo loves the dress.  But Daddy's Girl will not be getting a matching dress.  Ugh, the ruffles.  So adorable, yet so time consuming.

Jill Made It:  Sunshine and Ruffles

But look at this happy face.  Totally worth it.  And speaking of "worth it," this dress was completely free.  There's the obvious free pattern, plus the blue fabric was leftover from a project I completed ... two years ago? and haven't posted yet.  (Hmm, might should do that...)  And the yellow fabric was leftover from this summer skirt I posted two years ago.

Jill Made It:  Beautiful Morning Sunshine Backlighting

And as a side note, I've been wanting to get a picture like this (with the sun behind the person's head, lighting up their hair so prettily) for just about forever.  But it's hard to get out to take pictures when the sun is low enough.  So I'm really excited we could take pictures early enough in the morning to get this shot.  And isn't Boo beautiful?  Awww...


06 September 2013

Boo Starts Her First Day of Preschool!...How Did She Get So Big?

First Day of Preschool

Boo started preschool this week!  She is so excited--she would love to go every day if she could.  (It's twice a week.)  She didn't seem to be nervous at all, even on the second day.  The first day, I stayed to see how it's done, but the second day, I dropped her off and went back home.  

Boo has gotten so big.  Who said she was allowed to do that?

One Year Old Portraits

It doesn't seem that long ago that she was a one year old baby, toddling around everywhere, carrying Baby the baby doll, and wanting to be right by me at all times.  (She's still sometimes that way, so I was just a little worried that she'd have a hard time when I needed to leave her at preschool.  But she did great!)

Two Year Old Portraits

Then there's my sweet two year old Boo, with her beautiful bright eyes, adorable pig-tails, and love of Toy Story (all three movies, and she'd go in spurts which one she liked the best).

Three Year Old Portraits

And my precious three year old.  She is so smart, and so loving.  She takes good care of her baby sister, and loves to help me.   She asks questions about everything.  (Really, everything.)

Not too long and my three year old Boo will be gone, too, leaving a four year old in her place.  I'm not really sad my baby's growing up--I love watching her grow and helping her learn.  And I really love that she is learning do do things by herself.  So I guess what I'm saying is, I love all the stages.  Sometimes I wish my girls were little snuggly babies, but at the same time, I'm thrilled Boo is starting to draw people, rather than just coloring abstractly.

First Day of Preschool 2

Good luck at preschool, my darling girl.

{By the way, five other moms and I are taking turns teaching preschool for our combined six munchkins.  (Which is why I needed to watch and learn that first day!)  My first turn is in a few weeks.  I'm a little nervous.  Wish me luck, too!}