
Remember way back in this post when I showed you all the fabric I got for a new project? Well, I finally finished it!

The Pumpkin Patch!
I actually kind of forgot about it, but then I was getting ready to go quilt with some friends, and I remembered I hadn't worked on this since the last quilting night--the month before!
I thought it would be cute to have a wall hanging of pumpkins--all making different faces. So I made a little Nine Patch pattern of pumpkins (hence the project's name). I decided it would be a table runner (not that it "runs" much, being a square) since I don't have much wall space. My kitchen table needed some Halloween lovin' anyways.
I like it, but if I did it again, I would do a few things differently. For one thing, I'd try to come up with faces with fewer curves. Sewing around all those tiny curves was such a pain!

The truth hurts, little guy.
Second, I'd add little green stems. Why didn't I think of that before??? Once I got the green border on, I realized that I should have green in other places, too. But it was too late to add stems. I mean, maybe I could, but I didn't leave space for them in the blocks, and to make them match at the edges of the pumpkins...
Third, I might make all the pumpkins out of the same fabric. Maybe. I do like having the three fabrics, but I bet if they were all the same, it would emphasize the different facial expressions more, which was the idea of the project.
Ah, well. You (and my sister--she's planning on making one of these, too) get to learn from my experience.
This isn't going to be a full tutorial--more like a pattern. If you need help on a specific part, check out one of my previous sewing posts such as...
You will need:
1/4 yd black fabric
1/2 yd purple fabric
1/8 yd green fabric
1/3 yd orange fabric (divided among however many different oranges you want to use.)
23" x 23" batting
23" x 23" backing (I used muslin.)
General sewing supplies
Disclaimer: I think these fabric amounts are correct, but I would feel really bad if you ran out of a color and couldn't finish the project, so you may want to buy a little extra just in case.
{The pattern for the pumpkins and stems is at the bottom of this post.}
First step: Cutting (My least favorite step!)
From your black fabric, cut four 7 1/2" x 6 1/2" squares, and nine adorable pumpkin faces. You can use my faces as a guide, but remember: Tiny curves are annoying to sew! Another thing to keep in mind is that busier, higher contrast pumpkin fabrics will need larger faces to not get swallowed by the pattern. So for my orange-on-orange print, I could do intricate little faces, but for my floral orange-on-black fabric, I needed simple, large faces.
From your purple fabric, cut five 7 1/2" x 6 1/2" squares, and a 2 1/2" x 90" strip for binding. (You'll need to sew strips together to get that length, of course.) {Update: The 90" will give you extra, just so you know.}
From your green fabric, cut two 1 1/2" x 18" strips, two 1 1/2" x 20" strips, and nine pumpkin stems. {Update: I think I may have done the math wrong in figuring out how long to make these strips. Just measure your own nine patch when you're ready to add the green borders, and then cut to size. Just in case.}
From your orange fabric, cut out your nine pumpkins.
Whew! Glad that's done!
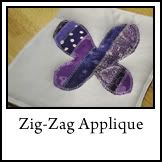
Now it's time to appliqué. I used the same technique as I did for my striped butterfly, but using a blanket stitch instead of a zig-zag.
Appliqué the faces onto the pumpkins.
Pin your first stem on to a pumpkin, then center the entire pumpkin on its square (...rectangle, I guess). Keep the stem in place, but remove the pumpkin. Stitch around the edges, but you don't have to stitch where it will be covered by the pumpkin. Then appliqué the pumpkin on top.
Next: Sewing it all together.
Squares go together in a checked pattern. Then sew the shorter green strips onto the top and bottom, then the longer strips on the two sides.
Sandwich your top, batting, and backing. (You'll trim off the excess batting and backing later--it's much easier to have these pieces slightly too big at this step.) For quilting, I sewed 1/4" from the seams on each of my squares. I used a slightly longer stitch than normal to emphasize the quilting.
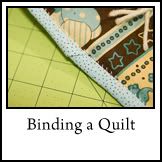
Trim off the extra batting and backing, and bind your wall hanging!
Hurray! You're done!

Happy crafting!

(Right click, "Save to Downloads")
No comments:
Post a Comment
Thank you for your comment! I love to hear from you--your comments make my day!
I've been getting a lot of spam comments lately, so I'll not be allowing anonymous comments for the time being. Sorry to any legitimate anonymous commenters!