24 December 2012

I Finished the Baby's Christmas Stocking Just in Time!

First off, thanks to everyone who's been leaving comments! I love knowing people are reading my posts and wanting to do my projects.  (If you have questions, I'll try and get back to you, but just know I'm not checking my blog very often at this point in new-baby-life.)

Second off, Merry Christmas!!!  I hope you're all having a great holiday and aren't even reading this until the 26th.  :)

Third off, I got Daddy's Girl's Christmas stocking done!  Just barely in time, too.


You like where we hung the stockings?  We don't have a fireplace in our apartment, so we put up a shelf to be a mantle.  :D


I think DG's stocking looks smaller than the other three, but I used the same pattern for all of them...Do you think it might be because I used a different (fluffier) batting?  More of the fabric is being taken up by the up-and-down from quilting the fluffier batting...Oh, well.  It's just a little bit smaller--hopefully the little ones won't notice, even when they get bigger.

The pattern I used, of course, is the one from this post.  (Just click over for the pattern and tutorial.)

But here's a trick I came up with between writing that post and now.  You see, I always have a hard time keeping all those little squares in order.  Oh, sure, I try labeling the rows, and keeping everything in order, but it doesn't always work out, and I end up laying it all out over and over again to make sure everything stays in its place.  Then I thought, why not label all the squares?


See?  The rows have numbers, and the columns have letters.  This way, I will always know where all the pieces go.  Boo could stick them in her bag, carry them around all day, and pour them out on my table in the evening, and I'd still be able to easily put each and every little square back in its place.  I'll never make this kind of quilt project any other way.


And just to make sure you've gotten your daily dose of cuteness, here's my little Daddy's Girl.  Isn't she precious?  I love that baby.


18 October 2012

Tiny, But Healthy

Remember back in the day when I used to actually post on this blog?  Yeah, it's been a while.  You see, I've been working on a continuing project...


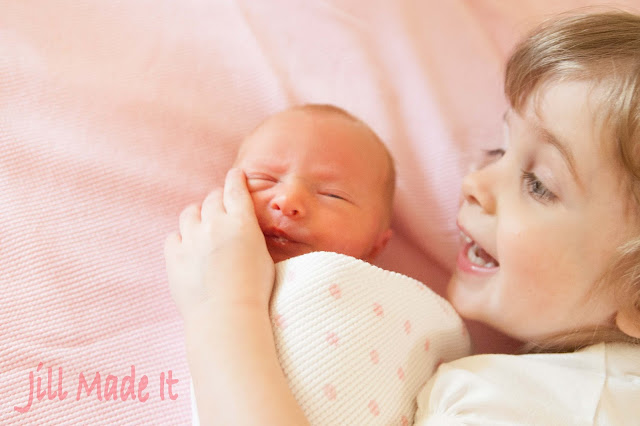
Meet Daddy's Girl.

Boo was definitely a mommy's girl, but this little one is a daddy's girl.  And she has her daddy's red hair, so that's lots of fun.  I hope she keeps it.  :)


This precious little baby joined our family a month early, and she certainly is tiny.  She was only 4 lb 10 oz at birth.  (It was really funny--while she was waiting in the hospital nursery to be checked by the doctor, right next to her was a 10 lb newborn...just in case we didn't realize how very tiny she was.)  If you remember from this post, she was small for how far along in the pregnancy we were, and we never did find out why.  So we were worried about her, and when she came early, we expected some time in the NICU.  But she's a healthy little squirt.  No NICU, no breathing problems (very common for 36 week babies, as I understand it), no jaundice, even.  (Well, it wasn't bad enough to need light therapy, anyways.)


So we've been adjusting to having two (healthy!) little ones.  (I have kids now--as in plural.  Weird.)  But we love it.  Boo is a great big sister; she loves to have tummy time with the baby.  ("Let's have a floor party!")  She goes and gets pacifiers, diapers, burp clothes--whatever we need.  Sometimes she's a little more clingy than before, but really, Boo is adjusting amazingly.


My blogging is going to continue being sporadic at least until Daddy's Girl starts taking regular not-needing-to-be-held naps, but you'll see me every now and again.


And the rest of the time, we'll just be enjoying our little baby.


17 July 2012

Mommy School--The W Book

I kinda' fell off the blogging planet, didn't I?  I have been working of stuff, but I've also been having pregnancy complications that make it hard to do too much, including blogging.  Anyone else had the problem of their baby being small for gestational age?  My doctor says there's not too much we can do for sure to help, but anything that's good for me is good for the baby--that means more food, water, rest, sleep...  And more doctor's appointments.  So that's what I've mostly been up to of late.

 Hopefully I can get caught up posting the projects I have been able to get done, anyways.  One thing I'm trying to keep up with is Mommy School.  Boo and I like to make books for the letters, so here's what we did for the letter W.


 I try and come up with lots of words that start with the letter of the week, draw simple pictures, and then Boo colors them.


 This week, we also looked up information (and pictures) about walruses.  Boo had fun seeing the pictures of the walruses, and she decided that she was Baby Walrus and I was Mommy Walrus.  Funny girl--we're different animals every day.  :)  I also used this opportunity to teach Boo about ice--that  water turns into ice when it gets really cold, then it turns back into water when it gets warmer.  We turned some ice cubes back and forth (and back and forth).  It was a fun little science experiment.


Then when all the pages were done, we sewed the book together, like Dana did in this tutorial.

Sometimes Boo chooses her Mommy School books for her bedtime stories.  :)  And she always loves watching me sew the books.  I like having something tangible for Boo to show Daddy and to look back on later to remind her of what she's learned.

(Edited to correct bad writing 10/17/12.)

26 June 2012

You'll Never Buy Hamburger Buns Again

When I got pregnant with Boo, it changed how I thought about food.  Before, I liked margarine better than butter because it's softer and easier to spread on toast.  Now, I only use butter to avoid the unhealthy trans fats of margarine.  And I liked Cool Whip better than whipped cream because it tasted better (or so I thought then).  Who cares that it's really sweetened hydrogenated veggie oil?

Basically, now I'm trying to eat real foods now, not the super-processed stuff I used to eat.  That's not to say I eat only garden-fresh, straight-from-the-farmer everything, because I don't.  I buy regular food from the grocery store just like everybody else.  But I just buy less off the processed and fake stuff.  A little bit at a time, I'm trying to replace my artificial flavoring-, additive-, and preservative-laced foods with natural, preferably homemade versions.  (Because homemade = usually cheaper.)

One delicious substitution?  Homemade hamburger buns.  I know, why would you spend all morning making hamburger buns when you can spend ten seconds adding them to your grocery cart?

Because you don't realize how tasteless the store-bought buns are until you make them yourself.

AND this recipe takes less than an hour, including rising (no work needed) and baking (ditto).

It is a seriously easy recipe.  I mean, if I can do it with Boo awake and "helping," it's an easy recipe.

Since it's not my own recipe, I'll just include the link, but be sure to click over and try it!
Taste of Home 40-Minute Hamburger Buns Recipe


You know you want to.  Mmmmmmmm.....  I will definitely be making some of these for the 4th of July.

23 May 2012

"Jesus Wants Me for a Sunbeam" Subway Art

I really like all the subway art I see as I stalk Pinterest.  (Who doesn't?  Love subway art, I mean, but who doesn't love stalking Pinterest, too?)  So I thought I'd give creating subway art a try.  I'm very much not a graphic designer, but here's what I came up with.


What do you think?  I think the first version is easier to read, but the second is more fun and happy.

If you like them, I hope you'll leave a comment.  And feel free to download either image and print it out.


10 May 2012

An Unexpected Stress-Buster

I've been having a hard time lately.  Nothing's even been that bad, but I have just been feeling stressed about it.  I blame being pregnant.  It's the perfect excuse for anything--forgot a commitment?  Pregnancy brain.  Too tired to do whatever?  Growing a baby--and in this case, my pregnancy hormones probably really are the reason.  But something unexpectedly snapped me out of it.

It started two days ago when Boo decided to not take her nap.  She was super tired by dinner time, but life happens and she got to bed late.  And then she slept badly.  I figured she was just having a hard time sleeping because over-tired little kids have a hard times sleeping (ironically).  Come daylight, we could tell she'd come down with a runny nose, poor thing.  No wonder she slept badly.

And, of course, when a two year old sleeps badly, so do the parents.  Especially not fun when you're pregnant and so tired anyways.

Then I had a pre-migrane.  My migraines always start with strange sparkling lines in my vision (imagine streaks of TV static), but they don't always escalate into a full migraine headache.  This one didn't, thankfully, but I just felt kind of off for a long time.

Next was lunch, and we had one of my favorite foods.  And I ate too much.  So I had a stomach ache.  (I know, poor me, ate too much of my favorite food.  I told you life wasn't actually rough, I just wasn't processing it well.)

After lunch, Boo again had a really short nap, and she woke up all sad.  (Still runny nose, and I think she's trying to outgrow naps.  I hope not, though!)

In the evening, dinner was rushed so Mr. MadeIt could get to scouts on time.  (He teaches the 11 year old Boy Scouts.)  And I had to wait for people to come and pick up some stuff I had for them, so Boo got to bed late again.  She didn't want to go to bed, but at least she settled down fairly quickly.

I needed to wash dishes, but if Boo heard me, she'd want to get up and help.  It would have been...probably half stalling going to bed and half actually wanting to help with dishes.  She loves helping to rinse the dishes.

So while I was waiting for her to be soundly asleep, I decided to take some pictures for my blog--not an easy task after eight at night in a dark basement apartment.  But Mr. MadeIt made me a light box, so I tried to set it up, but wasn't sure how to get it all together.  It kinda' worked, and I took a couple pictures.

I figured Boo was well asleep by that point, and was about to start on the mountain of dishes--really, it was bad--when Boo started crying in her room.  Dang.

I wasn't really feeling up to working through Boo's stall tactics, so I was glad when Mr. MadeIt got home from scouts while I was trying.  We got Boo back to bed, then my wonderful husband rubbed out the knots in my shoulders while I listed out all the things that were making me stressed.  (Including the lack of natural light in our apartment.  I read the other day that women are, as a category, more sensitive to that then men are, so maybe that's why it doesn't bother my husband nearly so much as it bothers me.)  I knew my problems were small, but I just felt that my stress-threshold was really low right then.  It was nice to explain how I was feeling, but I didn't feel less stressed.  (The massage helped, though.)

Then the last person finally came to pick up her stuff...and our talking woke up Boo.  Ugh!  Mr. MadeIt went to help Boo while I helped the visitor.  But when I was done, Boo was still wailing.  I went in to help and I found my husband supporting our little girl over the bathroom sink while she vomited into it.  No wonder she was wailing!

I took over for Mr. MadeIt, and he cleaned up what hadn't made it into the sink.  Sorry if this grosses anyone out, but I figure that if you're a mother, you've probably already had this happen to you.  To avoid too much detail, though, I'll just say that two outfit changes (we thought she was done before she really was, a bowl of Cheerios, and several stories later, Boo was back to sleep in her bed.

Great ending to my already-stressed day, right?  But actually, it was.  Not that I am glad Boo was sick--far from it--but focusing on my little girl's troubles made me not even care about mine anymore.  Who cares about the dishes or the dark apartment when my baby needs me?  I always knew my problems were small, but now I felt that they were.  And so I wasn't stressed anymore.  I just loved my sweet little girl, and wanted her to be happy and well.

(PS  Boo is doing better.  Hopefully she'll be fully over the illness tomorrow.)

30 April 2012

What I've been up to for the last month and a half...


Not what you were expecting to see, huh?  I know this isn't the kind of thing I normally post on my blog, but this picture took a month and a half to do (or about 45 hours), so I'm going to show it to you!  In case you're wondering, the Blue-Eyed Painter is the blog I'm posting my artwork to, so I can still share it with the universe without filling (HA!  I just wrote post #4) this crafting/mommy blog with unrelated stuff.  Check it out if you want to.  I won't be offended if you don't.

So, back to the artwork.  About forever ago, a friend of mine asked me to make a piece of artwork for him, something to illustrate the fight between good and evil, Armor of God vs the forces of darkness, that sort of thing.  Well, I finally got it finished!  Hurray!

Sometimes I liked the project, sometimes I wondered why on earth I was doing it at all.  (Oh, yeah--I'm getting paid.)  As you can probably guess, this kind of work isn't really my style, with the monsters and stuff.  Even just having so many characters in the picture is different than what I like to do.  I discovered in one of my illustration classes in college that I am just drawn (no pun intended) to artwork with very few characters who take up the whole picture.  So composing, drawing, and painting (for lack of a better term--it's digital) a scene with so many characters was a little daunting.  I had to talk my friend down to this many characters, even.  He'd first described a whole battle scene.

But I survived.  And I like the end result, too.  Painting the monsters was fun once I got some good ideas of how to make them monstrous.  (Let's just say, without my husband's helpful critique, the monsters would have been mildly upset, not-at-all threatening thugs.  Tall thugs, but not really monsters.)

So there's my random tangent of a post.  I'm proud of my work, so I just had to show you.  I will be posting a crafting tutorial soon--I made pearl necklaces for Boo and myself for Easter, so I'll show you how I did it.  Is there anything classier than a pearl necklace?  Hmm, that might be a good Mother's Day present...I might need some more beads...

Until then, happy crafting!


28 March 2012

Taking a Break

Yeah, I'm just not feeling doing the whole crafting-blog thing right now.  It has been a lot of fun, but it's time to focus on other things.  (Like the art commission I'm working on--my first non-fundraiser commission!)  So I'll be posting very erratically for the foreseeable future.

Thanks to everyone who reads my blog, and especially to those who comment.  Maybe I'll get back to a regular crafting and posting schedule later.  We'll see.

It's been great.

Bye for now.

21 March 2012

"Sometimes Being a Brother" Nursery Decor--Tutorial


Here's the finished crafting project I mentioned in my last post.  I have a friend who's about to have her second baby--another boy.  I made this as a present for her, and so I wanted to give the gift to her before I posted about it.  Wouldn't want to spoil the surprise!

I've barely used my Silhouette since I got it for Christmas.  Shame on me, I know!  I was (and still am) excited about all the many things the Silhouette could help me make...but choosing exactly what to do has been a little harder.  That and my pregnancy-induced tiredness and lack of crafting motivation for several months that is just starting to abate, plus wanting to focus more time on my art and on Mommy School...  But with this friend giving birth early next month,  I had motivation, inspiration, and a deadline!  Deadlines are always very helpful for me.

I wanted to make a sign/wooden wall hanging/whatever with a quote on it so I could use my Silhouette to cut the vinyl.  I also wanted to make a present that was kind of for the mommy and kind of for the big brother, so I was excited when I found this quote:

Sometimes being a brother is better than being a superhero. 
--Marc Brown

How cute is that?  Of course the three-year-old big brother won't care about it now, but I bet he will like it when he is older (and wanting to be a superhero...and is able to read).   

The sign was really easy to make, so much so that I didn't think there was a point to have in-progress pictures.  I'll just explain quickly what I did.

I asked Mr. MadeIt to cut out a 7 1/2" x 9 1/2" rectangle out of some scrap wood we had hanging around.  (Actually, it was a shelf from a wall unit we decided to get rid of.  Let's hear it for recycling!)

Then I spray painted the wood with primer.  I don't think this part is necessary, but I do think I wouldn't have gotten the subtle texture I liked if I hadn't primed the wood first.

Once the primer dried, I painted the wood with tole paints.  I bet whatever acrylic paints you have on hand would work just as well.  Since I wanted the sign to have a subtle texture, I applied the paint unevenly, letting some areas be darker, and others areas lighter.  Because of the primer, the paint didn't soak into the wood, allowing me more time to push it around with the paintbrush to get it just how I wanted it--smooth, but with tonal variations.  (I used Hunter Green + Charcoal, by the way.  For the edges, I had more Charcoal in the mix, so they would be darker.  For the back I mixed the green with black, to make it darker still.)


(So you can see the edges.)

And, of course, I had to make up the design so my Silhouette could cut the vinyl.  If you'd like to use my file, you should be able to download it here.  (This is my first time using Google Docs.  Let me know whether or not this link and the download work!)

If you'd rather make your own file, I used the font Haettenschweiler.  (Goodness!  I'm glad I don't have to actually pronounce that!)

I suggest using transfer paper when applying the letters--I did it without and it was a ROYAL PAIN.  It took forever to get those words on straight!

After that, I though the wood needed to be sealed and the vinyl stuck down permanently.  (No need for inquisitive little fingers to take my hard work apart.)  So I coated the whole thing with my homemade Mod Podge, which is just school glue watered down a little.  (Apply with a paintbrush, and be sure to wash the brush out really well afterwards.)

And that's it!  Except for spending forever getting the words on straight, this was a really quick and easy project.  (I'll have to get myself some transfer paper for next time.)

I hope you enjoyed the tutorial.

Happy crafting!

17 March 2012

Mommy School--Shapes

I have been crafting, really!  I've slowed down lately, though.  (I blame being pregnant, mostly.)  I even have a finished project to show you...but not right now.  Today's post is about the two main things I've been doing lately:  Mommy School and enjoying springtime.  First, Mommy School.

Boo and I usually just hang out around the house, sometimes coloring, sometimes playing with her toys (Buzz, Mike, and Jessie are by far her favorites--mostly Jessie), and all-too-often playing on the iPad.  Frankly, I was getting bored, and I bet Boo was, too.  I wanted to add a little more learning, structure, and just new-ness to our daily routine.  Enter Mommy School.

I got the idea from this awesome blog, where a former first grade teacher/current mommy to a toddler posts Mommy School packets.  I look through her packets and pick what I think will work the best for my little munchkin, and add my own ideas so that we have one Mommy School game each weekday morning.  I hope for the activities to last about half an hour, but we just go as long as Boo still wants to play.  Here's what we did our first week...


For this week, we focused on shapes.  On Monday, we played the Jumping Game.  I cut shapes out of copy paper, laid them on the rug, and told Boo different shapes to stand on, and then "One, two, three, jump off!"  So she was practicing identifying her shapes while jumping all around.  And at the end, she colored all she shapes and we put them up on the freezer to show Daddy when he got home.  (Repetition + reinforcement = good!)  In this picture, Boo was playing her own variation on the game by putting her toys on the different shapes.

(Sorry the picture's not really in focus.  But you still get the idea.)

The next day, we played the Throwing Game.  I used masking tape to mark off different shapes on Boo's bedroom floor, intending that we would throw beanbags/soft toys into them.  But Boo just wanted to put Jessie, Mike, and Buzz in their own shapes.  On the plus side, though, I left the shapes on her floor, and often she'll just walk across them reciting, "Diamond, rectangle, triangle, square" and then go on with whatever she was doing.  So, even though the game was a bust, Boo is still learning her shapes.


We also did the Picture Game.  I cut out shapes from colored paper and stuck tape on the back.  Boo stuck her new "stickers" all over a sheet of butcher paper and colored everything.  It's up on our freezer, too.

Another game Boo LOVED that I didn't take any pictures of was the Finding Game.  I cut diamonds and circles out of copy paper (and Boo colored them, of course) and then we went outside and "hunted" for the shapes.  Never underestimate how much fun two year olds have finding things in obvious places.  We played several rounds of this game.  (I had Boo tell me what shape she found each time, so we were reinforcing the shape names.) 

And lastly, we made sugar cookies and cut circles, hearts, and stars out (because those were the most applicable cookie cutters I have).  Boo got to learn about shapes, since that was the theme of the week, but she also got to learn about rolling out dough and cutting out cookies--good life skills.  :)

I was going to share more, but I don't want this to be the post that never ends.  I'll just leave you with one picture of us enjoying my favorite season of the year.  


Ah, I love spring.

Hope you all are enjoying your St. Patrick's Day!

07 March 2012

Ah, the Second Trimester! (Also: Maternity Stuff I Love)


Look!  Little tiny baby bump!

I am LOVING the second trimester!  Finally, I don't need a nap everyday!  Okay, it's not that I mind nap-taking, but Boo's nap times are my crafting times, me-times, and cleaning times.  Yes, by the end, I even missed being able to clean.  

So what have I been doing with my newly-regained couple hours of quiet?  Well, I've made two and a half of the skirt I showed you last week.  (I now have a green skirt, too, and a waistband for a black/white skirt.)  And I've spent hours scouring the web for great maternity tutorials.  (If you're interested in what I've found, I've pinned them here.  Not everything on this board is for maternity, but currently most of it is.)

I also made a maternity band (from this tutorial), which I love.  You can see it poking out under my shirt in the picture above--it just looks like a cami, right?  But no, that wonderful invention is holding up my unbuttoned non-maternity jeans.  Because I'm still in the awkward too-big-for-regular-clothes-but-not-big-enough-for-maternity-clothes stage.  So I love this little guy.  And it was really super easy to make, so be sure to check out the tutorial--it's definitely worth your time.

And speaking of things I love during maternity time, these are my favorite summer maternity shoes:


You got it--$2 flip-flops.

Because who wants to have to deal with tying shoes or buckling straps when you're 9 months pregnant?  Not me.  And it's (soon-to-be) summer, so flip-flops are totally appropriate.  When I was pregnant with Boo, I wore flip-flops almost every single day.  Those poor sandals have gone to Shoe Heaven (may they rest in peace), so now I'm looking forward to breaking in these new guys.  Come on, warm weather!  I'm ready!

29 February 2012

Maternity Skirt--Yep, for Me


First off, Boo is going to have a little brother or sister!  Hurray!  We're very excited.  Now that the first trimester's over, my energy levels are coming back up (hurray for that, too), and my baby bump is coming back out.  (Not that you can tell in this picture.  Which is nice, I guess.)

Even though Baby is still pretty small, he (or she--but I'll say "he" for simplicity) doesn't like to be squished.  But I'm not quite ready for maternity clothes yet; I bet even non-pregnant people look pregnant in those things.

In my perfect world, maternity clothes would work for non-maternity just as well.  It's an impossible dream much of the time, but not with this skirt.

This skirt is long, yet light (great because this will be my second pregnant-through-the-hot-humid-summer experience), and so comfy!  And easy to make--it was a great beginner project.  And I love that it works even with a tiny baby bump, will still fit with a big baby, and will transition back to no bump without another shopping trip.


(You can see the bump a little better in this picture, but really, Baby just isn't very big yet.)

This is thanks to the yoga style waistband.  See?  It's the same nice, comfy knit as the rest of the dress.  (Yes, my first experience sewing with knits!  I've overcome my fear of knits!  I actually have another project I may do with the rest of the blue fabric from this skirt, if there's enough.)  The waistband goes up over my baby bump now, and when Baby gets bigger...


 I'll just fold the waistband down again so it's entirely under the baby bump.  (If I'd used a stretchier knit, this wouldn't be necessary, but I'm okay with folding.)

I'm super pleased.  I may make myself another skirt or two, now that I've got some practice.  I followed this tutorial from Elle Apparel.  I used jersey knit, and measured my "waist" right under my baby bump.

I hope to post more maternity things as my pregnancy moves along, and if you know of some great maternity-themed tutorials, I'd love to hear about them!

Happy crafting!

22 February 2012

I'm in a Quilt Block of the Month Club--Here's January's Block.

First off, I have a question:  What do you think of 30's style fabrics?  They are bright and happy, but in my opinion, they're rather busy.  And I don't really like busy.  But when that busy 30's fabric becomes a $7 quilt top, I can handle the busyness.  A little.

I bring it up because a local quilt shop is doing a Block of the Month Club--$7 gets you the fabric and patterns for twelve different quilt blocks.  So I'm doing it.  I just couldn't turn down a $7 quilt.  At the worst, I could give away the quilt, and use the patterns again with more my-asthetic fabrics.


This is January's block--the Yankee Puzzle.  I'd love to give you instructions for this and all the other blocks I'll be sewing, but since I didn't make the pattern, I can just suggest you Google the pattern names.  (To get you started, here are some instructions I thought looked pretty good, though I haven't tried them.)


And here's my version.  I figured, fewer fabrics = less busy, even if the fabrics themselves are busy.  What do you think?  I didn't like the red fabric included, but I do like the value contrast it provided; my version is rather pale.  Hmm...

Let me just say, it is much harder to sew triangles than squares.  Getting all those little points matched up... My quilts thus far have been pretty basic as far as piecing goes (usually just squares/rectangles), so this quilt block was a challenge.  But that's good, right?  Learn new skills?  I hope I get better at it sooner than later, though, because January's block really wasn't much fun to sew.  And unpick.  And re-sew.  Again.


And here's the fabric for February's block, the LeMoyne Star (aka the Eastern Star, Lemon Star, Puritan Star, and Hanging Diamonds, so says my pattern).  There's that same fabric design I didn't like from January's block, but I like it better with the main color being blue.  Good thing, because I couldn't really take out a color when there are only three to start with.

13 February 2012

A Year of {Cheap, Fun, Simple} Date Nights

But first, a small announcement. I've decided I want to spend more time on the arts side of my creative pursuits, so I'll need to spend less time on my crafting and blogging. I LOVE painting (watercolors in particular) but it's really sad how few paintings I've done since graduating. It's so sad, I won't even tell you how many. Okay, I will--one. That's really sad.  (It was this painting, by the way.)


I also love my blog, though, so I will keep posting. And I don't think it's possible for me to stop crafting. So you'll still see me, just less often. I'm thinking once a week, probably on Wednesdays, though this week's post is (obviously) today, because I've been saving this project for Valentine's Day!


So without further ado:


A Year of Date Nights


It can be hard to come up with something fun to do each week! Mr. MadeIt and I were falling back on the same couple of activities, but we used to do all kinds of things--we just had to remember what. So I made a list. I wanted to have a different activity for every week of the year, so I also checked out other people's suggestions (links at the bottom of this post), and I had it--a whole year's worth of Date Nights. I printed the date ideas onto index cards and we were set.


{Disclaimer: These dates are intended to be done with a spouse, i.e. they are not all appropriate for unmarried people. So don't be shocked when you see Strip Poker.}


At Home
It is expensive to hire a babysitter every week!  Here are lots of ideas for fun date nights you can have without any hired help.

1--Dinner in the backyard, or on the porch
2--Watch a movie
3--Redbox + popcorn
4--Order pizza
5--Theme Night:  Dress, eat dinner, and watch a movie with the same theme (Ex:  Western--cowboy/girl outfits, BBQ, John Wayne movie)
6--Indoor picnic
7--Special dessert
8--Get all dressed up, but stay home
9--Very exclusive dance
10--Grand Night at the {Your Name} Theater--don't forget the formal invitation and fancy clothes!
11--Sexy clothes (pick another card for the activity)
12--Read a book (We like to read together and always have some book we're in the middle of.)
13--Candlelit dinner
14--Make a CD of playlist for the night's background music
15--Splurge on yummy treats
16--Back rubs
17--Share your favorite dating memories
18--Candles everywhere!
19--Exercise together
20--Try a new recipe
21--Go to bed early ;)
22--Play the Wii together (or whatever gaming system you have)
23--Watch a sports movie and eat stadium food (nachos, hotdogs...)
24--Hawaii vacation--tropical drinks, swimming suits, and kiddie pool
25--Breakfast for dinner
26--Board games
27--Card games
28--Super ice cream treats
29--Make s'mores/dinner outside
30--Grand Change Escapade--Gather up all your loose change and try to spend as much of it as you can without going over.
31--Indoor camping
32--Bubble bath for two
33--Make some silly craft together
34--Finger-painting
35--Work on a project together
36--Play 20 Questions--Write down twenty getting-to-know-you questions you never thought to ask before
37--Find a "how to" video at the library and learn a new skill  (I'm hoping we find one about dancing!)
38--Teach each other a new skill  (I want Mr. MadeIt to teach me how to play guitar.)
39--Get a movie from the library
40--Make Bucket Lists
41--Strip-poker, etc (any card game works)

Free and Cheap Going Out
Sometimes, you've just got to get out of the house.  But going out can be inexpensive, too!

42--Take dinner to the park (Love this one.)
43--Take pictures
44--Go on a walk
45--Go mall-walking/window shopping (Great for cold/wet/unpleasant days)
46--Go play at the playground
47--Go bowling
47--Go to an art show, museum community play...
49--Go hiking
50--Stargazing
51--Night swimming (if you have a local pool that's open at night)
52--Mini-Golf

Special Occasions
We're all for the $10 and under dates, but sometimes you just want to do something special.

53--Go to a nice restaurant
54--Outdoor camping, or any other overnight date
(Yeah, that's all I've got.  Free-and-cheap really is the way we roll around here.)

For the Holidays
I don't imagine this needs any explanation.  :)

55--Birthdays--Birthday boy/girl gets to choose everything!
56--Christmas--Make Christmas cookies
57--Christmas--Make Christmas tree ornaments
58--Valentine's Day--Make an all-red dinner
59--Valentine's Day--Make Valentine's cards for each other.  (The cheesier, the better!)
60--Halloween--Make your costumes

I'd love to hear your suggestions for date nights!  Please share!


Ideas from:
Things we've done before
Friends and family

08 February 2012

The Easiest Bracelet You'll Ever Make {Tutorial}


This really is the easiest bracelet you could ever make.  If you've never made jewelry before, or if you just want an instant-gratification kind of project, this is the one for you.  With elastic thread and no clasp, this bracelet is the easiest to wear, too.

I have lots of pictures, but don't worry that that means this is complicated (Easiest Bracelet Ever, remember?).  I just like having pictures for every step; really, you could just look at the pictures and understand the project without even reading my instructions.

Ready?


You need:
Beads (not pictured, but I bet you figured that out already)--Larger beads work best for this bracelet.
Crimp beads--They come in different finishes (I have silver and gold), so pick what will match your beads best.
Stretchy beading thread--I used .7mm diameter thread, but this depends on how big the holes in your beads are.  I figure thicker thread = stronger bracelet, so I use the thickest I can for my beads.
Crimping tool--You probably could use regular pliers if you need to, but crimpers are a better choice.
Something to cut beading thread--I used wire cutters since I keep those with my jewelry making supplies, but scissors would work better.


First, plan out how the pattern you want for your bracelet.  For this bracelet, I chose a symmetrical pattern, but a random pattern works nicely, too.  (That's what I did for the finished bracelet shown above.)


Then string your beads on the elastic thread.  Don't cut your thread until you have all your beads strung on, and you're sure the bracelet is the right size.  Trust me, it's a royal pain to keep having your beads falling off the opposite end of the thread.  Yep, I have experience with that one.


After you cut the thread, you'll string both ends of the thread through a crimp bead in opposite directions.


Next, you will crush the crimp bead with the crimpers, then fold it in half over itself.


The crimp bead gives a nice, barely noticeable, and professional finish to the bracelet.  Thread the elastic thread through the neighboring beads, if the holes are big enough.  Trim the thread.


And the bracelet is done! 

Depending on the beads you use, this bracelet would work for any occasion, and for any age group.  Pink plastic beads for a little girl for Valentine's Day, silver and gold glass beads for your sister for Christmas--this makes a really versatile, and super simple gift.

Happy crafting!