Hi all! Here's another quick post while I'm on vacation. Hope you enjoy!
So, the other evening, the munchkins were in bed and the adults were wanting to watch a movie. (Ramona and Beezus. Cute movie. I read the books when I was little, but I think I'm going to have to read them again now. Hmm, maybe I'll wait until Hailey is old enough to appreciate them and we'll read them together. What reading level are they, anyway? But I digress.) The problem was, we didn't bring our baby monitor! What if Hailey woke up and was crying and crying and we couldn't hear her at the other end of the house, down the stairs, and with the movie playing? (We'd just put her down and she wasn't asleep yet.) But Joseph and I came up with a genius idea, if I do say so myself. We called each other on our cell phones and put them both on speakerphone. My phone went in the guest room with Hailey, and Joseph stuck his in his pocket (muted, so Hailey wouldn't hear our movie or laughter). We could hear Hailey singing herself to sleep (we call it her "sleepy song") and knew she just fine.
(Warning! If you want to try this, make sure you won't go over your cell phone minutes! Joseph and I are on the same plan, so the hour and a half-ish movie didn't take any minutes.)

27 December 2010
23 December 2010
On Vacation, but still Posting!
Hi, readers! I'm away visiting relatives for the holidays, but I wanted to write a quick post for you. The other day, I made my little girl a tutu, and it turned out so cute! This is the tutorial I used. It was really easy to do, and the instructions were easy to understand. (Always good.)
Here are a few things I learned while making Hailey's tutu:
The tutorial says to use about 20 yards of 6" tulle, but how much is that if you buy it off a bolt? I ended up needing about two yards of 50" width fabric to make the tutu for my petiteone one year old. I cut the strips to 6" x 15" (and the tutu pokes almost straight out!). If your little girl is bigger than my munchkin or you want the tutu to be more of an actual skirt than a ballerina tutu, you'll need more fabric, but at least this will give you an estimate to start from.
I used big fat ribbon to tie the tulle around instead of elastic. It works well because it can grow with Hailey. But it was a little harder to tie the tulle around, because I couldn't really put it around an object to hold it for me.
You can feel free to not follow the instructions exactly; it's a forgiving kind of project.
I'll add an update with my own pictures later. (We brought the tutu with us, and I'm sure there will be some great photo opportunities at Grammie's house!) I've got to go now, it's breakfast time, and Hailey and her Daddy are hungry!
Here are a few things I learned while making Hailey's tutu:
The tutorial says to use about 20 yards of 6" tulle, but how much is that if you buy it off a bolt? I ended up needing about two yards of 50" width fabric to make the tutu for my petite
I used big fat ribbon to tie the tulle around instead of elastic. It works well because it can grow with Hailey. But it was a little harder to tie the tulle around, because I couldn't really put it around an object to hold it for me.
You can feel free to not follow the instructions exactly; it's a forgiving kind of project.
I'll add an update with my own pictures later. (We brought the tutu with us, and I'm sure there will be some great photo opportunities at Grammie's house!) I've got to go now, it's breakfast time, and Hailey and her Daddy are hungry!
11 December 2010
Wooden Nativity Set {with free pattern}

My husband and I wanted Hailey to have a nativity set that she could play with, and that would also look nice decorating out home. So we made her her very own set out of wood. It was lots of fun to do, and Hailey loves to play with it.
You will need:
my pattern :)
pencil or pen for tracing onto the wood
wood--we used white pine, 4 x 12 x 1
--some 1/8 inch thick wood for star and angel wings
scroll saw
sand paper
wood glue
paint (and other painting supplies, you know)
optional: a spray sealant

Here's the pattern. It's sized to print on a regular 8.5x11 sheet of paper. (That's why the stable is cut in half.)

After you print and cut out the pattern, arrange the pieces on your wood.


Here it is all traced out. Avoid knots if you can.
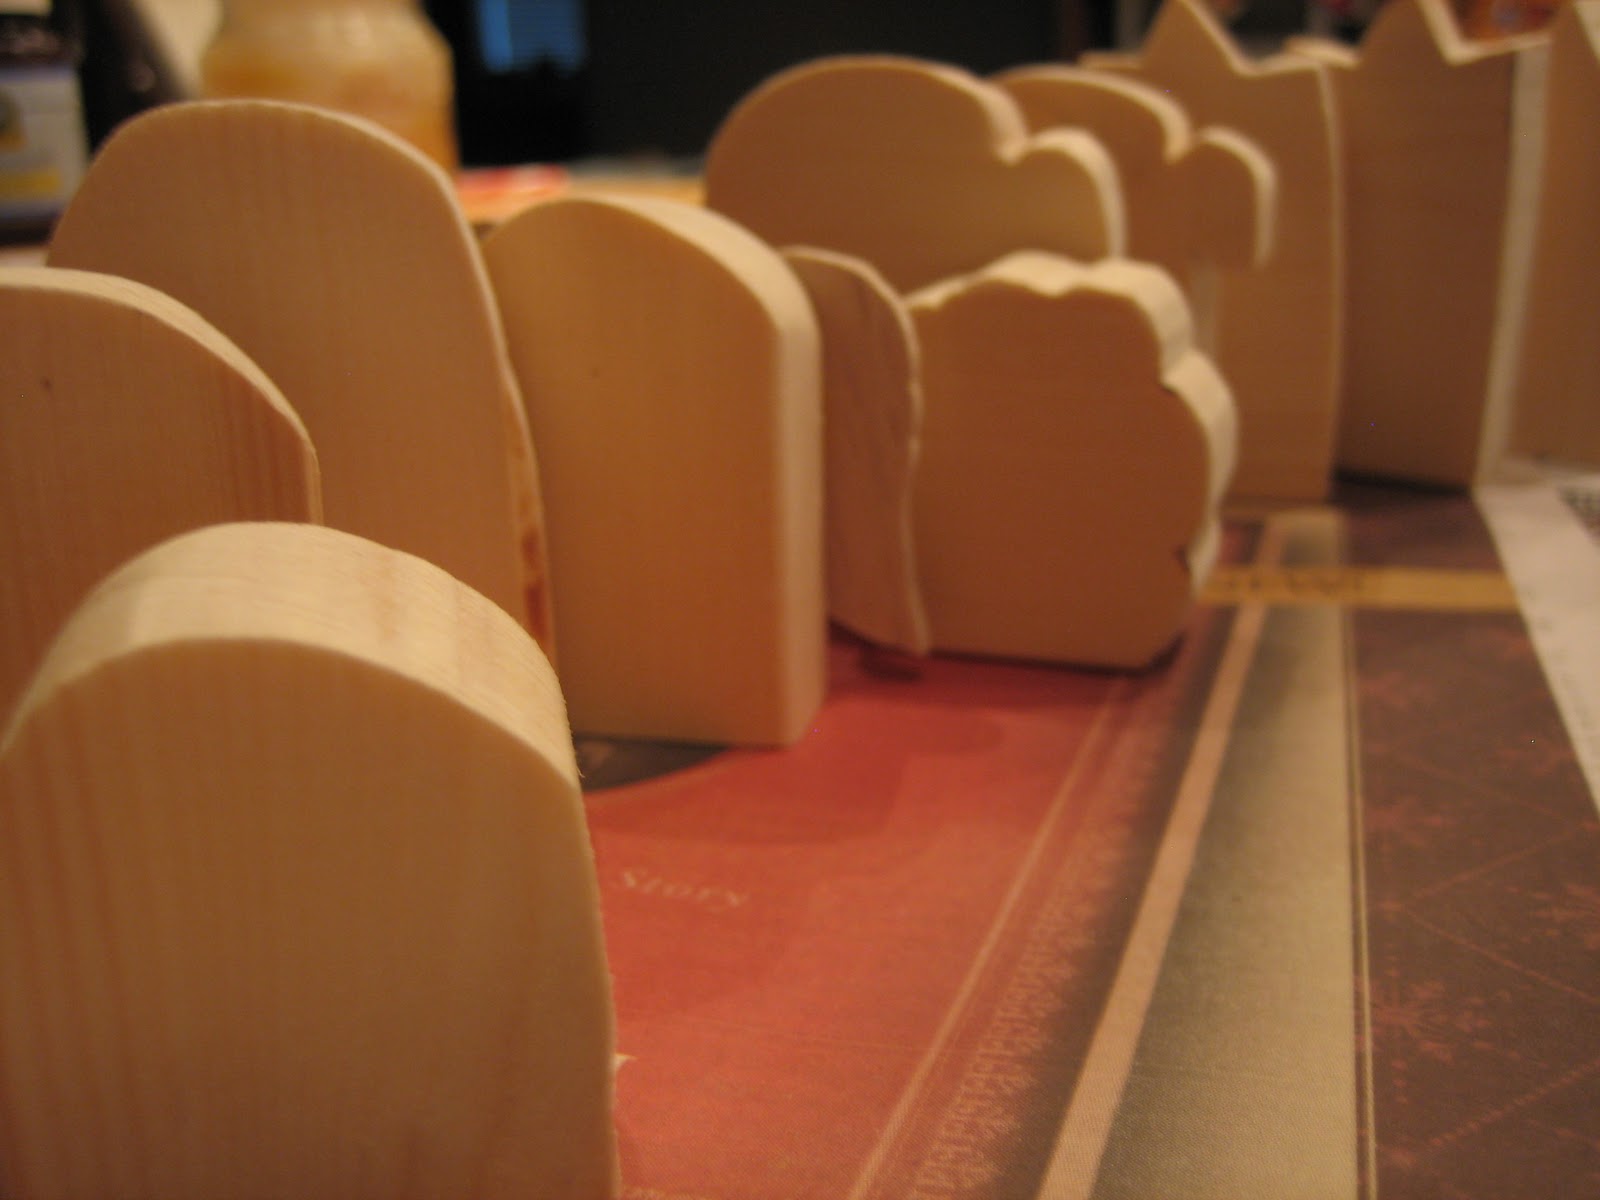
Cut them out. Sand away any splinters.
Glue the wings on the angel. (We ended up cutting the wings in half and gluing each wing on separately.) Glue the two halves of the stable together. Don't glue the star on just yet.
Once the glue is dried and set, paint everything all cute. :) This is the fun part. You can paint them like we did, or completely different. If your kids are old enough, let them help. :)
After everything's painted and dry, glue the star onto the joint in the stable. It covers up any imperfections in glueing. (Always a good thing.)
Spray on the sealant, if you want.
Now you're done!

Here's the finished nativity set, in front of the nativity Hailey isn't allowed to play with.
Subscribe to:
Posts (Atom)