Showing posts with label baby. Show all posts

18 March 2014

Every Baby Boy Needs a Tribal Frog Onesie

Hand-Stamped Tribal Frog Onesie

So, you know I like to make, rather than buy, presents for babies.  I've made quilts (like the Finding Nemo Quilt and Elephant Quilts for Twins), burp cloths, and nursing covers.  Right now, I like decorating onesies.

Specifically, I like to carve custom stamps, and stamp the onesies.  I've made flower, crab, crawfish, seahorse, starfish, and now frog stamps.  It's so fun to make (and use) a hand-carved stamp.  I have another baby shower coming up, this time for a baby girl, so I'm thinking about carving a new stamp. What design to do...?

Hand-Stamped Tribal Frog Onesie 2

What do you like to give for baby shower presents?  What is the best baby gift you've received?

21 January 2014

Baby Announcement Poster (Illustrator Class Homework)

In the next few weeks, you'll be seeing a lot of my Illustrator projects.  Comments are welcome; what do you think?

Baby Announcement Poster (Illustrator Project)

For the first homework assignment in my Illustrator class, we were to make a typography poster.  I have a friend expecting baby #3, so I decided to make this for her.

14 January 2014

The Finding Nemo Baby Quilt

{I had this whole blog post written and completely ready to go, but then I somehow managed to delete it by accident.  I don't know what happened.  (Sadness!)  So you get the abbreviated version.}

Jill Made It: Finding Nemo Quilt

I made this baby quilt for one of my friends.  She and her husband were planning a Disney theme nursery for their baby boy, so when I found this fabric, I knew it was meant to be.

I love giving handmade items as baby presents.  It's partially because I just really like making things, but it's also that I feel that handmade gifts are an extra-special welcome to the world.  :)

Jill Made It: Finding Nemo Quilt Close-Up

The quilt is just a big rectangle with a white border inside to add interest, so it was a pretty quick quilt.  I think I even got it done the night before the baby shower.


09 December 2013

"Blue Christmas" Simple Holiday Skirts

Boo loves to match.  Not like her shirt matching her pants; she comes up with some pretty...inventive outfits.  No, she likes to match other people.  So she will be so excited when she and Daddy's Girl unwrap matching Blue Christmas Skirts on Christmas morning.

"Blue Christmas" Simple Holiday Skirts

These are really basic skirts, but the nice thing about "basic" is that you can easily add your own spin on it.

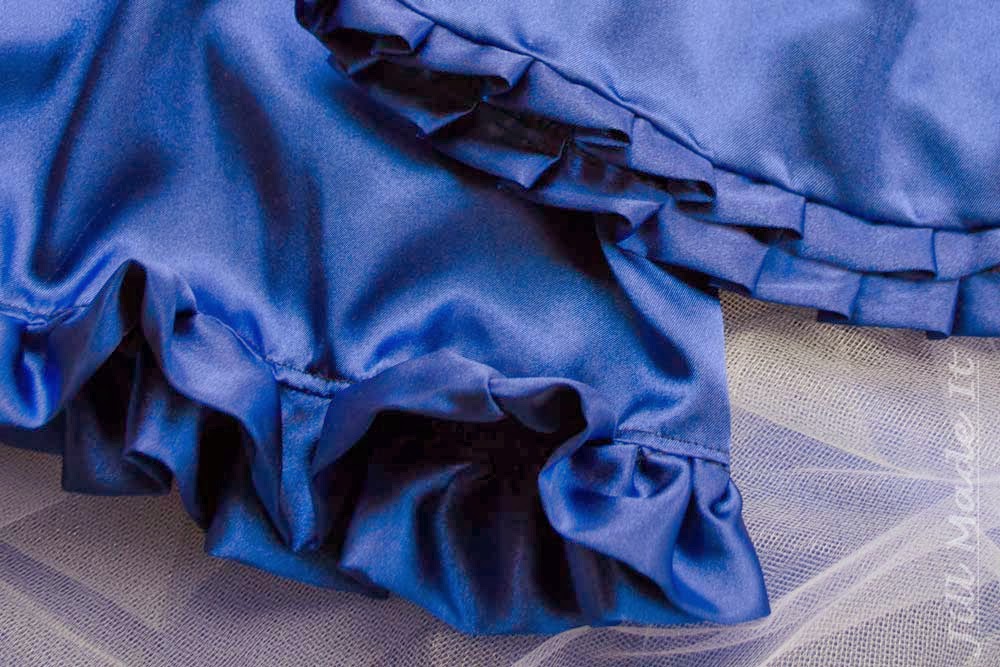
Holiday Skirts with Pleats, Ruffles

Both skirts are made from the same blue satin (surprisingly affordable, yet it adds a bit of "special" to the outfit).  Daddy's Girl got pleats on her skirt, Boo got ruffles.  I love variations on a theme.

Ruffles on Skirt

Oh, ruffles, why must you be so cute, yet so annoying to make?  I actually prefer making pleats than ruffles.  

Simple Holiday Skirt Pattern
(By the way, I certainly didn't invent this way of making a skirt; it's been around forever.)

I don't have step-by-step pictures, since I sewed these up at night so the girls wouldn't see their Christmas presents.  (Read:  There was really bad lighting for pictures.)  But the skirts are so easy.

Ready?

Cut the elastic to your child's waist measurement.  Don't add seam allowance—you need the elastic to stretch a little so the skirt stays up.

Cut your skirt fabric as shown in the picture above.  Or, if you want a fuller skirt, cut a longer rectangle.  Less full, closer to square.

Sew up the two short sides, finishing the seams as you prefer.  (I went over the raw edges with a zig-zag seam for the first, and made a french seam for the second.  Just because I didn't think about the french seam at first.)

Make your hem by folding the bottom edge over a half inch, then fold again another half inch.  And sew it down.  A decorative stitch with a contrasting thread could be a nice way to add some detailing.  You could also hand stitch for a less visible seam, or use the blind hem stitch on your sewing machine.  But that's another tutorial.

Now you'll make a casing.  Just iron the top edge down a quarter inch, then fold down again whatever size you need to fit your elastic.  Sew this down, too, being sure to leave a little space for inserting the elastic.

And insert the elastic.  Attach one safety pin to the leading edge so it's easier to thread it through, and another securing the other end to the fabric so it can't pull all the way through.  (Hate it when that happens.)  Once the elastic's through, overlap the two ends by a half inch and use a zig-zag stitch to secure them.

Topstitch the casing closed, and you're done!

(If any of this didn't make sense, send me an email or leave a question in the comments below.  If needed, I'd be happy to make a photo tutorial later.)

Skirts with Ruffles, Pleats

Now that you know how to make a basic skirt, you can change it up to make so many different looks!  Besides adding ruffles or pleats, you can make the skirt more or less full, longer or shorter, try color blocking, or a paper bag waistband...I think I'm going to try a scalloped hem next time.

Don't miss any posts as we Sew a Song of Christmas!

06 December 2013

"What Child is This?" Mini Quilt Tutorial from Al of Shaffer Sisters

Today, the wonderful Al is sharing with us her mini quilt inspired by the song, "What Child is This?"

She and her sisters, Jo and Scary (aka SarahLynn), have some great projects at their blog, Shaffer Sisters.  One of their projects I'm excited to try is the Minky Crib Sheet.  (How amazingly comfortable does that sound?!)  And they do a lot of sewing for girls (I love this cute dress) and for boys (like this awesome shirt).  You should definitely go check out their blog!

But first, the "What Child is This?" mini quilt.  On to you, Al.

~~~

Little Girl and Santa
This was taken at a church Christmas party when Ty was 18 months old.
I love Christmas. I treasure the peace, hope, and love that I feel when I think about the true meaning of the season. Too often it seems like the Christ in Christmas is lost to bright flashing lights and an excessive focus on Santa and the entitlement of gifts.
http://shaffer-sisters.blogspot.com/2012/12/merry-christmas-from-us-to-you.html
Christmas Towel Tutorial & Free Printable
I love my Lord and Savior, Jesus Christ, and this season (as with years past) it is my goal to give something that keeps the focus on my Redeemer. The King of Kings was born into the most humble of circumstances, but that didn't make Him less. His birth was marked by the fanfare of angels, the brightest star in the sky, and the company of humble shepherds and faithful Wise-men from afar. From a young, pure, and loving mother He was born. I'm sure that Mary, just like all new mothers, felt an overwhelming love of this gift straight from heaven, but also an uncertainty that she could be the best for of someone so precious and perfect.
"What Child is This?" Mini Quilt
This story is portrayed in the hymn of "What Child is This?"  It is one of my favorite Christmas songs. One day while thrift store shopping I found "Quilt a Colorful Christmas" (contains 39 projects) and it cost only $2. You should probably know that I love quilts so getting it was a no brainer. One of my favorites from the book was the Mother and Child project which I decided to share with you today.

This was such a fast and easy project. I thought it would entail paper piecing or something a little more complicated, but it was simply just fabric, sew-able heat-n-bond (they recommended fusible web, but I had to make due with what I had), stitching on top of the applique, and then putting it all together.
"What Child is This?" Mini Quilt 2
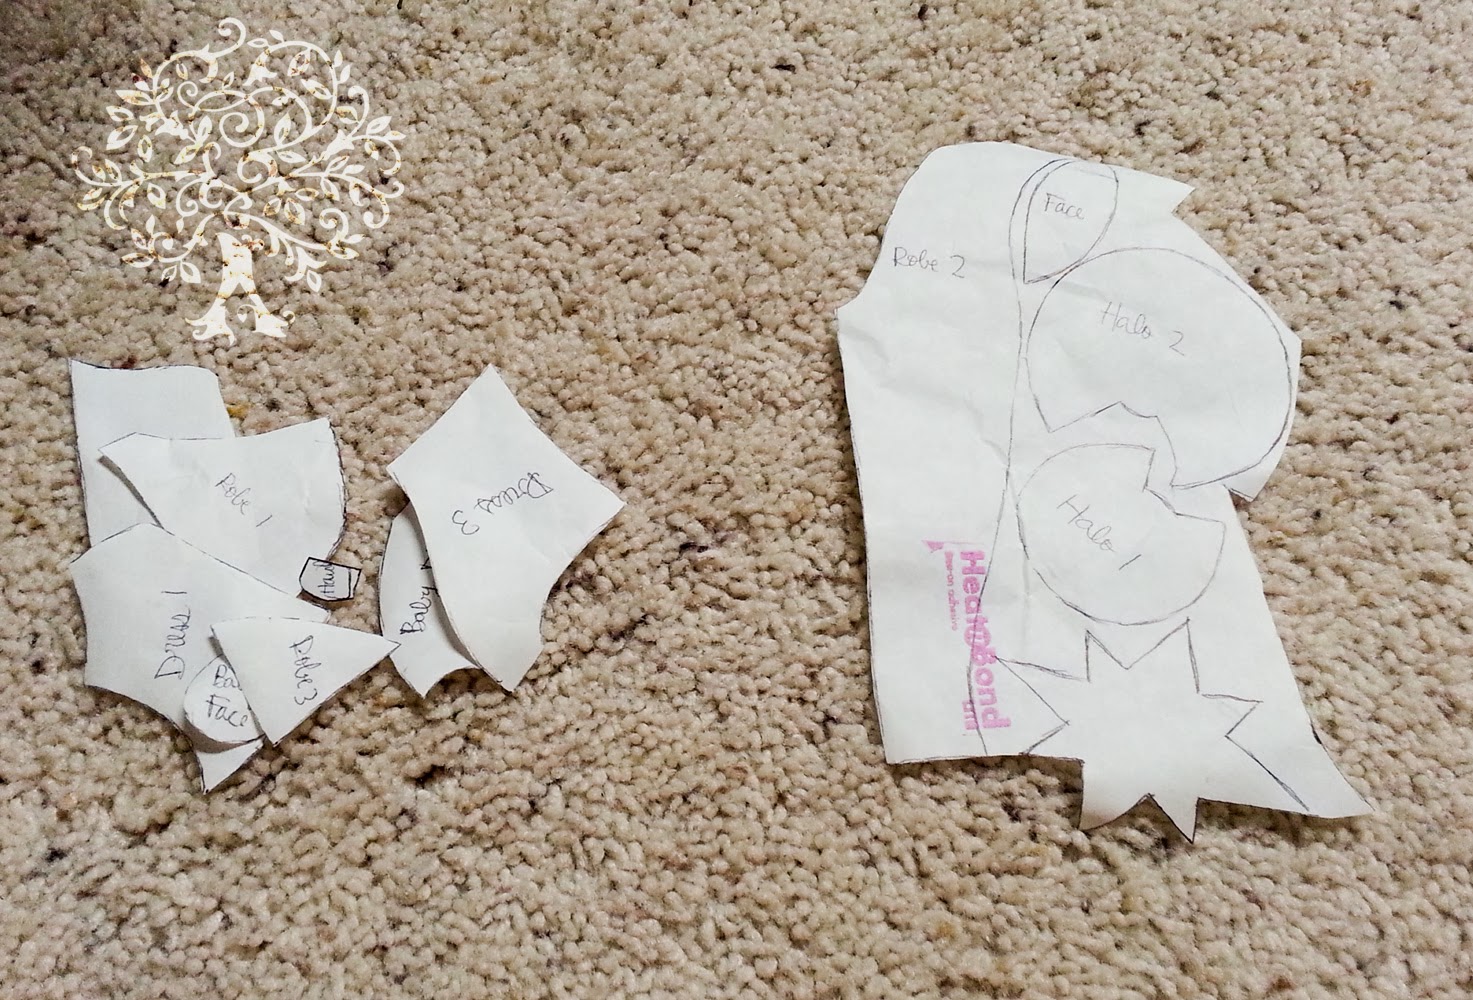
Sadly I can't give this pattern to you since it's not my design, but you can do something similar to this by just sketching it out. Then add 1/8-1/4" (on your sketch with a dotted line) to the pieces that lay underneath the pieces on top (so you don't have any unwanted dead space, but you will be able to trace out your pattern next). Then you can go through and trace out each little pattern pieces onto printer paper. And wala you have your own pattern.

Since I don't want you to miss out if you want to do something like this and feel like you lack the artistic ability necessary, I came up with my own design using the instructions above. I am sharing the pattern with you and tomorrow you can come over to my blog and see the finished project and share yours if you decided to make one as well.
"What Child is This?" Mini Quilt Pattern and Placement Guide
What Child is This Placement Guide & Pattern Pieces (print to be 8.5" x 11" size)
You will need:
Pattern pieces
Scraps of 6 different colors (plan appropriately and make sure there's enough)
(1) blue background fabric 8" x 6 3/4"
(2) 3 3/4" x 6 3/4" for top and bottom border
(2) 3 3/4" X 13 1/2" for side borders
(2) 2 1/4" x width of fabric for binding (piece together to have one long strip)
(1) 12 1/2" x 13.5" piece of quilt batting
*When sewing use 1/4" seam allowance.
"What Child is This?" Mini Quilt Pattern Pieces
After printing or designing your pattern pieces place then fusible webbing or sew-able heat-n-bond above the pattern (paper side up) making sure you trace all the pattern pieces. After that it's just a matter of cutting out the adhesive pattern pieces and ironing them to your scraps of fabric, cutting them out of the scraps and removing the backing paper.
"What Child is This?" Mini Quilt — Fuse on the webbing
To put it together you can look at your original picture for a placement guide and place it on the blue background. Don't iron until you are absolutely ready. When I did it, I just did a little at a time (starting at the bottom and making my way up) because I wanted to be able to adjust if it shifted. Once it's all ironed you can stitch around the edge of the applique with a small zigzag stitch in a clear or neutral thread so that the design will stay.
"What Child is This?" Mini Quilt Top
After that it's a matter of adding the border (top and bottom first then sides) and putting it all together like a mini quilt. There's a little extra length on the side pieces (1/4") that you can trim down and square off when you are done. All that will be left is to quilt (what design/method you choose) and bind. If you don't know how to do binding you could read this tutorial on binding.
"What Child is This?" Mini Quilt 3
Thanks so much for letting me share my love for the Lord this Christmas season.

With Love,
Al


~~~
Be sure to check out the other posts as we Sew a Song of Christmas!

30 September 2013

PR&P Week #4: Simple and Special

It's the last week of this season's Project Run & Play.  Boo has certainly loved week one's Belle Dress and week two's Easy Starburst Dress.  I was teaching Boo's preschool during week three, so even though I already had a project done (I didn't make it for PR&P, but it fit the theme), I couldn't manage to get it posted!  Life was crazy that week.  I'm hoping to post that project later.

This week's theme is Your Signature Look.  At first I thought, "I don't have a signature look.  I just do whatever I feel like at the time."  

But I don't sew shirts.  

I don't sew pants.

I rarely sew skirts.

I mostly sew dresses.

It's not like I'm necessarily opposed to sewing shirts or pants, they're just never what I feel like doing.  Because they're less special.  If I'm going to take the time to make clothes, they're going to be something a little fancy, and a little special.  Which works, because Boo loves fancy.  She wears dresses/skirts almost every single day.  I like dresses better than skirts because a dress is a complete outfit.  Simple and done.

I also like the designs to be fairly simple.  This may change as I sew clothes more, but for children's clothes, at least, I don't really want to be fussing with little details.  Cute, but simply executed details, simple to put on/take off (especially for wiggly babies!)--that's what I like to make for my girls.

So here is my Signature Look:

Simple and Special
Easter Dresses

Jill Made It | Easter Dresses for My Two Little Girls

I never did get around to posting my little girl's Easter dresses, and since they fit exactly into this week's theme, I thought today was a great day to show them off.

Jill Made It | Easter Dress for My Baby

Daddy's Girl's dress was another variation of a pattern I've used several times before.  I change the pattern every time!  Here are the first two dresses I made from this pattern.  This time, I made the dress fully lined, instead of using bias tape (blue dress) or facings (orange dress).  I lowered the neckline and thinned the straps, like I did for the orange dress.  I used a hook-and-eye closure instead of the zipper, which was a new alteration.  

I also added a contrast band around the bottom.  That was a really fast and easy alteration, and it made so I didn't even have to hem the dress!  I'll have to do a quick tutorial another day, so you can see how that worked.

Jill Made It | Baby Portrait

Aww, isn't she so pretty?  I love yellow on her.

Jill Made It | Beautiful Little Girl's Dress

Boo's dress is the same style, with a sash that ties in the back, hook-and-eye closure, and contrast band. This dress, I actually spent a lot of time on, and did a lot of work by hand.  (For Daddy's Girl's dress, which I did second and whipped out in one late night of sewing, I figured out how to do it without the handwork.  Good thing, too, because it was the night before Easter!)  

Jill Made It | Easter Dress

Easter morning, I gave Boo her new dress I'd spent so much time on...and she wanted to wear a different dress to church!  (Cry!)  But when I showed her she would be matching her baby sister, she became excited about this dress.  I'm doubly glad I got Daddy's Girl's dress done in time.

Jill Made It | Easter Portraits

After church, we went to the park to take family Easter pictures.  Boo actually didn't like being up in the tree, even though her Aunt Kelli was right there, making sure she stayed safe.  (I actually photoshopped her out of this picture--she was really right by Boo.)  But Boo was a good sport anyway, and let me get a few good pictures of her in the tree.

Jill Made It | Easter Dress

So here's the back of the dress.  The contrast band was actually a necessity, not just a design choice.  I'd bought the two fabrics for this dress one or two years before, intending to make Boo a dress for Christmas, but then the holidays rolled by without the dress being made.  This year, I realized I had to get the dress made NOW or Boo would be too big for the amount of fabric I'd bought.  I had to add the contrast band to the bottom of the skirt to make it long enough, even now.

Jill Made It | Baby Portrait

So that's it; that's my signature look.  Simple to sew, simple to wear, but also special.


And they make my little girls happy.  That's really what matters.

04 September 2013

Birthday Bash, Cake Smash, Pool Splash

Birthday Cupcake:  One Year Old

Daddy's Girl is one year old!  She actually had her birthday a while ago, but I decided to wait to post about it after Summer Swimming was over.  So now it's finally time!


Boo and Mr. MadeIt both helped me make Daddy's Girl a birthday banner.  Boo loves to help me with my projects.  Even though she makes things go slower, I love that she likes to do these crafty projects with me.

One Year Old Birthday Party:  I Love the Swimming Pool!

 We had Daddy's Girl's birthday party at the swimming pool, because she LOVES to play in the water.

One Year Old Birthday Party:  Unenthusiastic Cake Smash

We had the traditional cake smash.  (In case you're wondering what's up with the pattern-less spots on the birthday banner, they're where I blanked out her name, since we don't do real names on this blog.  Well, my name really is Jill...or is it? ;)
  
One Year Old Birthday Party:  Unenthusiastic Cake Smash 2

Daddy's Girl didn't like the cupcake.  But she's adorable anyway.

One Year Old Birthday:  Love the Cake Smash!

Turns out, she just didn't like the frosting--She DID like the cake!  Once I flipped her cupcake over and showed her the cake part, she loved it.

One Year Old Birthday Party:  Cupcakes from Scratch

And we all got cupcakes, too, of course.  I used the recipes HERE and made yellow and chocolate cupcakes from scratch.  The yellow cupcakes turned out yummy, but the chocolate were a little dry.  I'll have to tweak the recipe and try it again.  (Here's the pin, if you'd like.)

One Year Old Birthday Party:  So Much Fun in the Swimming Pool

Some of my family got to come, so that was nice.  Doesn't Daddy's Girl just look like she's having the time of her life?  Swimming pool, grandparents, and a ball--what more could a baby ask for?

One Year Old Birthday Party:  So Much Fun in the Swimming Pool 2

Boo had lots of fun swimming around, too.  Note to self, though:  Be sure to take more pictures of the not-birthday child.  I only got a few pictures of Boo!  Sadness...

One Year Old Birthday Party:  So Much Fun in the Swimming Pool 3

I love Daddy's Girl's face in this picture!  "Come back here, Ball!  I'll use my Jedi Mind Powers on you!"

It was a great party.

28 August 2013

So We Drove Across the Country With Two Children Under the Age of Four...

We might be crazy.  Mr. MadeIt and I drove across the country with two children under four years old...And Daddy's Girl (at least half the time) hates her carseat.  Which is really funny, because she used to sleep best when in her carseat...hmm.

But it was family reunion time, and we were determined to go!  The three married couples from the hubby's siblings all had babies last year (Daddy's Girl is the youngest by three weeks), and the other three cousins are within three years of each other, so I really really really want the cousins to get to know each other and be friends.  My own cousins are pretty widely spaced in age and geographic distance, and I don't think I even know all their names!  I don't want this to happen with my little ones.

So we nervously set off for my in-laws' home with a "Magic Bag" full of things my parents surprised us with to keep little ones entertained during the long (long, long, long) car ride.  (I'm so glad some family lives close!)  We drove through the night to have as little children-awake-and-wanting-out time as possible.  By two in the morning, whenever I'd see another car on the road, I would think, "What's the matter with you, you lunatics!  Go to bed!  ...Oh, wait..."  

The plan worked.  We made excellent time and the girls did really surprisingly well.  The next leg of the journey was easier, as we carpooled with Grammie and Pa (that's what the grandkids call Mr. MadeIt's parents) the rest of the way.

And it was worth it.

Daddy's Girl Playing at the Beach

One day, we all went to the beach.  We all had so much fun, but the cousins enjoyed themselves the most.  This was Daddy's Girl's first time at a beach.  (It's been super rainy here, remember?  No lake-going for us.)  Her slightly older cousin taught her about eating sand, unfortunately...Oh, well.  It's extra minerals, right?  Gotta have your minerals...  Needless to say, Daddy's Girl loved every bit of playing in the sand.  She was "helping" with the sand castle, digging in the sand, eating the sand...

Boo Has Fun at the Beach

Boo had a great time, too.  She LOVES playing with her cousins.  And just look at those cute sandy legs--she had a great time making the sand castle, too.

Child playing in the sand at the beach

Here's the cousin who's closest to Boo's age; she's almost exactly one year older.  We stayed at their house for a week, and I almost didn't see Boo during that time!  These two were playing pretend 24/7--Princesses, Incredibles, Mommies and Daddies, all the time!  I love that Boo got to have this time with her cousin.

SweetCheeks Playing in the water at the beach

This is "SweetCheeks."  She's the next cousin, and is, oh, probably 18 months younger than Boo.  She is such a sweetheart.  With her own baby sister almost exactly Daddy's Girl's age, I might have thought she'd be tired of the babies, but no--she loved playing with Daddy's Girl.  It was so cute.

Have fun in the sand at the beach

Out of six cousins on this side of the family, this little man is the only boy.  Maybe more will join him later, but for now, he's pretty outnumbered!


Cousins making sandcastles at the beach

This is "Tootsie."  Yep, she's the one who taught Daddy's Girl to eat sand.  I'm sure these two will be getting into all kinds of mischief together when they get older.

That's enough with the talking.  Let's get some more pictures of these little ones having fun!


Swimming in the water at the beach


Cousins swimming in the water at the beach


My baby playing in the water at the beach

Okay, maybe just a little more talking.  Daddy's Girl took a couple of steps by herself while playing at the lake!  I can't believe she's not still my little tiny preemie "just borned" (as Boo would say) baby.  Why do they have to grow so quickly?


She had so much fun playing at the beach

Thanks to my brother-in-law for taking these pictures!  Mr. MadeIt and I chose not to risk our nice camera around all this sand and water, but I'm glad we didn't have to do without pictures of our little ones having so much fun!

Did you get to visit cousins this summer?

09 August 2013

Beach Robe from a Beach Towel Tutorial

Daddy's Girl's Beach Robe from a Beach Towel

Boo had a cute little terrycloth beach cover-up that we loved.  It was so convenient to just put the cover-up on her and not have to worry about carting around another towel.  My goodness, with two kids, there sure is a lot of pool stuff to cart around!  But Boo did what kids are so good at doing and she outgrew her cover-up.  So I decided to make her a new, robe-style terrycloth cover-up.  One beach towel was even enough fabric to make matching robes for both my girls!

Want to make one?  It's not as quick and easy as my sarong-style cover-up, but it's still a fairly quick and easy project.

You need:
a beach towel
bias tape (bought or homemade)
a dress to draw your pattern from
general sewing supplies

Use the dress to draft your pattern for the robe.

Use the dress to draft the front piece of your pattern like in the picture.  Curve the neckline down so it meets the side seam at the waist.  I chose to curve the lower edge, but you could have it go straight down or follow the line of the dress; whatever you'd like.

For sleeves, go out straight from the shoulder.  Connect the underarm with a curved line--this will make the robe lay nicer when it's sewn together.  Make the sleeve roomy.

Add 1/2" seam allowance just to the shoulder seam and side seam.  We'll be binding the other edges, so no seam allowance is needed.

You will need to cut out two front pieces.

Beach Robe Tutorial:  Pattern Pieces

For the back, trace the pattern you just made.  Raise the neckline, and cut the pattern down the center back.  You'll cut out one back piece on the fold.


So here are my pieces all cut out.


Go ahead and zig-zag over the shoulder and side seam edges.  Usually you'd do this after sewing, but my towel frayed pretty badly, and I thought it was easier to zig-zag first.  If you have a serger--lucky!


Sew the side seams.  You'll probably have to clip the seam to get it to lay nicely.


This next step is optional.  After sewing the side seams, I went back and sewed down the seam allowance.  I did this to make the seam stronger by making the highly fray-prone towel less likely to fray.  Not totally necessary, but I want these beach robes to last (and last and last).  It also helped the seams to lay nicely.

Sew and, if desired, reinforce the shoulder seams.

The robe is coming together!  Just a couple of finishing touches, and you'll be ready to take your munchkin to the pool.  :D

Beach Robe Tutorial:  Bound Edges

The rest of the edges get bound.  I learned to quilt before I learned to sew clothes, so I bind everything like I bind a quilt.  I wrote a whole tutorial about making and using bias tape (in the quilting method) so just click on over if you'd like a little help with that.  (Just remember, since you have curved edges, you really do need to cut the fabric on the bias.  I explain that in the tutorial, but I also say I usually don't bother actually cutting in on the bias, since quilt sides are usually straight.  So just remember.)
If you'd rather bind the edges the clothes-sewing way, here's a great tutorial (not by me) for that.

Beach Robe Tutorial:  The Tie

The last step is to make the tie.  Just cut out a rectangle from the towel however long and wide you want it.  You could curve the corners if you want, or leave them.  Then bind the edges like you did for the rest of the robe.

Jill Made It Clothing Tag

I added a little tag.  One day, I may have them professionally done, but in the mean time, I like my little hand-stamped and written tags.


Beach Robe Tutorial:  Finished Beach Robe

Thanks for reading!  If you like what you've seen, please pin and share!