Showing posts with label make your own. Show all posts

04 December 2013

"O, Christmas Tree" Glitter Ball Ornaments

O, Christmas Tree Glitter Ornament Tutorial

Merry Christmas, everybody!  Since Thanksgiving is over and it's "legal" to get into the Christmas spirit, I helped Jill and her family put up their Christmas decorations on Saturday.  I've given Jill a Christmas tree ornament (or sometimes a set) every year since she got married.  Last year, I made her a glitter ball ornament.  Boo obviously liked it, because later Saturday, she informed me that she was going to use my glitter and ball ornaments to make an ornament for her baby sister.  After getting her to ask me, rather than tell me, I agreed to help her and let her use my stuff. 

When I made these the first time, I got the inspiration from the blog The Greenbean's Crafterole.  You can find the post here.

This tutorial said to use Pledge furniture polish, but I just couldn't bring myself to buy a big bottle of something I would only use once.  I used homemade Mod Podge (aka, watered down Elmer's glue) instead.  A year later, the glue's still holding.  I don't remember what ratio of water to glue I used—just mix in water until it looks good.  (Don't you love instructions like that?)  Just remember that it needs to make a nice, thin, non-gloppy film.


Materials for Glitter Ball Ornaments

What you need:
-Clear glass ball (or other shape) ornaments
-Adhesive of choice.  I used watered down Elmer's glue.
-Glitter
-A funnel.  I made my own with a sheet of paper.


Boo Helps to Make the Ornament
(Isn't my niece cute?  She was cold, so she grabbed the nearest coat—mine.)

Pour glue into the ball.  Use more that you think you'll need.  You'll pour the extra out anyway. Carefully swirl it all around.  As the original blogger said, shaking the ball would made froth, which is bad.  Hence the careful swirling.  Now, dump out the extra.  Make sure it drains well, but don't leave it so long that it dries.  Last year, I had to rinse out my glitter and start a ball over again because too much glue puddled on the bottom of the ball and didn't let the glitter coat the ornament evenly.


Glitter Ornament

Dump in the glitter.  Use the funnel, if needed.  Again, don't be afraid to use more than you think you'll need.  You will dump out the extra.  Just make sure you don't have big glue puddles in the ornament.  This time, you can shake the ball to get it covered.  Let it dry before you pour the extra glitter back into the bottles. You wouldn't want to get wet glue in your unused glitter.


Glitter Ornaments

And that's it!  After they're dry and free of extra glitter, put the tops back on and hang your beautiful, glittery ornaments on your tree.


Glitter Christmas Tree Ornaments on the Tree

Be sure to check out the other posts in our Sew a Song of Christmas series!

And check back on Friday for the next bit of musical Christmas fun!

31 August 2013

Fast, Easy, and Elegant Ombre Earrings Tutorial {Plus How to Make Hammered Headpins}

Fast, Easy, and Elegant Ombre Earrings Tutorial

I hope you've had fun with our Summer Swimming series; we have!  From making and using sea glass, to sewing cute and practical cover-ups for yourself and your little ones, to visiting family, we've had a lot of wet and wonderful fun this month.

For the last installment for our Summer Swimming, I made these quick and easy ombre earrings.  I like how the beads transition from white to dark blue, like the waves of the sea.  But at the same time, it's not so water-themed that you feel you can only wear them at the beach.  And I like long, dangly earrings.  Not that I feel safe wearing them quite yet--Daddy's girl is still likely to pull on them when I least expect it.  

These earrings are really easy to make, but if you're an absolute beginner, check out my Holiday Earrings Tutorial.  It goes over some basics I'll skip over here.

Ready for the tutorial?

Fast, Easy, and Elegant Ombre Earrings Tutorial--Supplies Needed

You Need:
Two pairs of pliers (one being round nosed)
Jewelry hammer and anvil (optional)
Two ear wires
Two jump rings
Four small white beads
Two medium white beads
Two medium light blue beads
Two large light blue beads
Four large dark blue beads
a length of 20 gauge wire a half inch longer than your finished length (or two headpins)

Note:  This anvil has a bit of metal on it to protect it from scratches, so the scratches won't be transferred to another project .  They don't come like that.

How to Make a Hammered Headpin

How to Make a Hammered Headpin:

This is so easy.  Just take your length of wire and hammer the end of it until it flattens wide enough that your beads won't fall off the end.  Easy and done.

{If you don't have a jewelry hammer and anvil, you can still make your own headpins.  Just use the method I did to make my Holiday Earrings.}

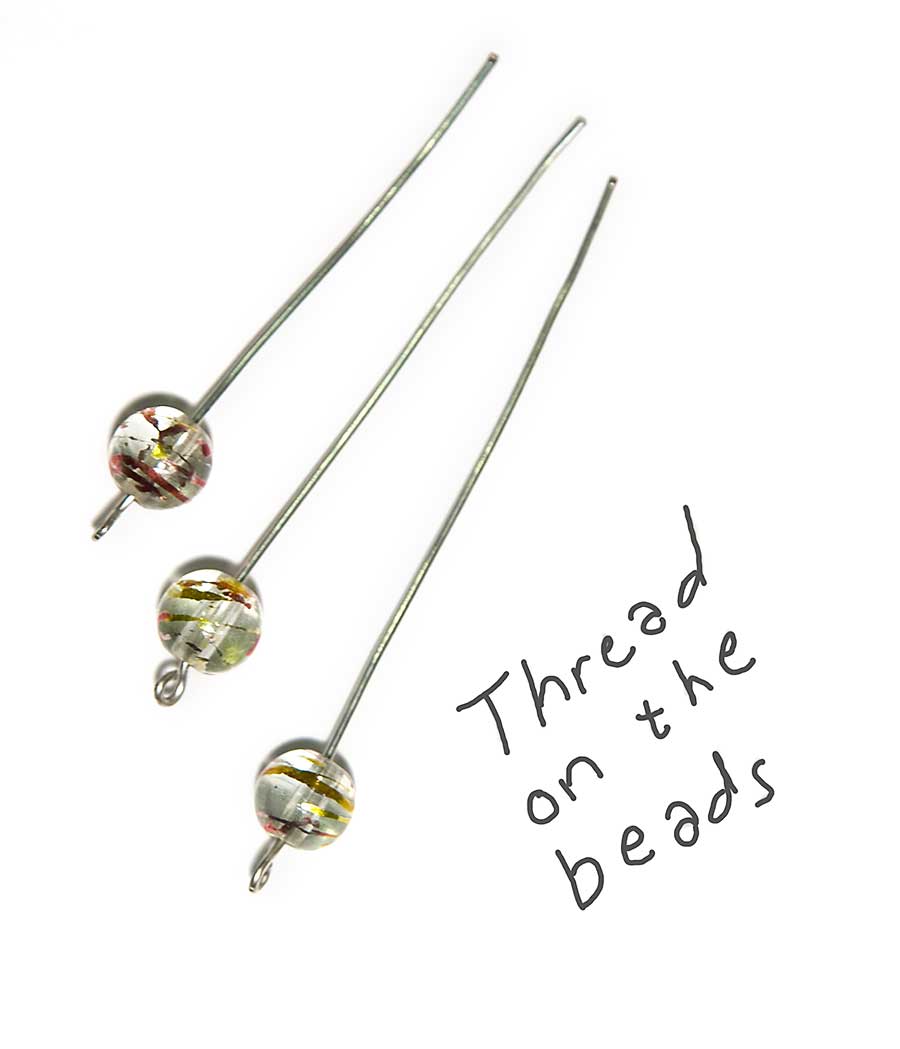
Fast, Easy, and Elegant Ombre Earrings Tutorial--Thread the Beads

Then just thread your beads on your brand-new headpin...

Fast, Easy, and Elegant Ombre Earrings Tutorial--Make a Loop

...make a loop at the top, cutting off any extra wire, and attach the jump ring and ear wire.  And you're done!

Fast, Easy, and Elegant Ombre Earrings Tutorial--Finished!

If you missed any of our Summer Swimming fun, just click on the images below to check them out.  I'm hoping to make this series a yearly event, only next year it will be Summer Swimming and Sun.  :D  What kinds of things would you like to see in next year's series?

07 August 2013

Super Easy Sarong Style Beach Cover-Up Tutorial

A couple of years ago, I made myself an easy swimsuit cover-up out of a beach towel, but I couldn't find it this summer!  I'm sure it will show up once the weather starts getting cold again...Isn't that the way it always goes?  Ah, well.  I guess I have an excuse to make myself a new cover-up!


(Yes, this was before my haircut.  My hair didn't grow out already!)

The cover-up I made last time was easy, but this one was super easy.  Beginning sewers need not fear!  


And then, when I was writing up this post, I came up with an even easier method!  The way I made this cover-up didn't take very long, but this new way would take almost no time at all!

Ready?  It might take you longer to read this tutorial than it will to make the cover-up.  And all you need is two yards of a pretty knit fabric and some coordinating heavyweight ribbon, such as grosgrain, in whatever width you prefer.

Step 1:
Decide how long you want your cover-up to be.  Cut your fabric so it is two yards x that length.  Knit doesn't fray, so you don't have to hem it or anything!  (I used quilter's cotton, so I did hem mine.  So it still didn't take long, but I'm excited about this no-hem option!)  Depending on how long you want your cover-up, you may even be able to get two cover-ups from one length of fabric.  Or a maxi-length skirt would be...ooo, that would look really nice.  I think I'll do that next time.  :)

Step 2:
Wrap the ribbon around your waist and tie it.  Now that you know how much ribbon you need, cut it to size.  Go ahead and finish the ends however you want to.  (Some ideas:  cut at a diagonal to minimize fraying, use a lighter to melt the edges of synthetic ribbon, or coat the edges with clear nail polish.)


Center the tie on the top edge of the sarong, and stitch it on like in the picture, leaving enough of the tie free on both sides so that you can, you know, tie it on.  (I made a tie out of more quilter's cotton.  Ribbon will be much cuter.)


Now you're done!  Head over to the pool, and enjoy taking random artsy photos of the brickwork.  (What?  That's just me?  Oh...)


Ah, there we go.  Enjoy your finished sarong.  That makes more sense.  Sillyness aside, I really like how the fabric cascades down where the cover-up ties closed.  And wouldn't it look even better in a beautiful knit?  Totally doing it that way next time.


But I do love the random artsy shots.


So, what are you doing this summer?  Beach?  Swimming pool?  Family vacation?  It's been ridiculously rainy here, but hopefully we'll be able to go to the lake sometime soon.

26 June 2013

Easy, Durable, Take-With-You-When-You-Move Growth Chart

I found this guest post I'd written, oh, probably almost two years ago.  The blog I guest posted on doesn't seem to exist anymore, so I guess I'd better repost my tutorial here!  Well, without further ado, here's my Easy, Durable, Take-With-You-When-You-Move Growth Chart.

. . .

Hi, everyone!  I'm Jill from Jill Made It, and I am really excited to be here today!  I love creating things, designing new things, and generally making my little world a prettier place.  I also love teaching people the things I learn, hence writing tutorials!


When my siblings and I were growing up, my mom kept track of our heights on growth charts.  Unfortunately, the early ones were made of paper and didn't survive.  Next, she marked our heights on a door...and then we moved.  Now that I'm a mommy, I want to keep a record of my munchkin's height, too, but in way that will withstand life in general.  So I came up with the Growth Stick.


(Yes, it's intended to be hung on the wall, but I couldn't get any good pictures outside.)

It is so easy and cheap, yet it will last right near forever.  Love that kind of project.

All you need to make it are:
 a 2x4x6 length of wood
sandpaper
some semi-gloss paint (mine was leftover from refinishing a dresser, which made this project even cheaper!)
two sharpies or other permanent markers (one fat, one medium or thin) 
a paintbrush (a large foam one)
a yardstick
and picture hanging hardware of your choice

First, sand down your board.


(Don't be like me and fail to realize your board needs sanding until after the first coat of paint.)

Paint all sides except the back.  (It'll never be seen anyway.)

Now take your smaller sharpie and mark the center of your board (longways--you know, like a hotdog).  You'll want to mark it near the top (but not at the very top--you'll see in a minute), then at the bottom and middle. These are just little marks to make sure you get your line straight.  (Sorry I forgot to take a picture of this.)

Next, use your yardstick and fat sharpie to connect these marks into one nice, straight line.


Use the space you saved at the top for your title.  I tried to come up with something cute, but decided to go with simple instead.


The next step is to mark your measurements.   First, determine how high on the wall you want to mount the growth chart.  I think we picked 7 inches off the floor.


This is the main reason for the skinny sharpie.

Make any touch-ups.

Mount your hardware, then hang your brand-new, super-durable, highly transportable growth chart.

Now all that's left is to mark everyone's heights!

10 June 2013

DIY Burp Cloths

Ready for a non-clothing project?  Just to make sure this blog isn't completely taken over by clothes-sewing.  :)  I made these for a baby shower a couple of months ago and hadn't gotten around to posting them yet.


Since Daddy's Girl was born, I've had less time for projects, as you can imagine!  So even though I like making tutorials for all of you, the choice has been between making a tutorial and actually finishing a project.  Obviously tutorials lost.  This project is super-simple, though, so here's a mini-tutorial.

Start off with a couple of plain cloth diapers.  (I got mine from Walmart, in the baby section.)  Get the pre-folded kind, though, unlike me, since they wrinkle less and are a good burp cloth shape to start with.  Decorate with some scraps of cute fabric, and you're done!


I just zig-zag appliquéd these cute little elephants onto the burp cloths, like in this tutorial, only simpler, since it's just a rectangle!  For a more finished look, I also bound the two short ends of the cloths with some non-bias cut 'bias tape' made from a different part of the same fabric scrap as the elephants.

If you need a little help with binding or zig-zag appliqué, click below.  


Now, since you're binding only two edges, rather than all four, it will be a tiny bit different than in the quilt binding tutorial--just cut the bias tape an inch longer than the length of the side you're binding, fold the two short sides 1/2" in so it ends up the same length, and then proceed as normal.

07 December 2011

Merry Christmas Ornaments


Remember my early Christmas present?  Well, here it is--my first finished made-with-my-new-Silhouette project.  (Thanks again, hubby!)

Custom Christmas Ornaments!

This was such an easy project, and I love how it turned out!  In Photoshop, I made an 8 1/2" x 11" design filled with the words "Merry Christmas 2011" plus lots of snowflakes.  (Any image-editing program would work.)  Then I saved it as a jpg.


Then I opened the file in the Silhouette software...


Selected the Trace option, highlighted the entire design, and clicked "Trace" (which I forgot to circle, but you can find it)...


Then I saved this to my SD card, took it to my Silhouette machine, loaded my vinyl, and let the machine do its thing.

It took maybe fifteen minutes to cut out all those shapes!  (I didn't watch the clock, but it was going for a long time.)

Then all I had to do was peel the letters (and numbers, and snowflakes)  off their backing, and stick them on the ornaments I'd bought at the grocery store.  

I've already given one to my in-laws, one's on my Christmas tree, I have one for this ornament exchange I'm going to in a couple weeks--talk about an easy homemade Christmas present!

PS  You can buy vinyl from Silhouette's store, but I just got mine from Lowe's--just ask for the contact paper.  I haven't used Silhouette's vinyl; maybe it's nicer, but this vinyl I got worked well and cost almost nothing.

Happy Crafting!

09 November 2011

Red Envelope Inspired Beaded Bracelet Tutorial (Plus Matching Necklace and Earrings!)

Okay, so I didn't restrain myself from starting my project until Craft Night.  But I realized that I wouldn't be able to finish this all in one night, and I wanted to share it with you today!

The other day, I found this bracelet (from redenvelope.com) on Pinterest:


Isn't is so pretty?  But what wasn't pretty was the price tag--$79.95.

So I made my own (in a different color scheme--I loved the rich creams and golds).  And mine only cost $10.01.  (Plus the headpins, which I already had.)


(Like the heart-shaped clasp?  I think it adds a little cuteness while still being subtle.  And it references the heart in the inspiration bracelet.)

Granted, theirs in made of semi-precious stones, silver beads, and freshwater pearls, whereas mine is made of glass beads.  But I love mine.  It's a lot more bracelet than I usually wear, but this time of year just makes me want to sparkle and shine a little.  (And the Christmas lights aren't even up yet!  I think I'm in trouble!)

I actually got too far ahead on my bracelet before Craft Night; I finished it long before my sister was ready to leave (or me, either, for that matter).  What to do...

I know, I'll make a matching necklace.

So I did.


I took more of the chain I'd used to make the bracelet, added another heart-shaped clasp onto one end, and beaded up the other.

Well, that necklace didn't take nearly as long as the bracelet had, and I got it done, too, before the night was over.  

Hmm...I don't have any pearl earrings, yet.

So I made a pair of those, too.

(Okay, the earrings look kinda' funny hanging on the necklace chain...Oh, well.)

The earrings were done in the same method as these earrings, but with much shorter wires.  I used a small, medium, and large bead for each earring, and had the wires for the small and large beads the same length, with the other just a little longer.

And then it was time to go home.  But now I've got a complete set of matching pearl jewelry!

Okay, so now for the Pearl Bracelet tutorial.  Ready?  It's time consuming, but really easy.

You need:
A plain chain bracelet  {OR a length of metal chain (from the jewelry section, still) and a clasp.  This is far and away the cheaper way to do it.  I got enough chain for my bracelet and necklace with lots still left over for $3.  One chain bracelet was going to cost me $7 or so.}
lots of headpins {OR you could make your own, like I did for my Holiday Earrings, but you'd need so many for this project that I think it's more worthwhile to just buy them.  I don't remember how much they cost, but it wasn't too much.}
a lot of beads of your choice  
Round-nosed pliers
Wire cutters
Second pair of pliers {optional, but very helpful}


Plan out where you want your beads.  I started with a pattern at first, but by the end, I was just filling in beads wherever they were needed.  So this picture shows where I put my first round of beads--the pearls.

Thread a bead on to your first headpin.  Use your round-nosed pliers to make a loop in the headpin above the bead (as above), then thread the wire on to your chosen link of the bracelet.


Next, wrap the wire around itself just above the bead.  Cut off the extra.  Bend the loop so it comes out straight from the bead.

{You could also attach the beads like in my Holiday Earrings tutorial, it you like that better.  I like that the loop can't accidentally be pulled open with this method.)

Continue until your bracelet is as full as you want it.  

Wasn't that easy?  A few supplies, a simple technique, and a few hours and you can have an $80 bracelet for $12 (to include the headpins in the total).  

Happy crafting!

P.S.  Tomorrow is a special day for my blog.  Check back to see why...  :)


02 November 2011

Holiday Earrings Tutorial

Whew!  I liked doing my Grand Month of Halloween, with all those fun projects and extra posts, but I'm glad to get back to my regular two posts a week.  Four posts each week is hard!  (I didn't even always manage that.)  Hats off to you bloggers who always do that (and more).

Let's start off November with these fun earrings I made the other day!  I realized that Boo is long past the pulling-on-everything stage, so it is safe to wear earrings again.  I really love dangly earrings, but I didn't have any yet, so I made up this pair while watching TV with my hubby one evening.


They will be great to wear all the time, but they make me think of fancy Christmas parties.  I'm just imagining theses earrings with a pretty, red, fancy dress...

And they are really easy to make.  Just gather your materials, put on your favorite TV show, and you'll have new earrings before the credits roll.


(The above picture shows the materials for each earring--you'll need twice this so you can make a pair.  But not twice the pliers; that would be silly.)

You Need:
a pair of ear wires
some 20 gauge jewelry wire
2 large jump rings
6 largish glass beads
round-nosed pliers
wire cutters
needle-nosed pliers (or a second pair of any kind of pliers)  These aren't absolutely necessary, but it does make working with such small things easier to have pliers for each hand.

(Note to self:  Use a pen instead of a pencil the next time I need to take pictures of writing.)

First, cut your wire.  Determine how long you want the finished earrings to be, then add a little for making loops at the top and bottom.  This is Wire 1.

Wire 2 will be one bead-length shorter than Wire 1.

Wire 3 will be one bead-length shorter than Wire 2.


Next, make a tiny loop at the bottom of each wire.  (This is just to keep the bead on.)  Bend the wire so the loop comes out straight from the wire.


Thread the beads onto the wires.

Make larger loops on the tops of each wire.  (I forgot to take a picture of this, but you know what I mean, anyways.)


If the loops are not lined up the way you want them to be, just twist them into place.


Connect the ear wire and beaded wires with the jump ring.

Repeat for the second earring, and you're done!  

See how easy that was?  I was so excited these earrings turned out so well and so easily, that I made several more pairs of earrings over the next few days.


First these pretty little things.


And then these fun little feet earrings.  I was actually trying (unsuccessfully) to do something else, when I realized it was starting to look like a foot.


And, of course, the earrings for my vampire costume!  But I love that they will work for non-Halloween occasions, too.

What kind of earrings do you like best?  Dangly, stud, or hoop?