Showing posts with label photography. Show all posts

11 October 2013

Senior Pictures

When I first started taking pictures as a serious hobby, my goal, what I thought was the pinnacle of professionalism, was to have the pictures look like they were taken in a studio.  Like at the mall.  Or for school yearbook pictures.  (Bleh!)

My style has evolved a bit since then.

Now, I love the lifestyle photography look.  Natural light, naturally posed people, friends and family having fun--that's what I like!  

While we were on our family reunion trip, I had the opportunity to practice this style of photography in a way I've never done before:  senior pictures for my beautiful sister-in-law.  We had so much fun--I got a lot of pictures of her laughing!  My MIL and other SILs came along to help with the shoot and join the fun, and we had a great time together.  I love spending time with my family. 

Want to see the pictures we got?  I probably took about five million (give or take), and here are a few of my favorites.


 My SIL loves Mini Coopers, so we borrowed one from a friend for a few shots.

Senior Pictures in a Mini Cooper 1

See?  So happy to be in a Mini Cooper.

Senior Pictures in a Mini Cooper 2

I had fun editing this picture.  Any guesses what year she'll graduate?  :)

More Senior Pictures

I love her eyes in this picture.  Wow.

Next, we took more pictures at the cabin where we had our family reunion.

Senior Pictures Close-Up

I had my telephoto lens on my camera from taking pictures at Mr. MadeIt's graduation (I'm so proud of him!), and my portrait lens was in the room with my sleeping baby.  Telephoto lens it was, then.  I actually love the super-close-up shots I got.


Senior Pictures with HatSenior Pictures with Umbrella 1


Senior Pictures with Umbrella 2

It was starting to rain, so we needed to grab an umbrella from another SIL's car--I'm so glad it was a super-cute one!  I love when necessity makes for good design.  :)


The last place we went was The Gardens at BYU-I.  Beautiful place.  I wish I could take pictures there every day...


Golden Hour Senior Pictures 1

We tried to get here at the "golden hour" (There are two each day:  the hour right after sunrise, the hour right before sunset.) which is hard then that's about bedtime for munchkins.  We managed to catch some of it, though.  Isn't the lighting on her hair beautiful?


Golden Hour Senior Pictures 2


Golden Hour Senior Pictures 3

Golden Hour Senior Pictures 4

Thanks for asking me to take your senior pictures, Sis.  I hope you like them!

11 September 2013

Project Run & Play Week 1: If Belle Was a 20's Flapper (aka Drop-Waist with Ruffles)

So, does everybody know about Project Run & Play?  It's the kid version of Project Sewn, which I participated in earlier this year.  (I made a date night high-low skirt, a 50's inspired sundress, an asymmetrical draped knit shirt, and a button and ruffles dress.  You could go and check them out; I'll wait for you.  ;)

The theme for week one of PR&P was to remix the Popover Dress.  (It's a free pattern--HERE.)  This is my interpretation.

Jill Made It:  If Belle Was a 20's Flapper--a Popover Dress Remix

When I showed Boo the mostly-completed dress, she said, "It's a Belle dress but it has sleeves!"  Really, to Boo, any yellow dress is a Belle dress, but I thought it was a Belle dress, too...if Belle was a 20's flapper.  :D

Jill Made It:  My Little Girl Dancing in Her New Dress

The original dress is a simple A-line with a small yolk and tie straps.  While my version of the dress looks significantly different than the original, structurally speaking, it's altered very little.  The straps no longer tie, and I added sleeves.  Besides that is the obvious drop waist and ruffles, but those were just sewn on top of the A-line dress--no structural change.

Jill Made It:  Bare Feet and Ruffles

So it was a really simple alteration.  But I learned something important in the process:  I really don't like making ruffles.

I love the dress.  I think it's adorable.  Boo loves the dress.  But Daddy's Girl will not be getting a matching dress.  Ugh, the ruffles.  So adorable, yet so time consuming.

Jill Made It:  Sunshine and Ruffles

But look at this happy face.  Totally worth it.  And speaking of "worth it," this dress was completely free.  There's the obvious free pattern, plus the blue fabric was leftover from a project I completed ... two years ago? and haven't posted yet.  (Hmm, might should do that...)  And the yellow fabric was leftover from this summer skirt I posted two years ago.

Jill Made It:  Beautiful Morning Sunshine Backlighting

And as a side note, I've been wanting to get a picture like this (with the sun behind the person's head, lighting up their hair so prettily) for just about forever.  But it's hard to get out to take pictures when the sun is low enough.  So I'm really excited we could take pictures early enough in the morning to get this shot.  And isn't Boo beautiful?  Awww...


20 March 2013

What I Learned About Taking Baby Pictures

Ah, my poor, neglected little blog.  Remember back in this post, I told you that my blogging would be pretty sparse until Daddy's Girl started taking regular in-her-bed naps?  Well, she does now... but those regular naps are only a half hour long.  Any advice on how to help her to sleep longer?  I know she needs it...


Anyway, I took my little munchkin's 7 month pictures a couple of days week or two ago while back (wow it's hard to find time for blogging with two little ones.  And they've both been sick off and on since January.  That isn't helping), and I thought I'd share some things I learned.  


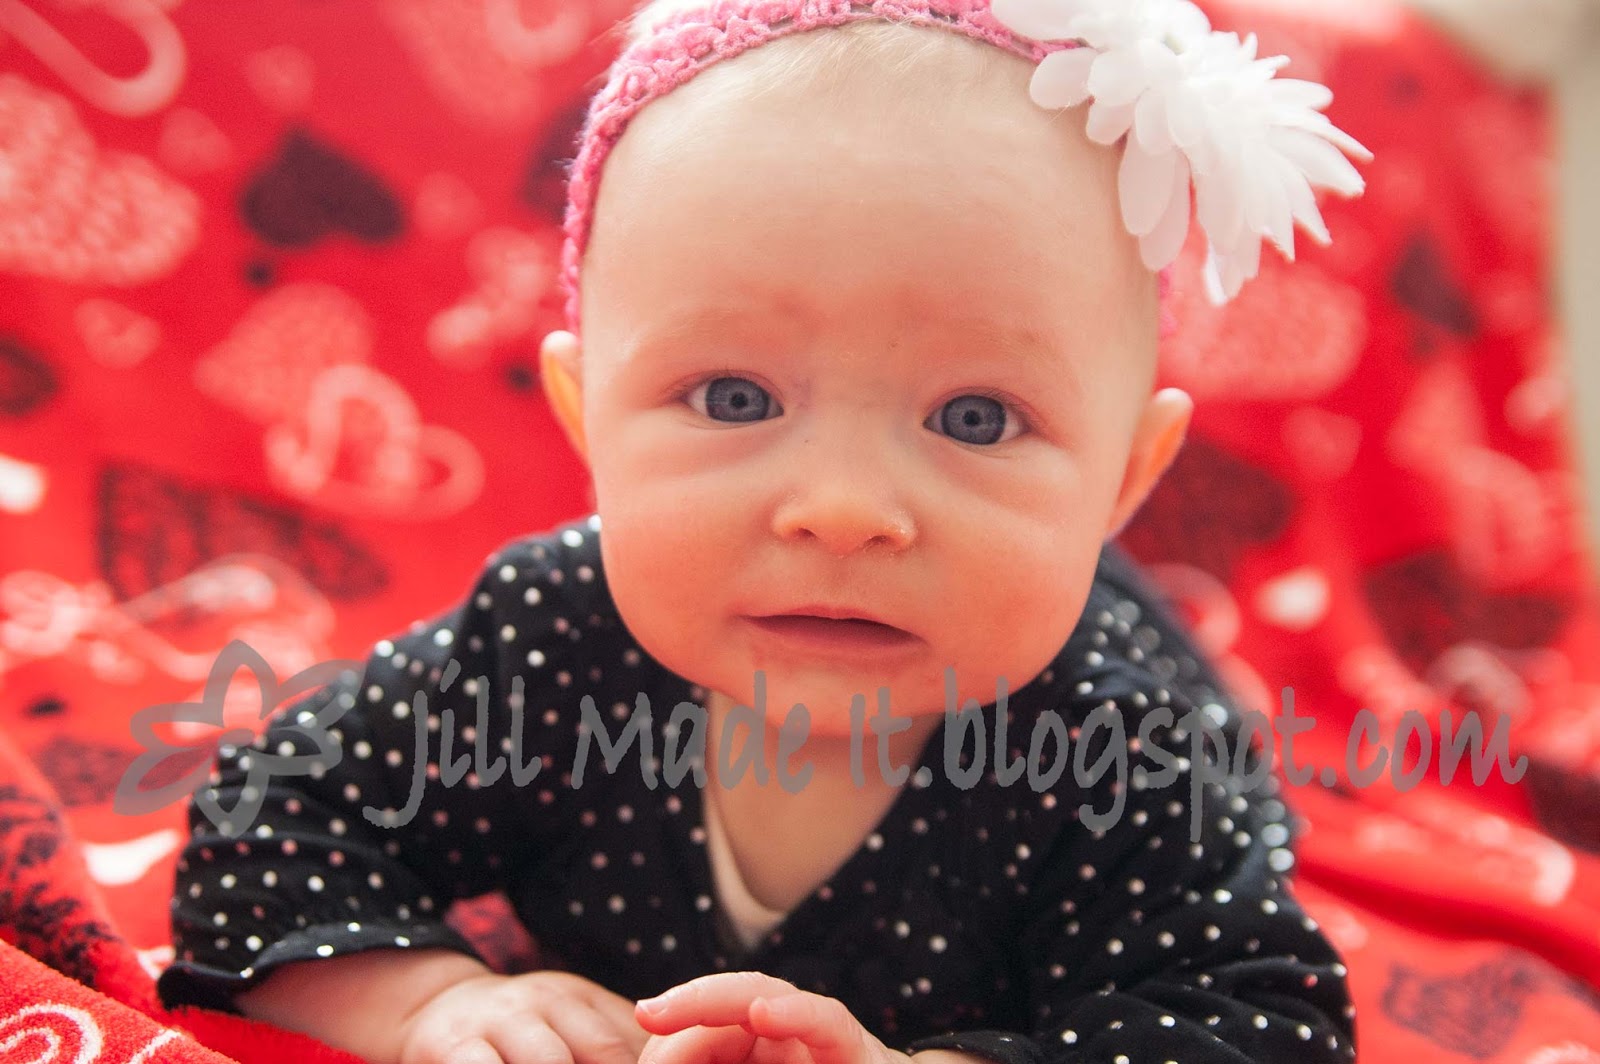
Lesson 1:  Use neutral/soft colors around your baby.  Daddy's Girl turned 7 months in February, so I thought this Valentine's Day blanket would make an excellent background.  Add to that its wonderful fuzziness and the nice contrast with my little girly's outfit, and I was sold.  Until I pulled the pictures onto my computer and saw the red color cast the blanket was bouncing back on my darling's face.


Also, the bright red was distracting from the soft beauty that my baby (and all babies) naturally has.  Nope--the red has to go.


Lesson 2:  You can always process the picture into black and white to fix the funny color casts and otherwise distracting colors.  I found this tip on making your black and white pictures really pop--thank you, Pinterest--and I use it every time.


Lesson 3:  Try to get your baby's personality, not just their likeness.  Part way through this photo shoot, I realized I was not really getting my little one's  personality in her pictures.  So I gave her her pacifier.  Now, Daddy's Girl doesn't really need to suck on her pacifier ("plug," to us) unless she's sleeping, but she sure likes to play with it.  And the ribbon of her plug-catcher is always in her mouth.  So even though you can't see her face in this picture, you see who she is.


Lesson 4:  If possible, have a helper to entertain your baby so you can concentrate on picture-taking.  It's really hard to keep still enough to take crisp pictures while playing with a baby.  


And two more quick tips I like to use for all portraits:

Tip 1:  Soft natural light is the best!  If the light is too harsh (think direct sunlight, camera flash...), you get ugly shadows and blown out lights.  Try going by a large window where the sun is not streaming directly through.  (North-facing windows are great for this.)  Sheer, white curtains can help soften the light if you are getting direct sunlight.

Tip 2:  If your camera has the option, use a wide aperture (small number).  This make for nicely blurred backgrounds, like in the first picture.  I love the look of a nicely blurred background...It also helps your camera be able to use a faster shutter speed, so you have a lower risk of motion blur (from baby or you).

Happy picture-taking!


30 January 2012

One Last Day of Blog Vacation

Do you ever just not want to do anything?  I've been feeling like that for about three weeks.  It's getting better, though--I actually made a couple things with my mom in the past week or so.  You can expect a tutorial on Wednesday, and hopefully regular posting after that.  And in the mean time...


Boo is (in my humble opinion) the cutest little piggy-tail wearing little two year old there ever was!  But I wouldn't be biased or anything.  Maybe a little.  Or a lot.  But just look at those curls!  And those eyelashes!

Ahem.  Back on topic.

I have been working on one project all of my own motivation.  I've been taking/editing family pictures to put up on our wall.  (Our pictures of Boo are sadly outdated.  Why does she have to grow up so fast?  But she's so adorable at every stage, I guess I can't really complain.)  This project isn't quite done yet, but I'm excited to show it to you when it is.

Quick question--do you prefer your family portraits to be in color or black & white?  I usually like color, but there's just something classy about black & white...so I'm undecided...Your thoughts?

09 January 2012

Yearly Family Photo Books with Blurb

It's that time again--time to make our 2011 Family Photo Book.

I don't do scrapbooks.  I like them, and I'm impressed with those who do do scrapbooks, but they're not for me.  My own personal style tends more towards simple--no embellishments, just pictures and some text.  And that's why I use Blurb.

A girl at my church showed me a Blurb photo book she made with her wedding pictures, and it was lovely.  So I tried it myself for my own wedding pictures and loved it.  I thought Blurb was really easy to use, their books are great quality, and the price was not bad, either.  And I've made one photo book each year since.


Here are a few of the Blurb books I've made.  (Notice the nice hardback binding!  These are quality books!)


And here's the back of our 2009 book.  (Aww, look at that little face!)

I think the best thing about making these yearly books is that all the many many pictures we take each year don't end up just forgotten on the computer's hard drive.  Each year, I go through, pick out the best, and they actually get printed.

And they make wonderful wedding presents, too.  Made a couple of those.

FYI
There are five book sizes of photo books to choose from.  I make my books at 7" x 7".
Your books can have as many as 440 pages.  But mine are usually 80.
There are four different binding methods to choose from.  I use Hardcover with ImageWrap, which means the cover art is printed on the book, as opposed to using a dust jacket.

And my 80 page, hardcover, ImageWrap 7" x 7" book costs $35.  Which when I shopped around, was the best price I found for a comparable product.


{This is not a sponsored post.  I just love Blurb and thought you might, too.}

12 December 2011

Cousin Presents Again

So last year, I decided to make these stuffed animal elephants for Boo and all her cousins.  This year, I decided to make them all little slippers!  I made Boo's first, to test the pattern.


Yes, this is the same fabric as I used for the elephants.  I had extra.  :)


I was trying to figure out a  fun way to take pictures of these shoes.  In the tree was fun.  :)

I altered this pattern to make these shoes.  I'll get a tutorial written...but maybe after Christmas.  I have three more of these to make!  (There's another cousin on his way!  He'll be here...in February, I think.)  In the meantime,  I'd like to share this cool photography tip I found on how to take glow-y Christmas tree pictures.


Set the ISO on your camera as high as it will go, which is 3200 on my camera.  I didn't remember the rest of the tip, so I just played with the other settings until I got it right.  For this picture, I used an ISO at 3200, aperture at 2.8 (largest my lens can go), and a shutter speed at 1/13 sec.  (This picture is straight out of the camera, by the way.)  Tripods are helpful, since the shutter speed's pretty slow, but I took this without one. The camera will think the picture is overexposed, but that just means the little twinkly lights will show up better!

05 December 2011

Family Portraits!

Family picture time has rolled around again--gotta' get those Christmas cards done!  Since I *pretend* to be a photographer, I don't really want to pay someone else to do the job.  Especially since I don't really like the take-your-portrait-in-the-mall kind of studio shot.  Enter:  tripod and 10 second timer.  (If anyone wanted to get me a remote shutter release for Christmas, they'd be welcome.  My camera's a Konica Minolta.  Hint, hint.)

So last Saturday, we took Boo to the park.  There's this nice brick building that I knew would be great for backgrounds and providing shade.  (It was about 11 o'clock in the morning--I wanted to go when it was warm enough to not wear jackets, but middle of the day lighting isn't really flattering.)  


Boo wanted to run and play, but we got her corralled for a few shots...


If we tell Boo to smile, she opens her mouth really wide like she's yelling or about to eat the world's largest hamburger.  (Why???)  So instead we told her show us her pretty teeth...It's close to a smile.


And then I discovered this nice little alcove--beautiful.  Boo wasn't going to hold still long enough for a whole-family shot, though.  Ah, well.  Her daddy has this picture on his phone already.  :)


And a couple shots of me.  It was fun getting the camera ready, setting the timer, and running into place.  And the pictures are a whole lot more flattering than those at-arm's-lengh pictures I've tried before!


And the Mister.  I did some fairly significant Photoshopping on this one; can you tell what I did?  (Hint:  it's not on Mr. MadeIt.)


One last shot of my wonderful husband!  Thanks for indulging my need to take our own family pictures.

24 October 2011

Family Trip to the Great Smokey Mountains!


Saturday night, we got home from our family trip to the Great Smokey Mountains in North Carolina.  We had such a great time.  It was a lot of driving, but Boo did really well.  (Thank goodness!)  She even fell asleep almost immediately when I told her it was nap time--in the car!  (Hurray!)  That is, until a low-hanging tree branch scraped against our car about half an hour into her nap.  After that, she wanted to sleep in her crib, which obviously couldn't happen, so no more nap time.  Poor thing!  At least she was happy-hyper-tired the rest of the day, instead of cranky-tired.

*Pre-branch*
Aww, I love to see sleeping babies...


We knew the trees in the Great Smokey Mountain National Park would be amazing right now, and we were right!


We took so many pictures...It was great.  Here are a few of my favorites.

Not bad for being taken through the car window when traffic happened to slow down, eh?


Boo's favorite part was when Daddy helped her climb all over some big rocks.

See, look at that happy face.

Hello, love!

Beautiful red leaves...

And I love these tiny flowers.


I hope you all had a great weekend!

07 September 2011

How To Take Pictures Without Natural Light

I live in a basement apartment, with north and west-facing windows.  And around the north and west sides of the house are lots of trees.  And a deck, up on the main floor.  And I do a lot of my crafting after Boo goes to bed.

Why am I telling you this?  Well, because it is really hard to take nice pictures with little-to-no natural light!

But I figured out a way to get nice lighting for finished projects, fun objects--generally anything reasonably small.  And stationary.  (Sorry, Boo.  I guess you still get the unflattering overhead lighting.  Or the regular camera flash.  But you're cute enough to pull it off.)  With a couple adjustments, I bet I could use this set-up for my how-to shots, too.


So, what do you think of that picture?  Not bad for having been taken at 9:30 at night (in a basement apartment, surrounded by trees, with no hope of natural light).

Want to know how I did it?  It was really easy, and I just used things I already had hanging around my apartment.

You need:
a desk lamp
some white fabric

Optional:
some white paper/foam core board, etc to bounce light back to your object
something for a background and for the object to sit on.  I used white paper, because I needed all the light I could to be bounce back to my object (my fabric for my new project!).


Here's the set up.  In case you're wondering, that is my kitchen table I used to hold up my fabric.  I'll figure out something more portable later.


My desk lamp is sitting behind the fabric, which is just plain white muslin I bought for practicing clothes pattern I designed.  (Hopefully I can get one of those posted soon!  I'm working on my first skirt!)  The fabric softens the light, so you don't get the harsh shadows and overexposed highlights.


I used white paper for my background, but other colors would work great, too.  Pretty scrapbook paper would work, or some colored fabric...


 I'm really pleased with the way this worked out.  I did have to raise the exposure in Photoshop, but a stronger lamp or more ambient light will probably do the trick, too.


Now, are you wondering what I'm going to do with this fabric?  Stay tuned...

Happy crafting.