Showing posts with label cheap. Show all posts

13 February 2014

You've Got Valentine's Mail

Jill Made It: Date Night in the Mail

Need a last-minute Valentine's Day gift for your sweetheart?  How about some mail?

Jill Made It: You've Got Valentine's Mail

I made these for my hubby for Christmas, but they make great Valentine's Day, birthday, anniversary, Father's Day, or just anytime presents!

All you need is twelve envelopes, some paper, a pen/marker, and imagination!  For each envelope (and month of the year), you come up with a date idea.  Write it down, and slip it in the envelope.  Label each envelope with the appropriate month, and any preparations you may need to take care of before Date Night.  That way, the date plans can be kept a surprise until the it's time!

Jill Made It:  February Date

For example, for our February Date, we'll be making fresh pasta and watching a romantic movie.  That means we need a babysitter for dinnertime.  

Other instructions could be, "Saturday Date" for an afternoon hiking trip, or "Buy Tickets and get babysitter" if you're going to a baseball game.  

The best part about this Valentine's Mail, besides that you'll be spending lots of time with your sweetie, is that you can customize the dates to be exactly right for you and your significant other.

If you'd like some simple date ideas, click over to see my Year of {Cheap, Fun, Simple} Date Nights. These are mostly at-home (no babysitter needed!) date ideas.

What are some great date ideas you've tried?  I'd love to hear them!

16 December 2013

"Away in a Manger" Sweet and Simple Nativity

Do you ever feel like Christ gets a little lost in the Christmas season?  I do.  So I wanted today's Sew a Song of Christmas project to remind us what Christmas is really about.

I did already make a wooden nativity set a couple years ago, but there's always room for another nativity set, right?   We will have fun playing with these cute little guys and teaching Boo and Daddy's Girl about when Christ was born.

"Away in a Manger" Sweet and Simple Nativity

This project was inspired by these adorable Princess Peg Dolls.  When I showed Boo this tutorial, she decided she wanted to paint a princess set.  So she did.  And they turned out really cute.  I'll have to show them to you later.
  
Wooden Peg People Nativity Set—Supplies

Besides the regular painting supplies, all you need for this project are eight wooden peg dolls.  I found mine at Hobby Lobby.  They come in packs of eight, so that worked out great!

These are the "Man" sized peg people; they also make "Boy" sized dolls, so you could make baby Jesus smaller than the others.  I didn't want Daddy's Girl to eat or lose the little baby Jesus, so I painted Him on Mary.  (The "Man" size are still a choking hazard, so be watchful if you have babies/toddlers.)

Wooden Peg People Nativity Set—Step 1

First, I painted their heads.  The nice thing about painting all the Nativity People at once is that by the time you've finished the last one, the first is dry already and you can go right to the next step.

Wooden Peg People Nativity Set—Paint Their Clothes

Then I painted their clothes.  I decided this was a "less is more" kind of project, and painted their clothes really simply.  

I painted Mary in her traditional blue.  Joseph is dark blue so he feels like he belongs with Mary.  The shepherds are grey to show their humble state in life. (I would have done brown, but I couldn't mix a nice color.)  The three kings are rich, jewel-toned colors.  And of course, the angel is white.

I feel like the nativity set is already identifiable, but that's probably just me.  Let's add a little something, while still keeping them simple.

Wooden Peg People Nativity Set—Mary and Joseph

Mary is holding baby Jesus and wearing the blue head covering.  I didn't know what to do for Joseph; most nativity sets I've seen have him holding a shepherd's crook, which doesn't make any sense at all for the carpenter that he is.

Wooden Peg People Nativity Set—Angel

 The angel gets a halo and wings.


Wooden Peg People Nativity Set—Shepherds

The shepherds get a shepherd's crook and a lamb.

Wooden Peg People Nativity Set—Three Kings, Wise Men

And the kings get crowns.  I thought about giving them gold, frankincense, and myrrh, but I went back to "less is more."

UPDATE:  I realized these guys should have a coat of clear polyurethane to protect them, but I haven't done that yet.

Wooden Peg People Nativity Set

I think this little nativity set turned out so cute.  :)  

 Merry Christmas, everybody!  Only nine more days!

Don't miss the other posts in our Sew a Song of Christmas series!
"I'm Dreaming of a White Christmas" Tulle Wreath
"O, Christmas Tree" Glitter Ball Ornaments
"What Child is This?" Mini Quilt
"Blue Christmas" Simple Holiday Skirts
"Rudolf the Red-Nosed Reindeer" Ornaments
"Let It Snow" Mitten Ornaments

02 December 2013

"I'm Dreaming of a White Christmas" Tulle Wreath Tutorial

Today we're kicking off my newest blog series, Sew {Cook, Paint, Craft} a Song of Christmas!  I've invited some wonderful bloggers to join in, and together we will be showing you our projects inspired by Christmas songs.  We'll be posting Mondays, Wednesdays, and Fridays until Christmas, so be sure to check back often!

Now, on to the first project!

When I was a kid, we always had snow at Christmas.  (Sometimes we even had snow for Halloween!)  My siblings and I built snowmen, made snow angels, and walked to school in five feet of snow, uphill both ways.  Okay, I don't think it was uphill even one way.  But still, there was a lot of snow.

Now we live where it's warm most of the year.  And I love being warm.  I love playing in the pool, going on walks in the warm evenings, and wearing short sleeves year round.  (Although I did that when I lived in a cold climate, too.  That's what coats are for.)

I love warm weather, but something about Christmastime just makes you want snowflakes.  And hot chocolate.  And sparkly, fresh snow, glistening everywhere.  And a fire crackling in the hearth.  (Yes, I really do like to be warm.)

So here's my homage to days gone by, back when I was a kid and we always had snow for Christmas, my "I'm Dreaming of a White Christmas" tulle wreath.


I'm Dreaming of a White Christmas Tulle Wreath Tutorial

When I was making this wreath, I told Boo it was a winter wreath because I wanted it to last for all of winter, not just until Christmas.  

"It looks cold."

Mission accomplished.  :)

You know I'm always up for a quick and inexpensive project, and this wreath certainly is that.  

Tulle Wreath Supplies

What you need:
A wreath blank.  I cut mine out of cardboard--two layers, to give it a little more body.  After I took this picture, I decided to cover the wreath blank with paper to be sure no brown would show through.  Ribbon would also work, but why waste pretty ribbon on something that won't be seen?  My wreath blank is 8.5 inches in diameter, with the inner circle 6 inches.

Tulle.  Buy it on a spool, rather than off the bolt--it's so much easier that way.  I bought one spool each of white, light blue, and glittery white.  I'm not sure how much I ended up using, but I bet less than half of the tulle I bought.

Extra, optional stuff to personalize your wreath.  I ended up using two of the three sizes of beads I bought, and a length of navy blue ribbon.


Cutting tulle the easy way

Cut your tulle into strips.  I cut mine to 14 inches long, but it will depend on how big your wreath blank is, and how big you want your finished wreath to be.  I saw this cool trick on Pinterest somewhere for quickly and easily cutting your tulle to even lengths.  Just wrap the tulle around a piece of cardboard the length you want your tulle to end up; cut down one side, and there you go.  (The cut size is twice the finished size, since you double the tulle over when you tie it on.  Make sense?  Okay.)

How to Tie Tulle step 1

Fold the tulle in half and lay it under the wreath blank...


...And then pull the loose ends around the top and through the loop.  Squish the knot right next to the one before.  If you want to.  I wanted my wreath to be nice and full, so I squished my knots as close together as I could.

{This is the same technique you use for making those cute tutus you see all over, by the way.  Just tie the tulle around elastic, or my favorite, ribbon, and you have a tutu!}

I alternated colors white, blue, white, glittery, white, blue, etc.


Finished Tulle Wreath, version 1

I like how the wreath looks at this point, but I felt it didn't look quite finished.  So I sewed my sparkly, icy-looking beads on to the wreath, sewing through the knots.  You could probably use hot glue to attach your beads, but I wanted to be able to remove mine if I decided the wreath was better off without.


Sew Beads onto the Wreath


And I added a ribbon to hang the wreath. The wreath was up too high without the ribbon, but with it--perfect.


I've never had a wreath on my door before.  I feel very grown up.  

19 October 2013

All Autumn Pumpkins Tutorial

 Last year about this time, I had a little tiny baby, a three-year-old, a Halloween party at church that I'd committed to bring table decorations to, and almost no time at all!  What Halloween decoration could I make really quickly?

If you were following my blog a couple years ago, you know I love pumpkins for Halloween/Thanksgiving decorations.  So I came up with the perfect quick, easy, and cheap Halloween decoration--pumpkins made from a 2x4!  And these pumpkins transition seamlessly from Halloween to Thanksgiving, so I was ready for all of autumn.


All Autumn Pumpkins Tutorial

These pumpkins are so easy to make!  Watch this.

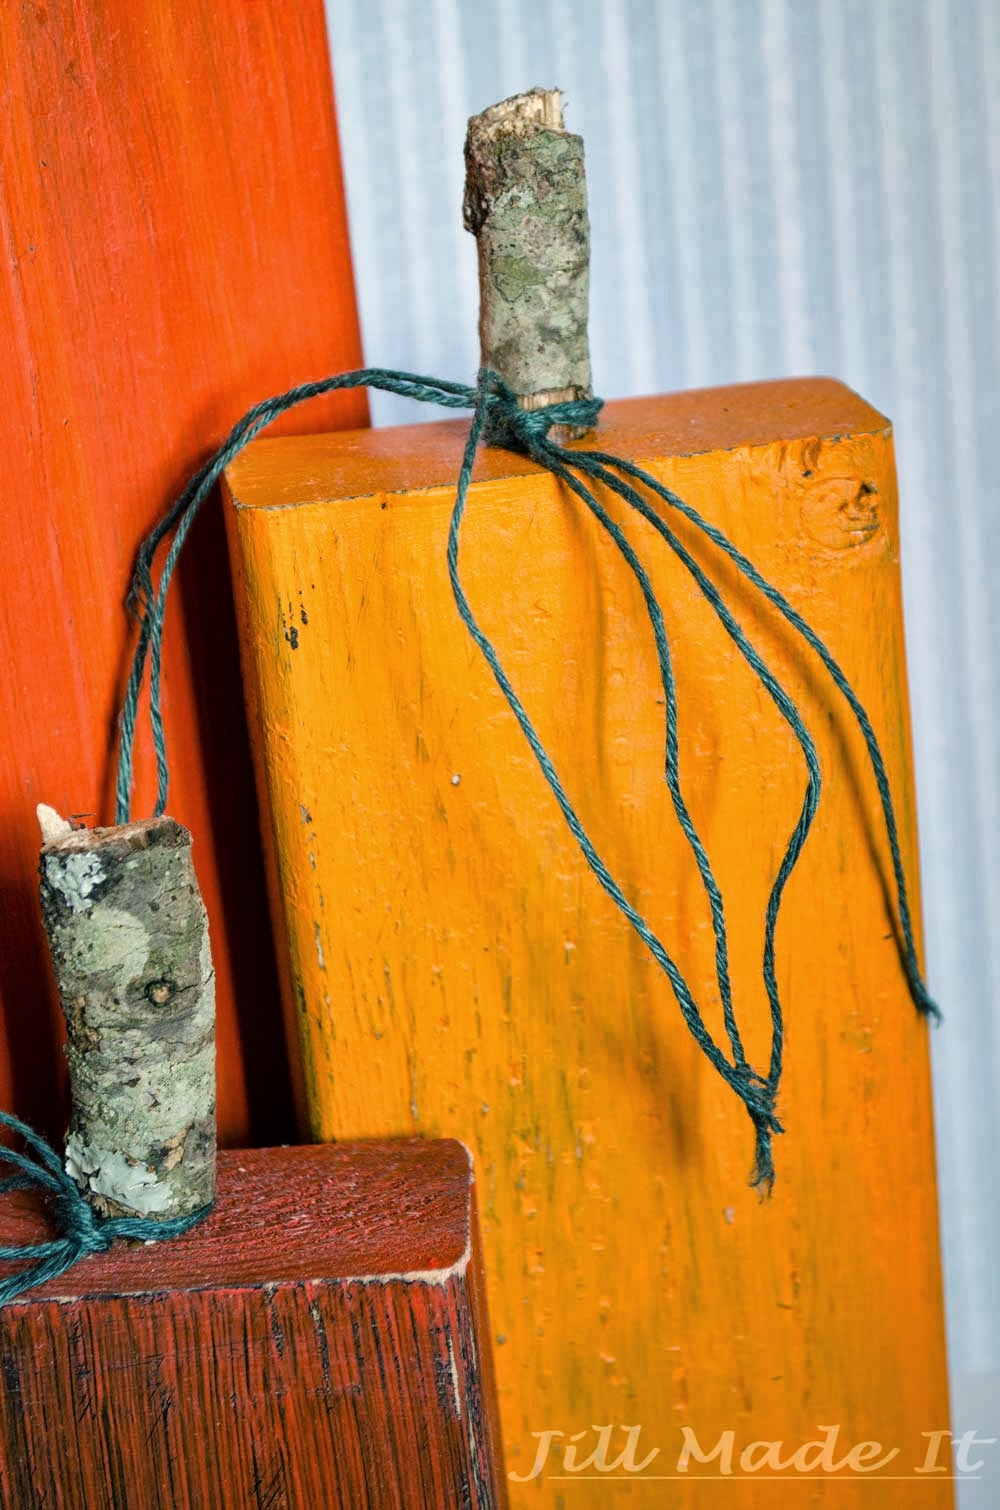
Short lengths of 2x4 + black spray paint + orange paint + sandpaper to distress + drill holes in the tops + glue in short, fat sticks from the backyard (or dowel rods, if you'd prefer) + raffia/hemp tied around pumpkin "stems."

All Autumn Pumpkin Tutorial Close-up

And done.

If you like pumpkin decorations like I do, you may want to check out the other pumpkin projects I've made.  

Fabric Pumpkin.  I didn't make a tutorial for this one, but I did find you some tutorials for similar projects.

17 July 2013

The Best From-Scratch Brownies I've Ever Made...and they're so easy, too!


Most foods taste better from scratch, but my previous attempts at brownies...well, I always went back to box-mix brownies.  I want brownies to be moist and fudgy, but my from-scratch brownies always turned out more dry or cake-like.  Not that there's anything wrong with cake, but if I wanted cake, I wouldn't be making brownies, now would I?


On Pinterest (where else?), I found this Fake Betty Crocker Brownie Mix Recipe.  Could this recipe really be the one?  The brownie recipe that tastes as good as box-mix, but leave me in control of all the ingredients?  (The Betty Crocker brownies aren't too bad as far as having fake-food ingredients, but I'd still like to eventually eliminate fake-food entirely.)  And could this recipe be really cheap and easy, too?


Oh, yes, my friends.  It is all that.

If you'd like to re-pin the recipe, here's my pin.  And if you'd like to skip right over to the original recipe, click here.

And if you'll excuse me, I think some chocolate is calling my name.  

Do you have a favorite brownie recipe?

21 March 2012

"Sometimes Being a Brother" Nursery Decor--Tutorial


Here's the finished crafting project I mentioned in my last post.  I have a friend who's about to have her second baby--another boy.  I made this as a present for her, and so I wanted to give the gift to her before I posted about it.  Wouldn't want to spoil the surprise!

I've barely used my Silhouette since I got it for Christmas.  Shame on me, I know!  I was (and still am) excited about all the many things the Silhouette could help me make...but choosing exactly what to do has been a little harder.  That and my pregnancy-induced tiredness and lack of crafting motivation for several months that is just starting to abate, plus wanting to focus more time on my art and on Mommy School...  But with this friend giving birth early next month,  I had motivation, inspiration, and a deadline!  Deadlines are always very helpful for me.

I wanted to make a sign/wooden wall hanging/whatever with a quote on it so I could use my Silhouette to cut the vinyl.  I also wanted to make a present that was kind of for the mommy and kind of for the big brother, so I was excited when I found this quote:

Sometimes being a brother is better than being a superhero. 
--Marc Brown

How cute is that?  Of course the three-year-old big brother won't care about it now, but I bet he will like it when he is older (and wanting to be a superhero...and is able to read).   

The sign was really easy to make, so much so that I didn't think there was a point to have in-progress pictures.  I'll just explain quickly what I did.

I asked Mr. MadeIt to cut out a 7 1/2" x 9 1/2" rectangle out of some scrap wood we had hanging around.  (Actually, it was a shelf from a wall unit we decided to get rid of.  Let's hear it for recycling!)

Then I spray painted the wood with primer.  I don't think this part is necessary, but I do think I wouldn't have gotten the subtle texture I liked if I hadn't primed the wood first.

Once the primer dried, I painted the wood with tole paints.  I bet whatever acrylic paints you have on hand would work just as well.  Since I wanted the sign to have a subtle texture, I applied the paint unevenly, letting some areas be darker, and others areas lighter.  Because of the primer, the paint didn't soak into the wood, allowing me more time to push it around with the paintbrush to get it just how I wanted it--smooth, but with tonal variations.  (I used Hunter Green + Charcoal, by the way.  For the edges, I had more Charcoal in the mix, so they would be darker.  For the back I mixed the green with black, to make it darker still.)


(So you can see the edges.)

And, of course, I had to make up the design so my Silhouette could cut the vinyl.  If you'd like to use my file, you should be able to download it here.  (This is my first time using Google Docs.  Let me know whether or not this link and the download work!)

If you'd rather make your own file, I used the font Haettenschweiler.  (Goodness!  I'm glad I don't have to actually pronounce that!)

I suggest using transfer paper when applying the letters--I did it without and it was a ROYAL PAIN.  It took forever to get those words on straight!

After that, I though the wood needed to be sealed and the vinyl stuck down permanently.  (No need for inquisitive little fingers to take my hard work apart.)  So I coated the whole thing with my homemade Mod Podge, which is just school glue watered down a little.  (Apply with a paintbrush, and be sure to wash the brush out really well afterwards.)

And that's it!  Except for spending forever getting the words on straight, this was a really quick and easy project.  (I'll have to get myself some transfer paper for next time.)

I hope you enjoyed the tutorial.

Happy crafting!

22 February 2012

I'm in a Quilt Block of the Month Club--Here's January's Block.

First off, I have a question:  What do you think of 30's style fabrics?  They are bright and happy, but in my opinion, they're rather busy.  And I don't really like busy.  But when that busy 30's fabric becomes a $7 quilt top, I can handle the busyness.  A little.

I bring it up because a local quilt shop is doing a Block of the Month Club--$7 gets you the fabric and patterns for twelve different quilt blocks.  So I'm doing it.  I just couldn't turn down a $7 quilt.  At the worst, I could give away the quilt, and use the patterns again with more my-asthetic fabrics.


This is January's block--the Yankee Puzzle.  I'd love to give you instructions for this and all the other blocks I'll be sewing, but since I didn't make the pattern, I can just suggest you Google the pattern names.  (To get you started, here are some instructions I thought looked pretty good, though I haven't tried them.)


And here's my version.  I figured, fewer fabrics = less busy, even if the fabrics themselves are busy.  What do you think?  I didn't like the red fabric included, but I do like the value contrast it provided; my version is rather pale.  Hmm...

Let me just say, it is much harder to sew triangles than squares.  Getting all those little points matched up... My quilts thus far have been pretty basic as far as piecing goes (usually just squares/rectangles), so this quilt block was a challenge.  But that's good, right?  Learn new skills?  I hope I get better at it sooner than later, though, because January's block really wasn't much fun to sew.  And unpick.  And re-sew.  Again.


And here's the fabric for February's block, the LeMoyne Star (aka the Eastern Star, Lemon Star, Puritan Star, and Hanging Diamonds, so says my pattern).  There's that same fabric design I didn't like from January's block, but I like it better with the main color being blue.  Good thing, because I couldn't really take out a color when there are only three to start with.

13 February 2012

A Year of {Cheap, Fun, Simple} Date Nights

But first, a small announcement. I've decided I want to spend more time on the arts side of my creative pursuits, so I'll need to spend less time on my crafting and blogging. I LOVE painting (watercolors in particular) but it's really sad how few paintings I've done since graduating. It's so sad, I won't even tell you how many. Okay, I will--one. That's really sad.  (It was this painting, by the way.)


I also love my blog, though, so I will keep posting. And I don't think it's possible for me to stop crafting. So you'll still see me, just less often. I'm thinking once a week, probably on Wednesdays, though this week's post is (obviously) today, because I've been saving this project for Valentine's Day!


So without further ado:


A Year of Date Nights


It can be hard to come up with something fun to do each week! Mr. MadeIt and I were falling back on the same couple of activities, but we used to do all kinds of things--we just had to remember what. So I made a list. I wanted to have a different activity for every week of the year, so I also checked out other people's suggestions (links at the bottom of this post), and I had it--a whole year's worth of Date Nights. I printed the date ideas onto index cards and we were set.


{Disclaimer: These dates are intended to be done with a spouse, i.e. they are not all appropriate for unmarried people. So don't be shocked when you see Strip Poker.}


At Home
It is expensive to hire a babysitter every week!  Here are lots of ideas for fun date nights you can have without any hired help.

1--Dinner in the backyard, or on the porch
2--Watch a movie
3--Redbox + popcorn
4--Order pizza
5--Theme Night:  Dress, eat dinner, and watch a movie with the same theme (Ex:  Western--cowboy/girl outfits, BBQ, John Wayne movie)
6--Indoor picnic
7--Special dessert
8--Get all dressed up, but stay home
9--Very exclusive dance
10--Grand Night at the {Your Name} Theater--don't forget the formal invitation and fancy clothes!
11--Sexy clothes (pick another card for the activity)
12--Read a book (We like to read together and always have some book we're in the middle of.)
13--Candlelit dinner
14--Make a CD of playlist for the night's background music
15--Splurge on yummy treats
16--Back rubs
17--Share your favorite dating memories
18--Candles everywhere!
19--Exercise together
20--Try a new recipe
21--Go to bed early ;)
22--Play the Wii together (or whatever gaming system you have)
23--Watch a sports movie and eat stadium food (nachos, hotdogs...)
24--Hawaii vacation--tropical drinks, swimming suits, and kiddie pool
25--Breakfast for dinner
26--Board games
27--Card games
28--Super ice cream treats
29--Make s'mores/dinner outside
30--Grand Change Escapade--Gather up all your loose change and try to spend as much of it as you can without going over.
31--Indoor camping
32--Bubble bath for two
33--Make some silly craft together
34--Finger-painting
35--Work on a project together
36--Play 20 Questions--Write down twenty getting-to-know-you questions you never thought to ask before
37--Find a "how to" video at the library and learn a new skill  (I'm hoping we find one about dancing!)
38--Teach each other a new skill  (I want Mr. MadeIt to teach me how to play guitar.)
39--Get a movie from the library
40--Make Bucket Lists
41--Strip-poker, etc (any card game works)

Free and Cheap Going Out
Sometimes, you've just got to get out of the house.  But going out can be inexpensive, too!

42--Take dinner to the park (Love this one.)
43--Take pictures
44--Go on a walk
45--Go mall-walking/window shopping (Great for cold/wet/unpleasant days)
46--Go play at the playground
47--Go bowling
47--Go to an art show, museum community play...
49--Go hiking
50--Stargazing
51--Night swimming (if you have a local pool that's open at night)
52--Mini-Golf

Special Occasions
We're all for the $10 and under dates, but sometimes you just want to do something special.

53--Go to a nice restaurant
54--Outdoor camping, or any other overnight date
(Yeah, that's all I've got.  Free-and-cheap really is the way we roll around here.)

For the Holidays
I don't imagine this needs any explanation.  :)

55--Birthdays--Birthday boy/girl gets to choose everything!
56--Christmas--Make Christmas cookies
57--Christmas--Make Christmas tree ornaments
58--Valentine's Day--Make an all-red dinner
59--Valentine's Day--Make Valentine's cards for each other.  (The cheesier, the better!)
60--Halloween--Make your costumes

I'd love to hear your suggestions for date nights!  Please share!


Ideas from:
Things we've done before
Friends and family

07 December 2011

Merry Christmas Ornaments


Remember my early Christmas present?  Well, here it is--my first finished made-with-my-new-Silhouette project.  (Thanks again, hubby!)

Custom Christmas Ornaments!

This was such an easy project, and I love how it turned out!  In Photoshop, I made an 8 1/2" x 11" design filled with the words "Merry Christmas 2011" plus lots of snowflakes.  (Any image-editing program would work.)  Then I saved it as a jpg.


Then I opened the file in the Silhouette software...


Selected the Trace option, highlighted the entire design, and clicked "Trace" (which I forgot to circle, but you can find it)...


Then I saved this to my SD card, took it to my Silhouette machine, loaded my vinyl, and let the machine do its thing.

It took maybe fifteen minutes to cut out all those shapes!  (I didn't watch the clock, but it was going for a long time.)

Then all I had to do was peel the letters (and numbers, and snowflakes)  off their backing, and stick them on the ornaments I'd bought at the grocery store.  

I've already given one to my in-laws, one's on my Christmas tree, I have one for this ornament exchange I'm going to in a couple weeks--talk about an easy homemade Christmas present!

PS  You can buy vinyl from Silhouette's store, but I just got mine from Lowe's--just ask for the contact paper.  I haven't used Silhouette's vinyl; maybe it's nicer, but this vinyl I got worked well and cost almost nothing.

Happy Crafting!

16 November 2011

Thanksgiving Puzzle Blocks (Free Printable!)

{Looking for the flower clip giveaway?  Click here.  Remember, it ends Friday!}
{This giveaway is now closed.}

Thanks to my cousin who came up with this idea!  She wanted to make Thanksgiving Puzzle Blocks, like the Pumpkin Puzzle Blocks I did for Halloween.

Just print, cut, and decoupage onto nine 2" x 2" wood blocks.


No, I didn't forget to upload a picture.  The sixth side is for a family portrait!  

Happy Thanksgiving!

And happy crafting!

09 November 2011

Red Envelope Inspired Beaded Bracelet Tutorial (Plus Matching Necklace and Earrings!)

Okay, so I didn't restrain myself from starting my project until Craft Night.  But I realized that I wouldn't be able to finish this all in one night, and I wanted to share it with you today!

The other day, I found this bracelet (from redenvelope.com) on Pinterest:


Isn't is so pretty?  But what wasn't pretty was the price tag--$79.95.

So I made my own (in a different color scheme--I loved the rich creams and golds).  And mine only cost $10.01.  (Plus the headpins, which I already had.)


(Like the heart-shaped clasp?  I think it adds a little cuteness while still being subtle.  And it references the heart in the inspiration bracelet.)

Granted, theirs in made of semi-precious stones, silver beads, and freshwater pearls, whereas mine is made of glass beads.  But I love mine.  It's a lot more bracelet than I usually wear, but this time of year just makes me want to sparkle and shine a little.  (And the Christmas lights aren't even up yet!  I think I'm in trouble!)

I actually got too far ahead on my bracelet before Craft Night; I finished it long before my sister was ready to leave (or me, either, for that matter).  What to do...

I know, I'll make a matching necklace.

So I did.


I took more of the chain I'd used to make the bracelet, added another heart-shaped clasp onto one end, and beaded up the other.

Well, that necklace didn't take nearly as long as the bracelet had, and I got it done, too, before the night was over.  

Hmm...I don't have any pearl earrings, yet.

So I made a pair of those, too.

(Okay, the earrings look kinda' funny hanging on the necklace chain...Oh, well.)

The earrings were done in the same method as these earrings, but with much shorter wires.  I used a small, medium, and large bead for each earring, and had the wires for the small and large beads the same length, with the other just a little longer.

And then it was time to go home.  But now I've got a complete set of matching pearl jewelry!

Okay, so now for the Pearl Bracelet tutorial.  Ready?  It's time consuming, but really easy.

You need:
A plain chain bracelet  {OR a length of metal chain (from the jewelry section, still) and a clasp.  This is far and away the cheaper way to do it.  I got enough chain for my bracelet and necklace with lots still left over for $3.  One chain bracelet was going to cost me $7 or so.}
lots of headpins {OR you could make your own, like I did for my Holiday Earrings, but you'd need so many for this project that I think it's more worthwhile to just buy them.  I don't remember how much they cost, but it wasn't too much.}
a lot of beads of your choice  
Round-nosed pliers
Wire cutters
Second pair of pliers {optional, but very helpful}


Plan out where you want your beads.  I started with a pattern at first, but by the end, I was just filling in beads wherever they were needed.  So this picture shows where I put my first round of beads--the pearls.

Thread a bead on to your first headpin.  Use your round-nosed pliers to make a loop in the headpin above the bead (as above), then thread the wire on to your chosen link of the bracelet.


Next, wrap the wire around itself just above the bead.  Cut off the extra.  Bend the loop so it comes out straight from the bead.

{You could also attach the beads like in my Holiday Earrings tutorial, it you like that better.  I like that the loop can't accidentally be pulled open with this method.)

Continue until your bracelet is as full as you want it.  

Wasn't that easy?  A few supplies, a simple technique, and a few hours and you can have an $80 bracelet for $12 (to include the headpins in the total).  

Happy crafting!

P.S.  Tomorrow is a special day for my blog.  Check back to see why...  :)