20 May 2013

Project Sewn Week 3: Asymmetrical Draped Shirt


I wasn't going to do this week's Project Sewn because the theme is 80's Inspired and I couldn't figure out anything redeeming about fashion in the 80's.  I really look forward to seeing what other ladies made for this theme.  How can you interpret those crazy fashion trends into something you'd actually want to wear today?

But I finally came up with something.  Draping was fashionable in the 80's, as I understand it.  (I wasn't fashion-aware myself back then.)  And when I showed my mom the fabric, she told me she had exercise pants back in the day that were almost that color.  So that worked out unexpectedly well.


My sister wanted a shirt for this week's project, since I'd already made her a skirt and a dress.  I got 4th place for the dress, by the way, and 3rd for the skirt.  Thanks, everyone who voted for me!  And if you didn't vote for me...well, I guess we can still be friends.  No, really, there were lots of great entries, and I'm happy to have done so well.  But I hope you'll vote for me this week!


I made this pattern by tracing around a knit shirt that fits me.  I then "slashed and spread" at the front shoulder to give extra fabric for the pleats.  The neckline wasn't going to be asymmetrical, but either the pleats pulled it funny, or the neckline stretched out, because it was gaping.  So I took in the one shoulder seam, making the neckline asymmetrical.  And I like it better this way!  Happy accident.


You may recognize the skirt.  I made it, too.  You can read about it in this post.


And of course, Boo wanted me to take pictures of her, too.


Isn't she adorable?  She doesn't hold still very well for pictures, so they turned out a little blurry, but I love them anyway.  Just look at that happy smile!


Please vote for my Asymmetrical Draped Shirt starting on Friday!  


13 May 2013

Project Sewn Week 2: 50's Inspired Sundress

I got the material for this week's challenge a couple weeks ago, in the same shopping trip as for the black/white challenge.  With that head start, I thought I'd be able to finish this week's outfit earlier in the week.

Not so much.

This dress has gone through so many incarnations even since buying the fabric.  Really, all that stayed the same (besides the fabric) was that I wanted cap sleeves and a fitted bodice.

First idea:  Lace detail.  My sister vetoed that at the fabric store, saying that all their lace looked like it was for old ladies.

Second idea:  Pockets on the front.  My mom and sister both said no to that one, feeling that it would look juvenile. (The pockets would have been like these ones--they wouldn't look too young, right?  But that dress is for a toddler, so maybe I'm wrong...)

Half-circle skirt?  Would hide the piping I was planning to have in the skirt.

Princess seams with piping?  Too hard to draft.  (I'll figure it out, just not with this time crunch.)  So I guess I could have done the half-circle skirt, after all.

Ruffles?  No, not needed.  And I'm running out of time.

And then there was the method of patten-making...

Draft from an item of clothing I already have?  Tried that for two entire days (well, evenings anyway; gotta take care of the little ones during the day), but failed.  (Probably should have started with something simpler than a button-up shirt with princess seams and bust darts.)

Highly alter a pattern I used back when I was sixteen?  Okay, let's try that.


I didn't really want to start with a commercial pattern because I was afraid I would end up making their dress instead of my dress.  But this pattern was drastically different than what I had in mind while at the same time having the features I was having such a hard time drafting.  (Namely, a fitted bodice and dolman-style cap sleeves.)  So what began as a Asian-style shirt and top became:

The 50's Inspired Sundress


Okay, first I want to point out that this all-yellow dress really has little white polka-dots all over it.  Because polka-dots are awesome.  And 50's-ish.  (My sister and I really wanted yellow fabric with LARGE white polka-dots, but it wasn't to be.  Next time, I'll paint the dots on myself.  :D )

Let's talk about the changes I made.


Mandarin collar changed into scoop neck.
Cap sleeves shortened.
Shirt-and-skirt combo changed into dress.  Yes, I used the shirt/skirt pattern pieces instead of the dress option.  It seemed appropriate because I was making a bodice/skirt kind of a dress instead of an all-one-piece kind.
Gathers instead of the darts on the front of the bodice.
Four darts instead of two on the back of the bodice.  Seriously, this dress is full of darts; there were going to be 24 darts in this dress before I changed some out for gathers.  Granted, half of the darts are in the lining, but I still had to sew them.  But I'm getting ahead of myself a little.
Neck and sleeve facings changed to fully lined everything.  (Hence fully lined...)
Slim skirt widened to A-line.  That alteration was actually really easy.  Maybe I should write a quick tutorial on that.  You know, someday.  When I'm not designing and sewing a new outfit every week for this competition.
No sash to wide sash.  Really difficult change, I know.

Okay, I think those are all the changes I made.  So, radically different from the pattern, huh?  


Here's a close up of my favorite details of the dress.  (See?  There really are polka-dots.)  I like the interest the gathers add to the front of the dress, and I think the white sash was necessary to break up all the yellow.

Please vote for my dress starting on Friday!
Here's the link:  Project Sewn Week 2

By the way, I got third place last week for the black and white skirt  I made!  Thanks to everyone who voted for me.  :)  


06 May 2013

Project Sewn Week 1: The Spiffy Date Night Skirt

Have you heard of Project Run and Play?  Blogging designers, kids clothes, contest, short deadlines, you get the drift.  Now they have a sister site called Project Sewn, and this season's competition starts today!  

I am not yet an awesome enough blogger/clothing designer/sewer to be one of the official contestants, but they have a sew-along division for us regular folks!

This week's theme is "Black and White."  I happen to love black and white clothes since they're so dramatic and classy.  So I love this theme.  I'm making the clothes for my sister, though.  Just because.  (She loves black/white, too.)

Week One Entry:

The Spiffy Date Night Skirt


This is one of the first times I've designed clothes, and it's the first time ever designing adult clothes.  It's less intimidating to whip up a no-pattern baby outfit; if it turns out a little funny, oh, well.  They'll love it anyway.  Or not care.  I don't imagine babies really care what they wear.  And Boo likes anything I make for her, especially if she gets to help and it has "fancies."  (That would be ribbons, ruffles, etc.  She is a girly-girl. :) )


Isn't she pretty?  I love the red shoes with the black and white.  (I didn't make the shirt, by the way; just the skirt.)


Boo wanted in on the photo shoot.


And she loves to be with her aunt.


Please vote for me starting Friday morning!

25 March 2013

How to Add Social Media Icons to Your Blog

I'm working on redesigning my blog, and one of the things I wanted to add was social media icons.  It's pretty easy; want to learn how to do it?

First, of course, you need to get/make your icons.  You can get free icons in various styles, in several file types, for more social media sites than I've ever heard of here.  That's where I got mine.


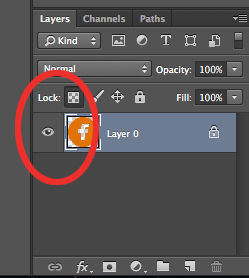
This is the Facebook icon I chose.  But I didn't want it to be black, so I pulled the png file into Photoshop.  


 I just locked the transparent pixels, pick my color, and (on a Mac) hit SHIFT+F5 to fill the unlocked pixels with the new color.


And now I have my own customized Facebook icon.

Then you just follow the same steps as in this tutorial for adding customized navigation tabs.

If you want to have an e-mail icon, the code goes like this:  

<a href="mailto:your-e-mail@whatever.com" mce_href="mailto:your-e-mail@whatever.com/"><img src="the url where the image is hosted aka Direct Link on photobucket" mce_src="the url where the image is hosted aka Direct Link on photobucket" border="0" /></a>

Just change the red text to your information.

If you are adding multiple icons, you can put a couple spaces (not line breaks, just spaces) between the code blocks to make them not butt up against each other.

Social media icons:  check!

Now on to the next blog-improvement project...


(This post just needed a Pin-able image, so now it has one.)

20 March 2013

What I Learned About Taking Baby Pictures

Ah, my poor, neglected little blog.  Remember back in this post, I told you that my blogging would be pretty sparse until Daddy's Girl started taking regular in-her-bed naps?  Well, she does now... but those regular naps are only a half hour long.  Any advice on how to help her to sleep longer?  I know she needs it...


Anyway, I took my little munchkin's 7 month pictures a couple of days week or two ago while back (wow it's hard to find time for blogging with two little ones.  And they've both been sick off and on since January.  That isn't helping), and I thought I'd share some things I learned.  


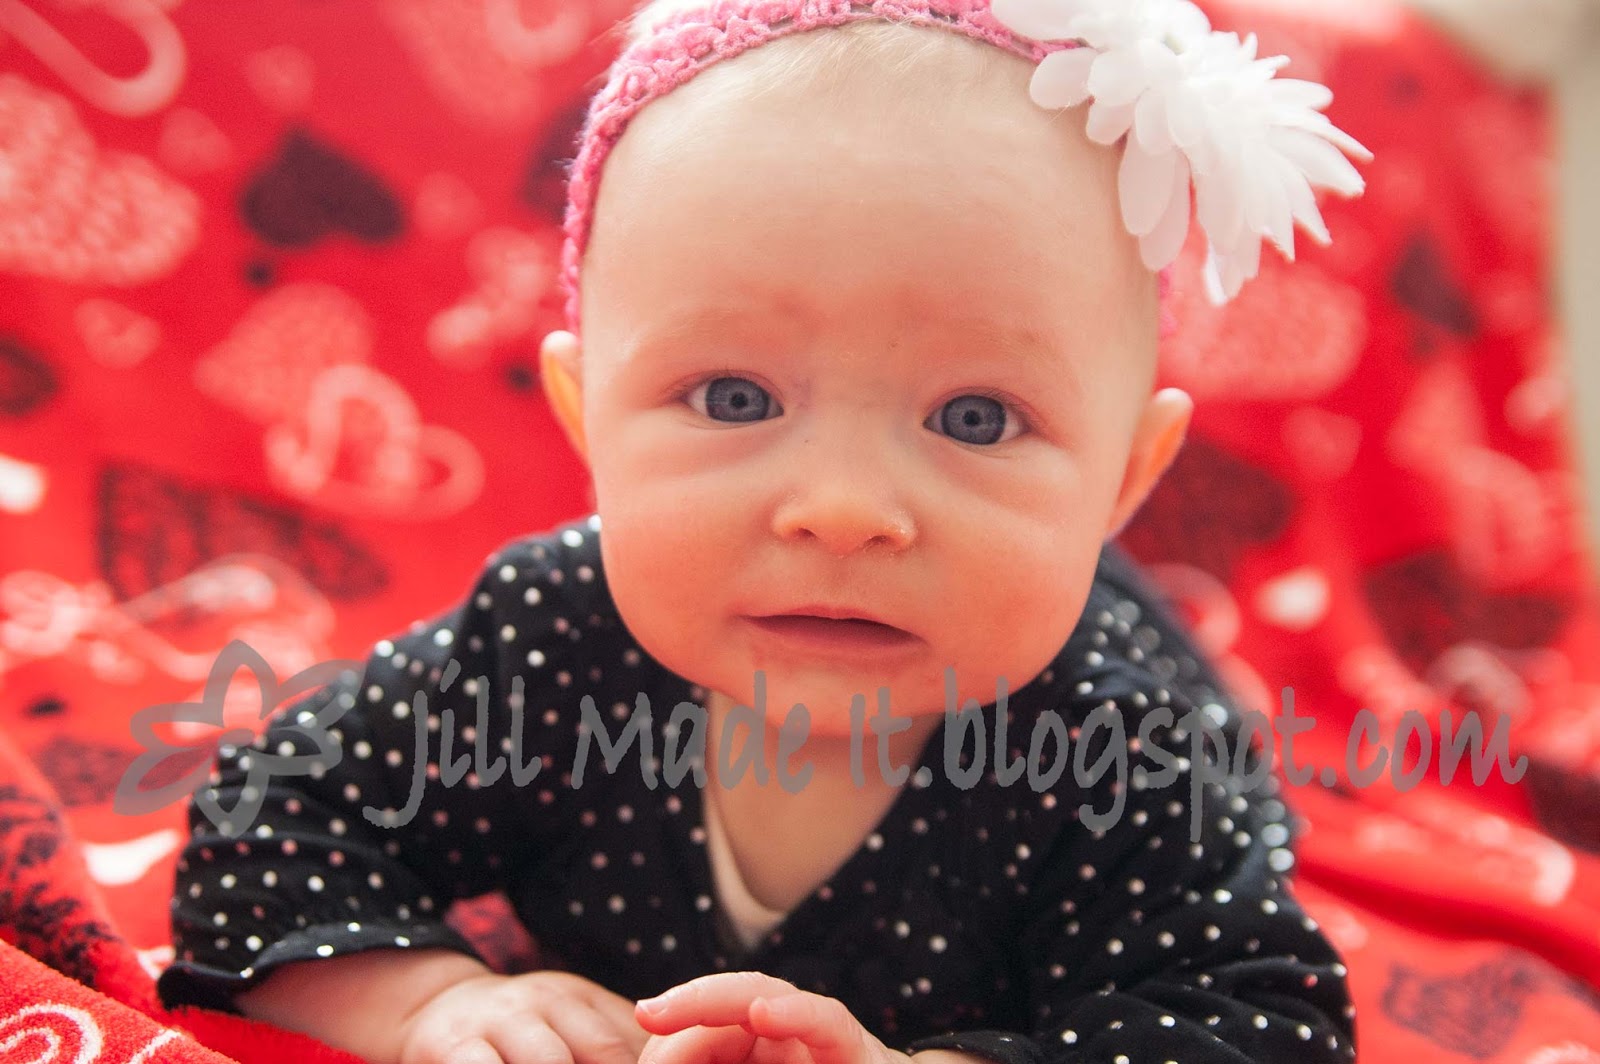
Lesson 1:  Use neutral/soft colors around your baby.  Daddy's Girl turned 7 months in February, so I thought this Valentine's Day blanket would make an excellent background.  Add to that its wonderful fuzziness and the nice contrast with my little girly's outfit, and I was sold.  Until I pulled the pictures onto my computer and saw the red color cast the blanket was bouncing back on my darling's face.


Also, the bright red was distracting from the soft beauty that my baby (and all babies) naturally has.  Nope--the red has to go.


Lesson 2:  You can always process the picture into black and white to fix the funny color casts and otherwise distracting colors.  I found this tip on making your black and white pictures really pop--thank you, Pinterest--and I use it every time.


Lesson 3:  Try to get your baby's personality, not just their likeness.  Part way through this photo shoot, I realized I was not really getting my little one's  personality in her pictures.  So I gave her her pacifier.  Now, Daddy's Girl doesn't really need to suck on her pacifier ("plug," to us) unless she's sleeping, but she sure likes to play with it.  And the ribbon of her plug-catcher is always in her mouth.  So even though you can't see her face in this picture, you see who she is.


Lesson 4:  If possible, have a helper to entertain your baby so you can concentrate on picture-taking.  It's really hard to keep still enough to take crisp pictures while playing with a baby.  


And two more quick tips I like to use for all portraits:

Tip 1:  Soft natural light is the best!  If the light is too harsh (think direct sunlight, camera flash...), you get ugly shadows and blown out lights.  Try going by a large window where the sun is not streaming directly through.  (North-facing windows are great for this.)  Sheer, white curtains can help soften the light if you are getting direct sunlight.

Tip 2:  If your camera has the option, use a wide aperture (small number).  This make for nicely blurred backgrounds, like in the first picture.  I love the look of a nicely blurred background...It also helps your camera be able to use a faster shutter speed, so you have a lower risk of motion blur (from baby or you).

Happy picture-taking!


24 December 2012

I Finished the Baby's Christmas Stocking Just in Time!

First off, thanks to everyone who's been leaving comments! I love knowing people are reading my posts and wanting to do my projects.  (If you have questions, I'll try and get back to you, but just know I'm not checking my blog very often at this point in new-baby-life.)

Second off, Merry Christmas!!!  I hope you're all having a great holiday and aren't even reading this until the 26th.  :)

Third off, I got Daddy's Girl's Christmas stocking done!  Just barely in time, too.


You like where we hung the stockings?  We don't have a fireplace in our apartment, so we put up a shelf to be a mantle.  :D


I think DG's stocking looks smaller than the other three, but I used the same pattern for all of them...Do you think it might be because I used a different (fluffier) batting?  More of the fabric is being taken up by the up-and-down from quilting the fluffier batting...Oh, well.  It's just a little bit smaller--hopefully the little ones won't notice, even when they get bigger.

The pattern I used, of course, is the one from this post.  (Just click over for the pattern and tutorial.)

But here's a trick I came up with between writing that post and now.  You see, I always have a hard time keeping all those little squares in order.  Oh, sure, I try labeling the rows, and keeping everything in order, but it doesn't always work out, and I end up laying it all out over and over again to make sure everything stays in its place.  Then I thought, why not label all the squares?


See?  The rows have numbers, and the columns have letters.  This way, I will always know where all the pieces go.  Boo could stick them in her bag, carry them around all day, and pour them out on my table in the evening, and I'd still be able to easily put each and every little square back in its place.  I'll never make this kind of quilt project any other way.


And just to make sure you've gotten your daily dose of cuteness, here's my little Daddy's Girl.  Isn't she precious?  I love that baby.


18 October 2012

Tiny, But Healthy

Remember back in the day when I used to actually post on this blog?  Yeah, it's been a while.  You see, I've been working on a continuing project...


Meet Daddy's Girl.

Boo was definitely a mommy's girl, but this little one is a daddy's girl.  And she has her daddy's red hair, so that's lots of fun.  I hope she keeps it.  :)


This precious little baby joined our family a month early, and she certainly is tiny.  She was only 4 lb 10 oz at birth.  (It was really funny--while she was waiting in the hospital nursery to be checked by the doctor, right next to her was a 10 lb newborn...just in case we didn't realize how very tiny she was.)  If you remember from this post, she was small for how far along in the pregnancy we were, and we never did find out why.  So we were worried about her, and when she came early, we expected some time in the NICU.  But she's a healthy little squirt.  No NICU, no breathing problems (very common for 36 week babies, as I understand it), no jaundice, even.  (Well, it wasn't bad enough to need light therapy, anyways.)


So we've been adjusting to having two (healthy!) little ones.  (I have kids now--as in plural.  Weird.)  But we love it.  Boo is a great big sister; she loves to have tummy time with the baby.  ("Let's have a floor party!")  She goes and gets pacifiers, diapers, burp clothes--whatever we need.  Sometimes she's a little more clingy than before, but really, Boo is adjusting amazingly.


My blogging is going to continue being sporadic at least until Daddy's Girl starts taking regular not-needing-to-be-held naps, but you'll see me every now and again.


And the rest of the time, we'll just be enjoying our little baby.