09 December 2013

"Blue Christmas" Simple Holiday Skirts

Boo loves to match.  Not like her shirt matching her pants; she comes up with some pretty...inventive outfits.  No, she likes to match other people.  So she will be so excited when she and Daddy's Girl unwrap matching Blue Christmas Skirts on Christmas morning.

"Blue Christmas" Simple Holiday Skirts

These are really basic skirts, but the nice thing about "basic" is that you can easily add your own spin on it.

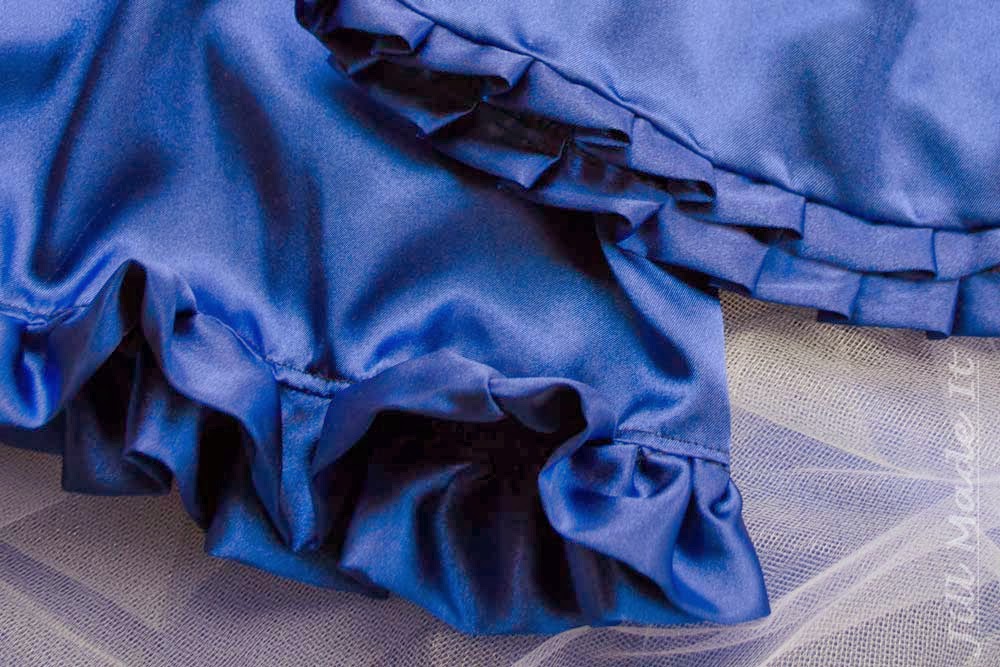
Holiday Skirts with Pleats, Ruffles

Both skirts are made from the same blue satin (surprisingly affordable, yet it adds a bit of "special" to the outfit).  Daddy's Girl got pleats on her skirt, Boo got ruffles.  I love variations on a theme.

Ruffles on Skirt

Oh, ruffles, why must you be so cute, yet so annoying to make?  I actually prefer making pleats than ruffles.  

Simple Holiday Skirt Pattern
(By the way, I certainly didn't invent this way of making a skirt; it's been around forever.)

I don't have step-by-step pictures, since I sewed these up at night so the girls wouldn't see their Christmas presents.  (Read:  There was really bad lighting for pictures.)  But the skirts are so easy.

Ready?

Cut the elastic to your child's waist measurement.  Don't add seam allowance—you need the elastic to stretch a little so the skirt stays up.

Cut your skirt fabric as shown in the picture above.  Or, if you want a fuller skirt, cut a longer rectangle.  Less full, closer to square.

Sew up the two short sides, finishing the seams as you prefer.  (I went over the raw edges with a zig-zag seam for the first, and made a french seam for the second.  Just because I didn't think about the french seam at first.)

Make your hem by folding the bottom edge over a half inch, then fold again another half inch.  And sew it down.  A decorative stitch with a contrasting thread could be a nice way to add some detailing.  You could also hand stitch for a less visible seam, or use the blind hem stitch on your sewing machine.  But that's another tutorial.

Now you'll make a casing.  Just iron the top edge down a quarter inch, then fold down again whatever size you need to fit your elastic.  Sew this down, too, being sure to leave a little space for inserting the elastic.

And insert the elastic.  Attach one safety pin to the leading edge so it's easier to thread it through, and another securing the other end to the fabric so it can't pull all the way through.  (Hate it when that happens.)  Once the elastic's through, overlap the two ends by a half inch and use a zig-zag stitch to secure them.

Topstitch the casing closed, and you're done!

(If any of this didn't make sense, send me an email or leave a question in the comments below.  If needed, I'd be happy to make a photo tutorial later.)
Skirts with Ruffles, Pleats

Now that you know how to make a basic skirt, you can change it up to make so many different looks!  Besides adding ruffles or pleats, you can make the skirt more or less full, longer or shorter, try color blocking, or a paper bag waistband...I think I'm going to try a scalloped hem next time.

Don't miss any posts as we Sew a Song of Christmas!

06 December 2013

"What Child is This?" Mini Quilt Tutorial from Al of Shaffer Sisters

Today, the wonderful Al is sharing with us her mini quilt inspired by the song, "What Child is This?"

She and her sisters, Jo and Scary (aka SarahLynn), have some great projects at their blog, Shaffer Sisters.  One of their projects I'm excited to try is the Minky Crib Sheet.  (How amazingly comfortable does that sound?!)  And they do a lot of sewing for girls (I love this cute dress) and for boys (like this awesome shirt).  You should definitely go check out their blog!

But first, the "What Child is This?" mini quilt.  On to you, Al.

~~~

Little Girl and Santa
This was taken at a church Christmas party when Ty was 18 months old.
I love Christmas. I treasure the peace, hope, and love that I feel when I think about the true meaning of the season. Too often it seems like the Christ in Christmas is lost to bright flashing lights and an excessive focus on Santa and the entitlement of gifts.
http://shaffer-sisters.blogspot.com/2012/12/merry-christmas-from-us-to-you.html
Christmas Towel Tutorial & Free Printable
I love my Lord and Savior, Jesus Christ, and this season (as with years past) it is my goal to give something that keeps the focus on my Redeemer. The King of Kings was born into the most humble of circumstances, but that didn't make Him less. His birth was marked by the fanfare of angels, the brightest star in the sky, and the company of humble shepherds and faithful Wise-men from afar. From a young, pure, and loving mother He was born. I'm sure that Mary, just like all new mothers, felt an overwhelming love of this gift straight from heaven, but also an uncertainty that she could be the best for of someone so precious and perfect.
"What Child is This?" Mini Quilt
This story is portrayed in the hymn of "What Child is This?"  It is one of my favorite Christmas songs. One day while thrift store shopping I found "Quilt a Colorful Christmas" (contains 39 projects) and it cost only $2. You should probably know that I love quilts so getting it was a no brainer. One of my favorites from the book was the Mother and Child project which I decided to share with you today.

This was such a fast and easy project. I thought it would entail paper piecing or something a little more complicated, but it was simply just fabric, sew-able heat-n-bond (they recommended fusible web, but I had to make due with what I had), stitching on top of the applique, and then putting it all together.
"What Child is This?" Mini Quilt 2
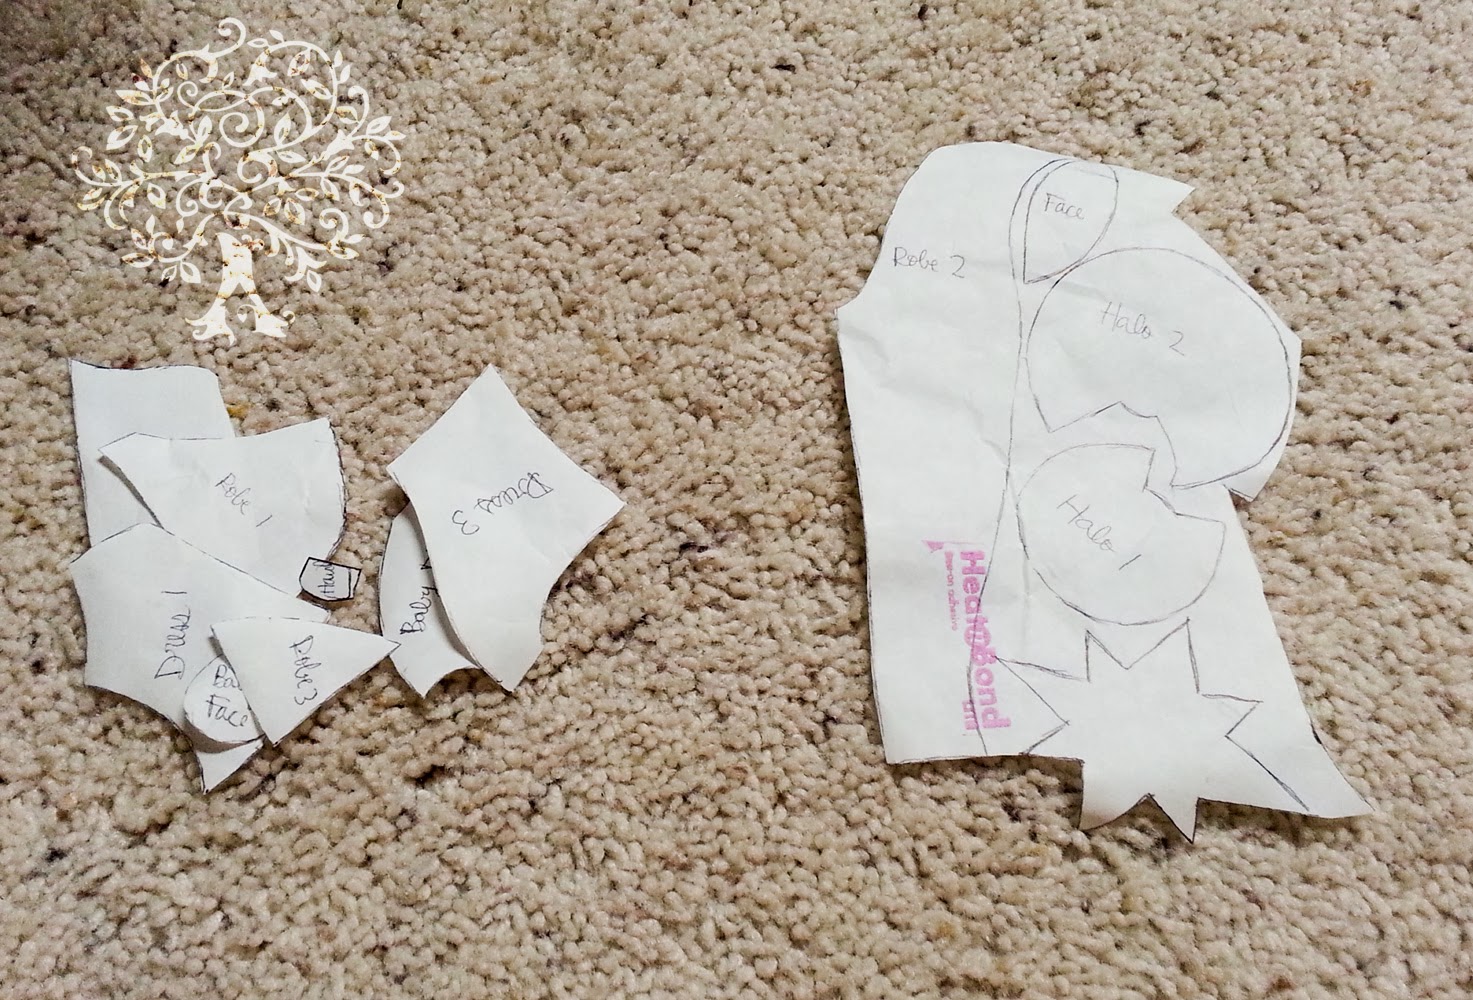
Sadly I can't give this pattern to you since it's not my design, but you can do something similar to this by just sketching it out. Then add 1/8-1/4" (on your sketch with a dotted line) to the pieces that lay underneath the pieces on top (so you don't have any unwanted dead space, but you will be able to trace out your pattern next). Then you can go through and trace out each little pattern pieces onto printer paper. And wala you have your own pattern.

Since I don't want you to miss out if you want to do something like this and feel like you lack the artistic ability necessary, I came up with my own design using the instructions above. I am sharing the pattern with you and tomorrow you can come over to my blog and see the finished project and share yours if you decided to make one as well.
"What Child is This?" Mini Quilt Pattern and Placement Guide
What Child is This Placement Guide & Pattern Pieces (print to be 8.5" x 11" size)
You will need:
Pattern pieces
Scraps of 6 different colors (plan appropriately and make sure there's enough)
(1) blue background fabric 8" x 6 3/4"
(2) 3 3/4" x 6 3/4" for top and bottom border
(2) 3 3/4" X 13 1/2" for side borders
(2) 2 1/4" x width of fabric for binding (piece together to have one long strip)
(1) 12 1/2" x 13.5" piece of quilt batting
*When sewing use 1/4" seam allowance.
"What Child is This?" Mini Quilt Pattern Pieces
After printing or designing your pattern pieces place then fusible webbing or sew-able heat-n-bond above the pattern (paper side up) making sure you trace all the pattern pieces. After that it's just a matter of cutting out the adhesive pattern pieces and ironing them to your scraps of fabric, cutting them out of the scraps and removing the backing paper.
"What Child is This?" Mini Quilt — Fuse on the webbing
To put it together you can look at your original picture for a placement guide and place it on the blue background. Don't iron until you are absolutely ready. When I did it, I just did a little at a time (starting at the bottom and making my way up) because I wanted to be able to adjust if it shifted. Once it's all ironed you can stitch around the edge of the applique with a small zigzag stitch in a clear or neutral thread so that the design will stay.
"What Child is This?" Mini Quilt Top
After that it's a matter of adding the border (top and bottom first then sides) and putting it all together like a mini quilt. There's a little extra length on the side pieces (1/4") that you can trim down and square off when you are done. All that will be left is to quilt (what design/method you choose) and bind. If you don't know how to do binding you could read this tutorial on binding.
"What Child is This?" Mini Quilt 3
Thanks so much for letting me share my love for the Lord this Christmas season.

With Love,
Al


~~~
Be sure to check out the other posts as we Sew a Song of Christmas!

04 December 2013

"O, Christmas Tree" Glitter Ball Ornaments

O, Christmas Tree Glitter Ornament Tutorial

Merry Christmas, everybody!  Since Thanksgiving is over and it's "legal" to get into the Christmas spirit, I helped Jill and her family put up their Christmas decorations on Saturday.  I've given Jill a Christmas tree ornament (or sometimes a set) every year since she got married.  Last year, I made her a glitter ball ornament.  Boo obviously liked it, because later Saturday, she informed me that she was going to use my glitter and ball ornaments to make an ornament for her baby sister.  After getting her to ask me, rather than tell me, I agreed to help her and let her use my stuff. 

When I made these the first time, I got the inspiration from the blog The Greenbean's Crafterole.  You can find the post here.

This tutorial said to use Pledge furniture polish, but I just couldn't bring myself to buy a big bottle of something I would only use once.  I used homemade Mod Podge (aka, watered down Elmer's glue) instead.  A year later, the glue's still holding.  I don't remember what ratio of water to glue I used—just mix in water until it looks good.  (Don't you love instructions like that?)  Just remember that it needs to make a nice, thin, non-gloppy film.


Materials for Glitter Ball Ornaments

What you need:
-Clear glass ball (or other shape) ornaments
-Adhesive of choice.  I used watered down Elmer's glue.
-Glitter
-A funnel.  I made my own with a sheet of paper.


Boo Helps to Make the Ornament
(Isn't my niece cute?  She was cold, so she grabbed the nearest coat—mine.)

Pour glue into the ball.  Use more that you think you'll need.  You'll pour the extra out anyway. Carefully swirl it all around.  As the original blogger said, shaking the ball would made froth, which is bad.  Hence the careful swirling.  Now, dump out the extra.  Make sure it drains well, but don't leave it so long that it dries.  Last year, I had to rinse out my glitter and start a ball over again because too much glue puddled on the bottom of the ball and didn't let the glitter coat the ornament evenly.


Glitter Ornament

Dump in the glitter.  Use the funnel, if needed.  Again, don't be afraid to use more than you think you'll need.  You will dump out the extra.  Just make sure you don't have big glue puddles in the ornament.  This time, you can shake the ball to get it covered.  Let it dry before you pour the extra glitter back into the bottles. You wouldn't want to get wet glue in your unused glitter.


Glitter Ornaments

And that's it!  After they're dry and free of extra glitter, put the tops back on and hang your beautiful, glittery ornaments on your tree.


Glitter Christmas Tree Ornaments on the Tree

Be sure to check out the other posts in our Sew a Song of Christmas series!

And check back on Friday for the next bit of musical Christmas fun!

02 December 2013

"I'm Dreaming of a White Christmas" Tulle Wreath Tutorial

Today we're kicking off my newest blog series, Sew {Cook, Paint, Craft} a Song of Christmas!  I've invited some wonderful bloggers to join in, and together we will be showing you our projects inspired by Christmas songs.  We'll be posting Mondays, Wednesdays, and Fridays until Christmas, so be sure to check back often!

Now, on to the first project!

When I was a kid, we always had snow at Christmas.  (Sometimes we even had snow for Halloween!)  My siblings and I built snowmen, made snow angels, and walked to school in five feet of snow, uphill both ways.  Okay, I don't think it was uphill even one way.  But still, there was a lot of snow.

Now we live where it's warm most of the year.  And I love being warm.  I love playing in the pool, going on walks in the warm evenings, and wearing short sleeves year round.  (Although I did that when I lived in a cold climate, too.  That's what coats are for.)

I love warm weather, but something about Christmastime just makes you want snowflakes.  And hot chocolate.  And sparkly, fresh snow, glistening everywhere.  And a fire crackling in the hearth.  (Yes, I really do like to be warm.)

So here's my homage to days gone by, back when I was a kid and we always had snow for Christmas, my "I'm Dreaming of a White Christmas" tulle wreath.


I'm Dreaming of a White Christmas Tulle Wreath Tutorial

When I was making this wreath, I told Boo it was a winter wreath because I wanted it to last for all of winter, not just until Christmas.  

"It looks cold."

Mission accomplished.  :)

You know I'm always up for a quick and inexpensive project, and this wreath certainly is that.  

Tulle Wreath Supplies

What you need:
A wreath blank.  I cut mine out of cardboard--two layers, to give it a little more body.  After I took this picture, I decided to cover the wreath blank with paper to be sure no brown would show through.  Ribbon would also work, but why waste pretty ribbon on something that won't be seen?  My wreath blank is 8.5 inches in diameter, with the inner circle 6 inches.

Tulle.  Buy it on a spool, rather than off the bolt--it's so much easier that way.  I bought one spool each of white, light blue, and glittery white.  I'm not sure how much I ended up using, but I bet less than half of the tulle I bought.

Extra, optional stuff to personalize your wreath.  I ended up using two of the three sizes of beads I bought, and a length of navy blue ribbon.


Cutting tulle the easy way

Cut your tulle into strips.  I cut mine to 14 inches long, but it will depend on how big your wreath blank is, and how big you want your finished wreath to be.  I saw this cool trick on Pinterest somewhere for quickly and easily cutting your tulle to even lengths.  Just wrap the tulle around a piece of cardboard the length you want your tulle to end up; cut down one side, and there you go.  (The cut size is twice the finished size, since you double the tulle over when you tie it on.  Make sense?  Okay.)

How to Tie Tulle step 1

Fold the tulle in half and lay it under the wreath blank...


...And then pull the loose ends around the top and through the loop.  Squish the knot right next to the one before.  If you want to.  I wanted my wreath to be nice and full, so I squished my knots as close together as I could.

{This is the same technique you use for making those cute tutus you see all over, by the way.  Just tie the tulle around elastic, or my favorite, ribbon, and you have a tutu!}

I alternated colors white, blue, white, glittery, white, blue, etc.


Finished Tulle Wreath, version 1

I like how the wreath looks at this point, but I felt it didn't look quite finished.  So I sewed my sparkly, icy-looking beads on to the wreath, sewing through the knots.  You could probably use hot glue to attach your beads, but I wanted to be able to remove mine if I decided the wreath was better off without.


Sew Beads onto the Wreath


And I added a ribbon to hang the wreath. The wreath was up too high without the ribbon, but with it--perfect.


I've never had a wreath on my door before.  I feel very grown up.  

04 November 2013

I Might As Well Make It Official

I'm on a blogging hiatus right now.  I'm feeling stressed with all the things I need to do, and I want this blog to be something I enjoy, rather than something that causes me more stress.  So I'm taking the month of November off.  During that time, I hope to catch up on my non-blogging things that are shouting at me to complete them, as well as get ahead on blog posts so I can keep to my self-imposed schedule without self-imposed stress.

I'll be back at the beginning of December, and I have something great planned.  Oh, yes.  It will be good.  I'm excited.  And I'm taking this month to prepare for it, so it can be awesome.

Until then, have a great November.

{Might I suggest you sign up to get my posts via RSS, or follow by e-mail so you won't miss any posts when my hiatus is done?  Both options are in the sidebar, right there at the top.}

19 October 2013

All Autumn Pumpkins Tutorial

 Last year about this time, I had a little tiny baby, a three-year-old, a Halloween party at church that I'd committed to bring table decorations to, and almost no time at all!  What Halloween decoration could I make really quickly?

If you were following my blog a couple years ago, you know I love pumpkins for Halloween/Thanksgiving decorations.  So I came up with the perfect quick, easy, and cheap Halloween decoration--pumpkins made from a 2x4!  And these pumpkins transition seamlessly from Halloween to Thanksgiving, so I was ready for all of autumn.


All Autumn Pumpkins Tutorial

These pumpkins are so easy to make!  Watch this.

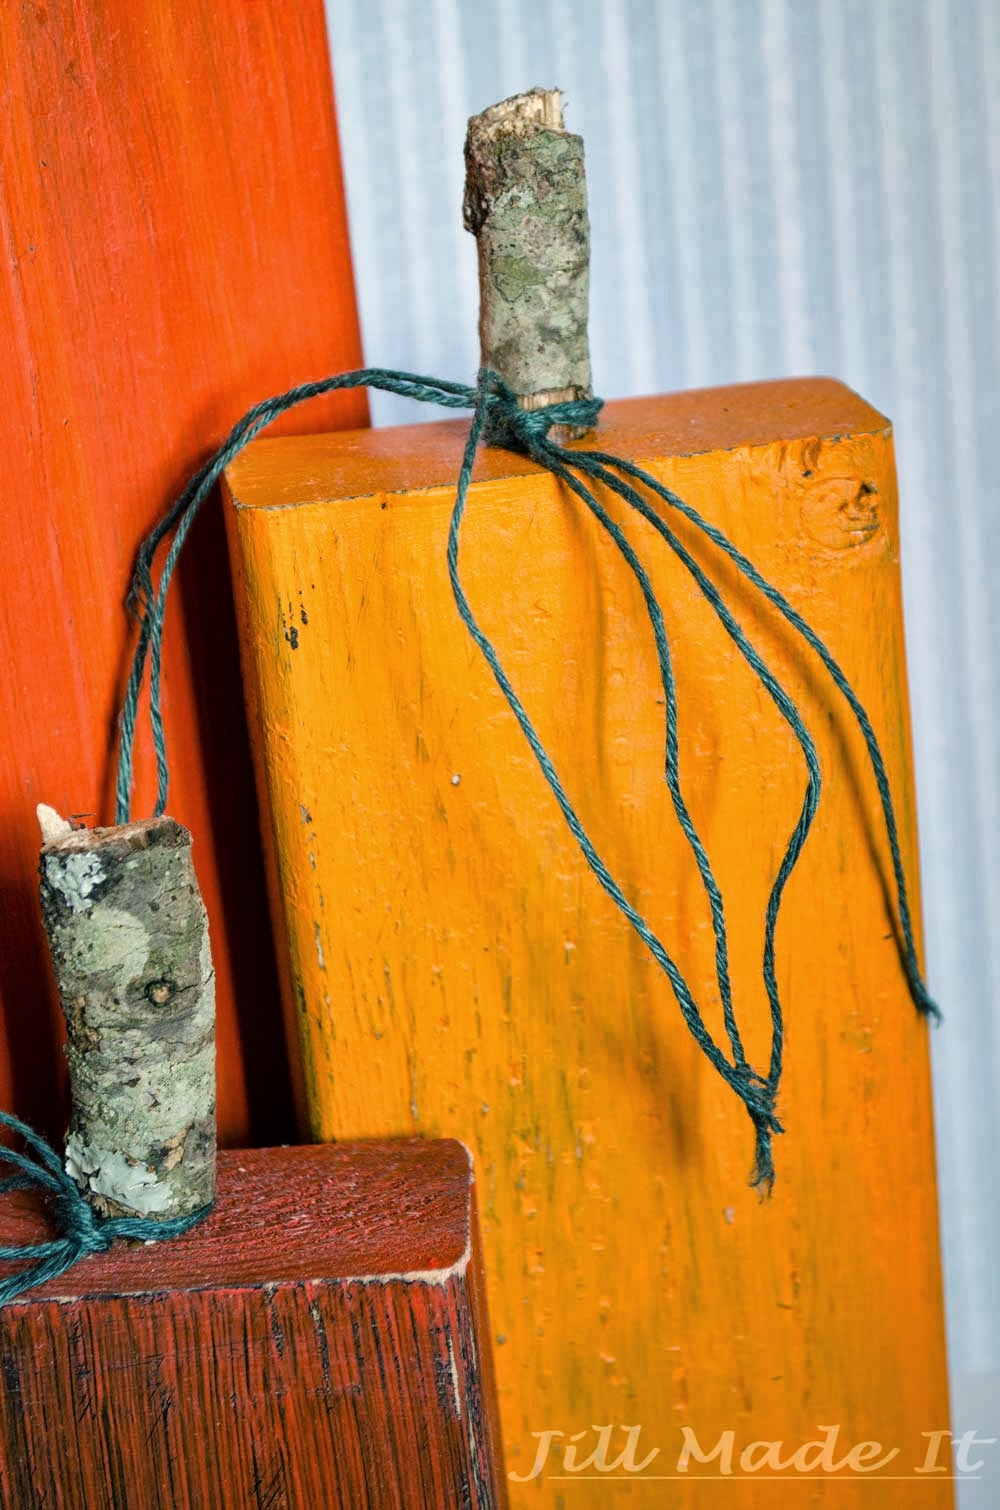
Short lengths of 2x4 + black spray paint + orange paint + sandpaper to distress + drill holes in the tops + glue in short, fat sticks from the backyard (or dowel rods, if you'd prefer) + raffia/hemp tied around pumpkin "stems."

All Autumn Pumpkin Tutorial Close-up

And done.

If you like pumpkin decorations like I do, you may want to check out the other pumpkin projects I've made.  

Fabric Pumpkin.  I didn't make a tutorial for this one, but I did find you some tutorials for similar projects.

16 October 2013

Flower Clip Tutorial, AKA Flowers In Winter


The Finished Flower Clip

This post is a first for me: the first time doing my own pictures.   Here's a bit of what that involved: 
Jill: The camera's set to shoot in RAW, so you'll have to process the pictures.
Me: I don't know what that means.
(Later) Jill: You might be able to do batch processing.
Me: I don't know what that means either.
I was going to attempt to edit the pictures with newly-aquired Photoshop Elements, courtesy of Jill's husband, who already had the full version. (Thanks!)  Neither Jill nor I could figure out how to get the pictures from iPhoto to Elements, so we eventually put them on Jill's computer and she edited them for me.  Next time, though, the pictures will be all mine.  Now, on to the flowers!

 A while ago, some crafty ladies at my church got together and we made flower hair clips.  They are fun, easy to make, and compliment-attractors, so I thought I’d show you folks how to make your own.  If you don’t want a flower in your hair, clip it on you purse or your belt.  You could also put it on a headband for your baby so when strangers see her, they can tell that the baby  dressed in pink, with a pink blanket and a pink diaper bag, is, in fact, a girl.  

My Everlasting Gardenia

You can put them wherever you want an embellishment.  I like them because they're a quick way to add color, and they make it look like I at least put some effort into my hair.  (Let's just say I'm "low maintenance" with my hair.  Anything beyond washing and brushing it is usually deemed more trouble than it's worth.  Thank goodness my hair cooperates.)  They can look surprisingly real, too.  One time when I was wearing my white flower, in the picture above, a lady I know who owns gardenias thought I had a real gardenia in my hair.  

The Needed Supplies

Here are the materials you’ll need:
Synthetic fabric, any color or pattern you like
Fabric scissors
Circle templates, if desired
Small candle, like a tea light
Something to light the candle, of course
Needle and Thread (optional)
Small beads
Felt, at least two square inches per flower
Hair clips
Hot glue gun 

Several Fabric Circles

Cut out several circles of fabric, each one bigger (or smaller) than the one before it.  You can use a template if you want, but wobbly edged circle-wannabe's aren’t a big problem with this.  I think the easiest way to figure out how big to cut each one would be to cut your biggest and your smallest circles first.  Cut them a little bigger than you think they should be.  In the first picture, I have two flowers as one clip because they both ended up unexpectedly small.  Next,  cut your smallest and use that as a template to make each successive circle  bigger.  That way, you can pin the previous circle to the fabric and cut your next one a bit bigger.  Or you can wing it.  That works too.  You can do as many or as few layers as you think would look good, but I wouldn’t go less than three. The blue one you're seeing in progress has seven layers. 

The Flower Layers Now Have Petals

You can keep these as circles, you you can cut petals into them.  The circle flowers are a bit easier, but ones with petals will look more realistic.  If you want petals, make sure to not cut too far towards the center.  Cut as many or as few petals as you want, but don't cut them too thin, or you'll make the next step difficult.  You may want to practice the next step before you cut your petals, if you want them to be thin.

Melt the Edges of the Fabric and Sew the Layers Together

Melt the edges with your candle.  Besides keeping the fabric from fraying, melting the edges makes them pucker and warp and not just lay there like a flat piece of boring.  This is why you needed to use synthetic fabric.  Synthetic will melt; natural will burn.  I suggest you practice a little with some scrap fabric to see how exactly you want to do it.  I prefer to have the edges curl down, but you see what you prefer.  Make sure to not let the hot edges touch. They could melt together.  If something doesn't go quite right, don't worry.  This is a forgiving craft.  It seems like half of my petals curled up and half curled down, but the flower still worked out nicely.

Sew or hot glue the layers, one on top of the other.  I prefer to sew them, but glueing should work too, if you want a no-sew project.  See?  It’s coming together!

Almost Done!  Add Beads

Sew or glue a few beads in the center of the flower.  Again, I prefer to sew it. That way, I don't have to worry about the glue showing around the beads.  I was going to say this step was optional, but then I realized the beads serve a practical purpose.  If you sew the layers together, you'll need the beads to hide the stitching that will show on the top layer.

Add your Felt

Cut out two small pieces of felt.  Glue one to the underside of the flower.  Glue the other one onto it, with the top of a hair clip sandwiched between the two felt pieces.  After the glue’s set, you’re done!  

My Pretty Flowers, All In A Row

How will you use your flower hair clip?  Do you prefer “natural” looking fabrics, or ones with bold colors or patterns?